Home / video (page 7)

video

Hiking the John Muir Trail – Tulley’s Hole to Muir Trail Ranch

After an early start we headed out on the trail through some more amazing scenery. Check out the photos and video down below.

part5b


part5c

One of the many fish caught on the trail.

part5d

This was another nice fellow that I ended up letting go.

part5e

Nothing like repacking a bear canister and deciding what to leave behind!

part5z


31 lbs with food and water!

Hiking the John Muir Trail – Garnet Lake to Tulley’s Hole

Things really kicked in on the trip as we pushed 18+ miles on day 3 past Devil’s Postpile into Tulley’s Hole. Yet more scenery to wow!

Day34lLake


It was hard to believe the contrast between this area and over the ridge to Devil’s Postpile.

Day34DevilPP

Devil’s Postpile National Monument was probably the least favourite part of my trip just becauseone has to trudge through a hot, dry valley in thick dust and sand. It saps your energy, but it does surprise you with views like this.

Day34lBerry ‘

This looks like a member of the gooseberry family, but I wasn’t prepared to take a risk and find out I was wrong. Anyone?

Day34bridge

Climbing out of the valley, things got a lot more hospitable… er hairy as we encountered some of the JMT’s famous bridges. It’s no where near as dicey as it looks.

Day34Lily

This photo would have been amazing if I had god the lighting correct! Yay for trying!

Day34fish

In pretty much every lake I was teased by sights like this. Every now and then I got lucky too! (see below).

Day34sushi


Nothing like a bit of really fresh sushi to keep you going on day 4!

Check out the video down below for another take on these days.

Hiking the John Muir Trail – Tuolumne to Garnet Lake

For the past year I’ve been organizing a hike of the John Muir Trail with a group of social media enthusiasts. The trip finally started with three of the original 6 on July 13th.

Day1b

After waiting for person number until midday, we took off up the trail towards Donahue Pass. We camped before the ascent the same day and then shot over the pass, averaging about 2.8 mph before descending down to Garnet Lake.

Day1

The views were incredible and the weather was perfect. We even managed to get in a bit of fishing.

Day1d

Take a look at the video below to see the results of several pounds of camera gear!

Hiking from Yosemite to Tuolumne Meadows

To help get in as many miles of the John Muir Trail that weren’t on the group permit, Adam and I decided to hike from Yosemite to Tuolomne on  an alternative route that brought us onto the JMT at about mile 8 (at Sunrise Lakes). In two days we did the short 23+ mile stretch and we had a blast doing it.

YtoT3

The start of the trail had us hiking up the Snow Creek trail that boasts 110 switchbacks out of Yosemite Valley in only 1 or 2 miles. It was a pretty intense start, but we were rewarded with a crystal clear creek at the top to cool off in.

YtoT2

From there we made our way past Tenaya Lake and up to Sunrise Lakes on our way to Cathedral Pass. After Cathedral pass it was downhill to Tuolomne at a quick pace so we could pick up the next permit for the group we would meet.

YtoT1

Take a look at the video below to see this 2 day trip.

Hiking the Half Dome

One of the downsides of being the fifth child is that the family has already done all the cool stuff by the time you roll around. I never went to Yosemite and I never visited Disneyland or Yellowstone.

Since I was travelling down to California to hike the John Muir Trail starting at Tuolomne Meadows I thought I’d take the chance to hike the Half Dome and then snake my way to the meadow via a side trail that joined up with the JMT at Sunrise Lakes.

I had booked the cables of the half dome for the 10th and after a long drive down from Washington, I arrived with hiking buddy Adam (www.hikingthetrail.com) the night of the 9th. I realized very quickly that there’s only one Yosemite.

HD1

The next morning I hiked through the uniqueness of the Yosemite Valley and made my way up the Mist Trail and up to the junction to the Half Dome. I had gotten up early enough to miss most of the crowds and had the trail pretty much to myself until I hit the final 2 mile climb to the Half Dome cables.

I don’t know what I expected, but whoever decided to put those cables up there was a bit crazy. I’m glad he did. The 16 mile round trip is definitely worth it. The views on the way and at the top shouldn’t be missed.

HD3

Take a look at the video below for the Full HD experience of my adventure. Also, stay tuned on Monday for Day 2 of the Pre-trip.

Chawel: The 5 in 1 changing towel

You may have seen the Chawel on the Dragon’s Den. It’s a 5 in 1 changing towel designed by Canadian Dan Plante.

The basic concept is a towel that can be used to change in public. It has a hole at the top for your head so you can get inside and change on the beach, in the park, or anywhere there are prying eyes. Having said that, it can be used for much more, like:

  • A blanket
  • Sleeping bag
  • Pillow
  • And many other things you could think of

On the side of the Chawel you’ll find a pocket that you can use to store valuables and keys.

Chawel2

The Chawel comes in three models:

  • Chawel Hybrid – made of Polyester and providing a warm fleece on one side and includes a set of eye sleep mask.
  • Chawel Traveller – made of cotton terry and microfleece
  • Chawel Sport – Quick Dry anti-bacterial fabric

The Chawel comes in two sizes: a medium and a large. We have a large Hybrid and a medium Sport.

We’ve taken them both on backpacking and day trips to the park/lake. I prefer the Sport for my needs, but I can easily see how the Hybrid and Traveller would be useful for flights and people living out of a suitcase. We found the Sport did a better job of drying one off and then drying itself off.

Just last weekend we were in the parking lot and had to get the kids changed for swimming so we pulled out the chawel. I felt much more comfortable having the kids (and myself) covered up. The only complaint is that there isn’t a kids version that they don’t drown in, but it does do a great job.

If you’re going to spend a lot of time at the beach or park and don’t want to change in those nasty bathrooms, the Chawel will definitely save you from a lot of embarrassment and prove to be a versatile, multi-use purchase.


Survival Saturday #6 – Finding North Using a Watch

Have you ever been lost without a compass? There are lots of ways to orientate yourself in the back country. This one uses a compass (digital or analog) to calculate North. Check it out and let us know if you’ve ever been lost in the back country or front country and how you got out safely.

Smartwool PHD Hyfi Merino Midlayer – Discount

If you’re looking for a high-quality Merino wool Midlayer that looks good and keeps you warm, I recommend taking a look at the Full or half zip PHD Hyfi by Smartwool.

Let’s look at the facts first:

  • ZQ itch-free merino wool is temperature regulating, moisture wicking and odor resistant
  • PHD HyFi merino wool-nylon double jersey knit
  • Flatlock seams reduce chafing and provide a low-profile fit
  • Offset shoulder seems for comfort
  • Camlock zip front with interior flap and zipper garage
  • Zip chest pocket with media cord port
  • Zip hand pockets
  • Articulated elbows for mobility
  • Extended cuffs with thumbholes and elastic binding
  • Base layer weight: Midweight
  • Sleeves: Long sleeves
  • Closure: Zipper
  • Length: 27″ (based on size large)
  • Weight: 1 lb. 6 oz.
  • Fabric: 64% merino wool, 36% nylon
  • MRSP: $200 (but much less at the Sierra Trading Post)

The PHD Hyfi is not a 100% Merino garment. It has a merino wool liner and a Polyester outer. There theory (see diagram below) is that the nylon outer will protect the merino and block wind while the Merino interior will keep you warm and odor and moisture free. It also gives the Hyfi a really nice cut and fit. 100% Merino doesn’t look as tidy and professional as this jacket, although something 100% merino will do a better job with breathability and odor.

phd_hyfi_s13


This jacket has just the right number of pockets. It has 3 external zip pockets and 2 internal ones. To help with breathability, all pockets are made of mesh. The downside of this is that the internal pockets sag a bit and one has to be careful with keys and sharp objects to ensure you don’t snag and damage them. A nice feature is that they include an internatl ear phone access to the external chest pocket for your mp3 player.

The collar and cut of the jacket are perfect. The collar is just high enough to keep your neck warm and the length is the perfect length to allow you to raise your arms and not get your belly-button blasted by a cool breeze. It’s an athletic cut too so there’s no bulk, but at hte same time, no restriction in movement.

Smartwool added thumb holes to the sleeves to keep your wrists warm while wearing gloves. A great choice. They almost disappear when not in use too so that’s another plus!

SMHYFI1

All in all, this is a solid jacket. The price is high, but the styling makes it perfect for formal and informal wear off the trail when you’re not battling the elements in the outdoors.

The Sierra Trading Post gave me this jacket, asking for an honest review. In return they’ve offered the following 25% off discount on all Smartwool gear at the Sierra Trading Post. Just use this link: http://stp.me/SmartwoolReview

Survival Saturday Giveaway

As a special thank you to all our youtube fans, we’re having a giveaway of some pretty awesome gear from Cold Steel via www.BuyLighters.com. Rules are simple:

Giveaway is open to North America. Winners must be 18 years or older or have parental consent.

Here’s what we’re giving away:

  • Cold Steel Tomahawk
  • Cold Steel Special Forces Shovel
  • Cold Steel Kudu folding knife
  • Cold Steel FGX Boot Blade 1 (only available to US Winners for legal reasons)

Winners can choose from available prizes based on order of random draw choosing. Items may show very minor use (I couldn’t help myself!)

Don’t forget to check out the video below and head over to www.BuyLighters.com and use the discount code: BCSURVIVAL.


Windmill Trekker Stormproof Lighter

I’m all for bushcraft and survival skills. When I start a fire I try to use a fire steel or matches. That said, I know that in an emergency when I most need to light a fire, that will be the most challenging time. It’s hard to beat a good lighter, and the Windmill Trekker is certainly that and more.

Cold fingers and shivering can make a simple task like lighting a match incredibly difficult. The reality is that that’s when lighting a fire needs to be the easiest task you do. Add wind and wet and you’re in for a cold night.

The Trekker by Windmill is a high capacity Butane lighter with a lot of features:

  • Piezo-Electric Ignition
  • High capacity reservoir (1000 ignitions per fill)
  • Windproof flame to 70-80 MPH
  • Water Resistant (5 O-rings)
  • Adjustable flow flame
  • Refillable
  • Rubberized case
  • Dual locking case (external bale and trigger button)
  • Lanyard
  • Weight: 2.5 oz
  • Size: 3.7″ x 1.5″
  • Available in Blaze Orange, Clear, Matte Black, Smoke Black, and Smoke Green
  • MRSP: $55
  • $49.99 at www.buylighters.com

WT1

The first thing you’ll notice when you pick one of these up is that it is not your cheap gas station lighter. It’s a heavy duty piece of survival gear. I see this as a great resource for hunters, fishermen, backpackers and anyone that needs a reliable, practically bombproof method of starting a fire.

The windproof flame is incredibly impressive. Even in high winds the lighter springs to life in a split second and stays on. I can’t help thinking that it’s more of a torch than a lighter. My wife gives me that look as I too often snap it open and “test” it inside.

Finding the fuel flow adjust on the bottom was another treat for me. It quickly went from efficiency mode to look at how quickly I can burn this stump mode… where it has stayed.

The lighter 5 rubber O-rings to keep water out and all the insides moisture free. It’s a nice feature for me, considering that one of my lighters failed for half a day on a recent backpacking trip after I spilled a few drips from my water bottle on it.

WT2

The dual locking makes my wife and I feel more comfortable having it in the house. One has to flip the bale and then press the button underneath it to get access to the lighter. It’s a minor detail, but it will definitely keep moisture and little hands out.

The lanyard is another useful feature. It’s designed for one’s wrist, and I can’t help but think tha a neck sized lanyard would serve a bit better for this sort of device.

I really like the Orange Blaze colour. The olive colour may look cooler, but I like to have my gear easy to find and hard to lose.

Nothing has failed on me yet, but I’d like to see a bit of a sturdier hinge, as that’s probably going to take the most abuse.

Let’s get the biggest elephant out of the room, price. It’s $50 (only $45 with the coupon code BCSURVIVAL). That may seem a lot for a lighter, but it isn’t your typical throw away lighter. It’s a high capacity work horse that you can rely on in the back country and emergency situations where an easy to start flame makes the difference.

So, What do you take with you to light fires on your adventures? Have you ever had your ignition source fail on you for any reason? Please leave a comment down below.


I was given the aforementioned lighter to review by http://www.buylighters.com to get word out about their site, which offers a range of high quality lighters. They are offering a 10% discount on any purchase using the code: BCSURVIVAL. Check them out and check out the Windmill Trekker.

Family Backpacking the Ozette Triangle, WA – Part 2

I can’t say enough how much of an amazing hike the Ozette Triangle is. In my previous post I looked a little bit at the logistics, now I want to take some time to share part 2 of the video and talk about the hiking itself.

Day 1

We left at about 10 am from Seattle, boarded the ferry to Kingston and then drove all the way out to Port Angeles. The weather for the next three days was rain, but we wanted to take the risk. Light showers don’t scare us.

OzettePT1-pic11

All the way to Port Angeles there was a mixture of sun and rain. When we picked up our permits at the Wilderness Center it was raining when I entered and sunny when I left.

From there it was another 2 hours of winding roads and some nasty weather. It got so bad that the wipers blew out of alignment and one of them flipped inside out! Surprisingly, when we disembarked at the Ozette Lake trailhead it had calmed down completely.

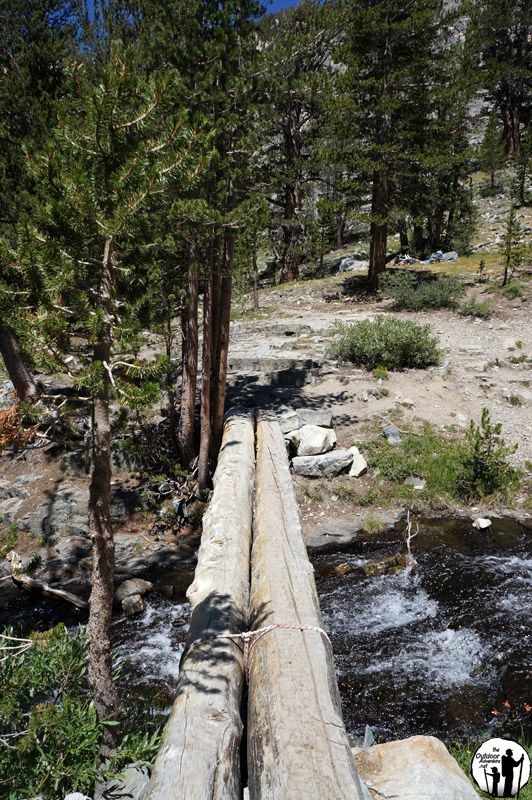
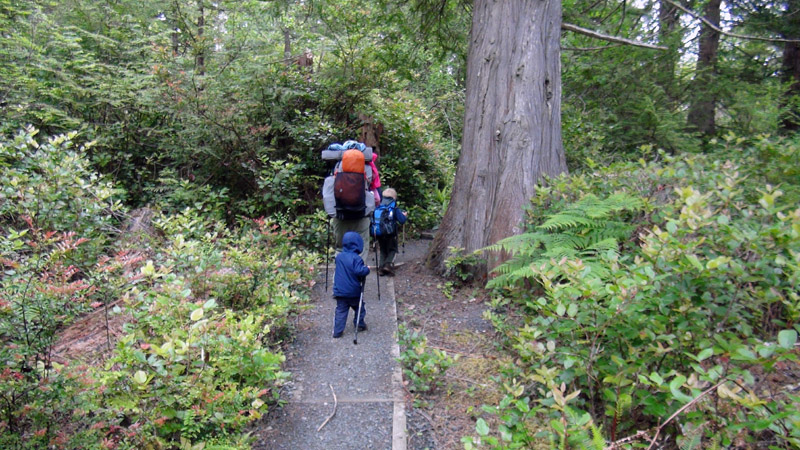
After filling up with water at the trailhead we crossed the bridge and entered the Temperate Rainforest of the Olympic Peninsula. All around are cedars, salmon berry bushes and dense foliage. The area is so wet that most of the paths are elevated boardwalks. We were warned of them being slippery, but the kids took the advice of their parents and navigated the course carefully.

About a quarter mile up the trail we arrived at the fork. The Ozette Triangle is just that. the trail drops down to the beach, then north to the next camp and then meets back at the original trail near the trailhead.

OzettePT1-pic12


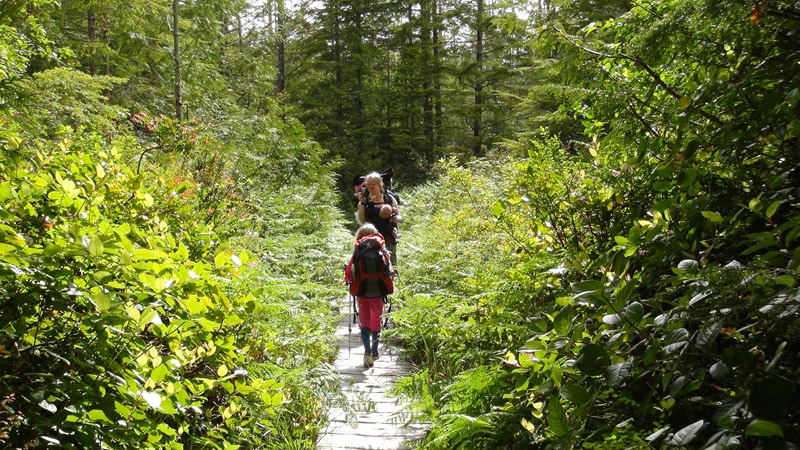
Being under the shade of old cedars made for a cool hike which made it easier for the kids. We spent lots of time telling stories, examining fungus and banana slugs and playing games. The next few hours blew b and we arrived at the camp with plenty of light to set up camp and make dinner.

The kids were tired, but had to push through the bushes to the beach to see the sunset and look for seals.

After a delicious dinner we slept soundly and warmly in our tents excited for the next day’s hike.

Day 2

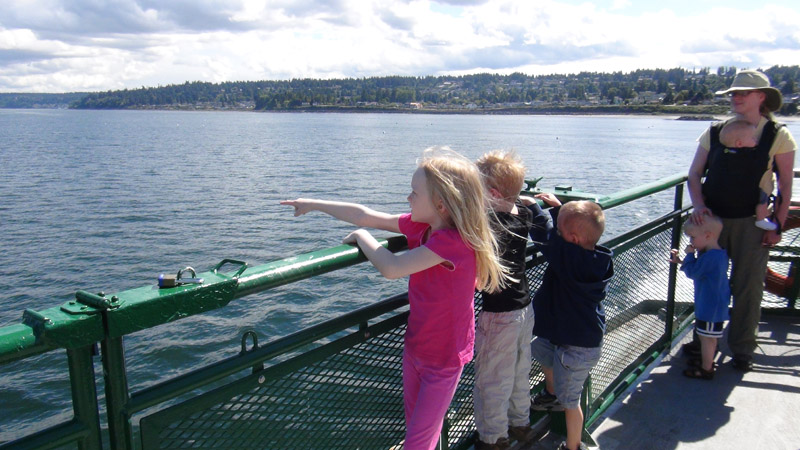
After packing up and talking to the Park Ranger about weather and routes we consulted our tidal chart and decided to leave at around 12 pm. This gave us a receding tide and plenty of time to avoid the steep rope routes.

OzettePT1-pic7

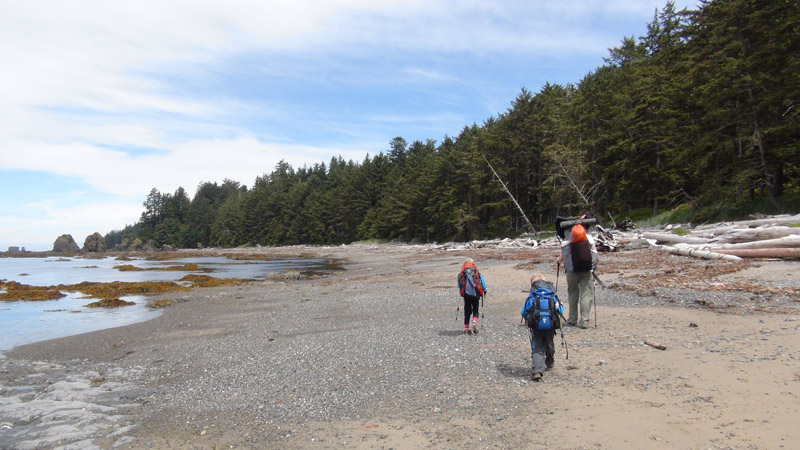
The weather was amazing. We had sunny skies all day as we trekked along the shore looking for crabs and other animals. For lunch we ate date bars and explored the sand for shells.

OzettePT1-pic10

As a fun project we carved some dried out bull kelp heads into trumpets for the kids (see the video below) which they spent the next twenty minutes confusing sea lions with.

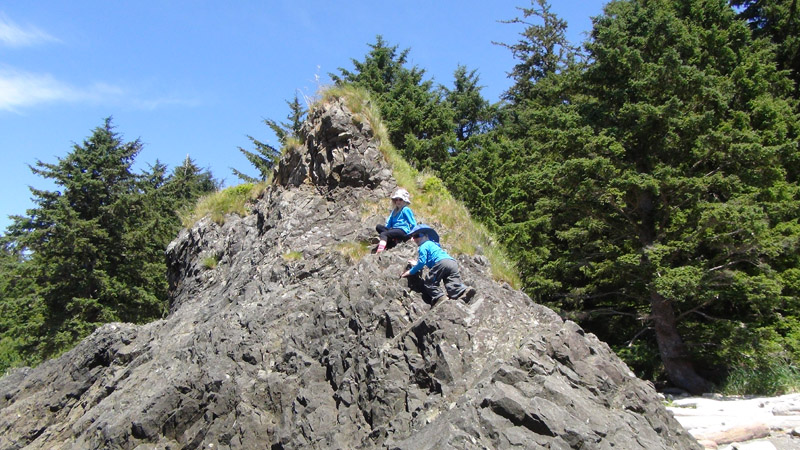
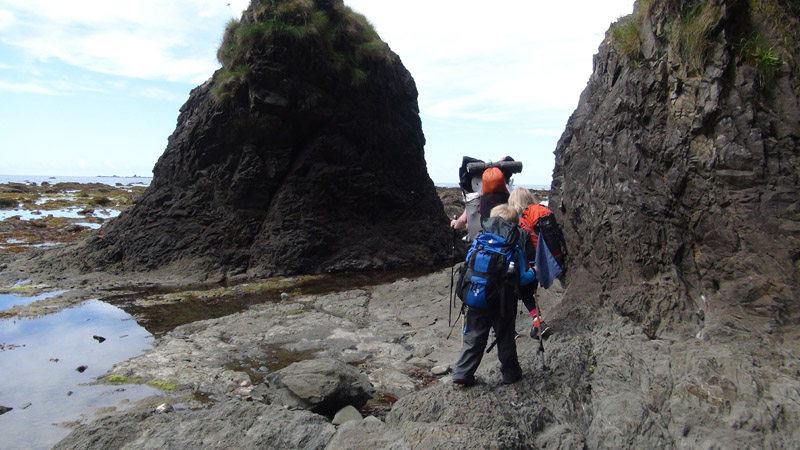
The kids had a blast taking turns navigating around the rocks to avoid fallen logs. Their trekking poles were a huge asset to their stability.

On one break a lone deer wandered by. It fearlessly stared at us from about 15 feet away and then carried on down the beach passed us.

OzettePT1-pic9

Late in the day we arrived at the whale carcass that we had read about on the WTA site. We almost missed it as the odor had almost completely disappeared… although the crows were still looking for an easy meal. The bones were mostly exposed and we spent a little time examining it and guessing what type of whale it was.

OzettePT1-pic8

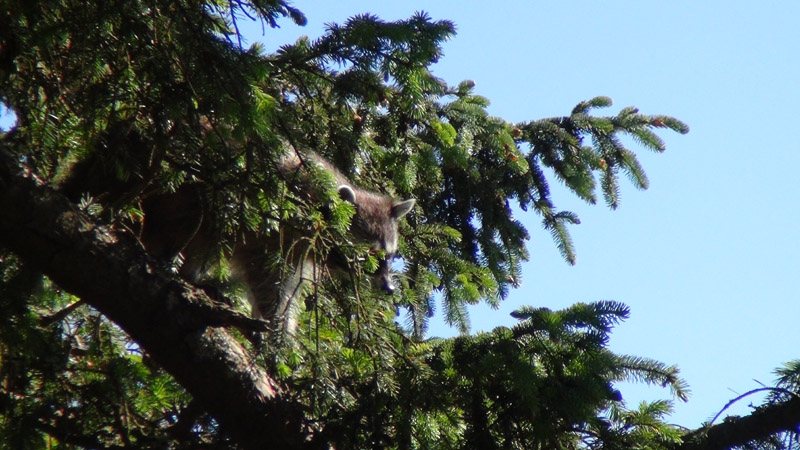
At the camp we quickly met up with another deer and raccoon that eagerly tried to help relieve us of our dinner. Fortunately we kept the bear canister closed and the food packed away, but they gave us a good run for our money… err… dinner.

After spending a few hours playing on the beach, the kids came back for dinner covered in sand and dirt. We ate up dinner quickly and the kids went to bed listening to the sea lions off in the distance.

Day 3

OzettePT1-pic2

We woke up the next morning to strong winds and a dark sky. We had planned to stick around until lunch, but changed our minds as rain started to spatter. We quickly packed up without any hot drinks and headed back down the trail. It turned out to be the right choice as the rain came down on us in buckets whenever we crossed an open meadow.

Buoyed by the promise of as much juice as they could drink when we got back to civilization, the kids powered ahead, only stopping for salmon berries along the way. We got back to the car tired but happy from an amazing 3 day trip in an almost untouched area.

Survival Saturday #5 – Finding North Using Shadows

If you get lost and you don’t have a compass then you’ll need to find a way to navigate out safely. One of the ways to do that is using the shadows from the sun. Take a look at the video below and leave a comment below if you’ve tried this trick before!

Have you ever been lost? How did you find your way back out?