Home / review (page 10)

review

Headlamps: How to save batteries and weight


Lighten your load and save on batteries with a lightweight, low powered headlamp.
Let me First just say this. I have a love / hate relationship with headlamps. They have their place in certain situations (midnight bathroom runs on the trail, Search and Rescue, early morning summit attempts), but most of the time we can minimalize their need and save a lot of weight and batteries by using some simple tricks.

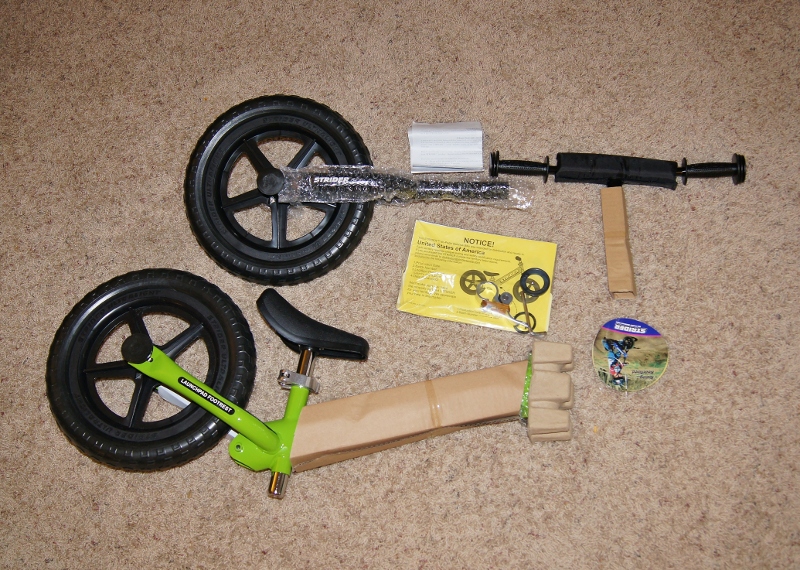
Last summer I bought a Cyclops Atom low powered LED headlamp that I now use for most of my trips. I originally bought it for my kids, but now I’ll have to buy them their own!


The Cyclops is a low powered headlamp that runs on just 2 CR2016 3 volt batteries. It has a simple hinge that allows you to adjust it up and down and you just twist it to turn it on and off or to replace the batteries. The light plastic plate that it is mounted on has a fairly durable foam backing that is comfortable on the head (although I usually mount mine on my hat). The head strap only goes around the sides, but the headlamp is so light that it stays on without any problems at all. The strap itself is perfect and a decent quality elasticized fabric. All in it weighs only 0.9 oz (27 grams). To give a comparison, my Princeton Tec that I use for summit attempts and mountaineering weighs in at 3.40 oz. More important than weight though is its packability. I can keep it in the hip pocket of my backpack and still have lots of space for snacks, etc.


My Cyclops batteries (CR2016) weigh in at 4 grams a pair and because they’re so tiny they can be stowed anywhere. I’ve used them on 3 – 3 day hiking trips and the b atteries still work fine. I carry a spair set of batteries, but haven’t needed to change them yet. The one downside of the cyclops is that the LED beam isn’t super bright, but that hasn’t been a problem for me as I’ll explain below:
Battery and weight saving tips
When I hike I usually am not hiking at night. I set up camp in the afternoon or evening and then go to bed. The only time I need to stay up late is if I’m out chatting with friends. Usually though, we’re all tired and just want to get to bed early and get up with the sun. In summer time the need for a headlamp is lessened by the fact that it’s usually bright until 9 or 10 pm and sunny as of 4:30 or 5 am.
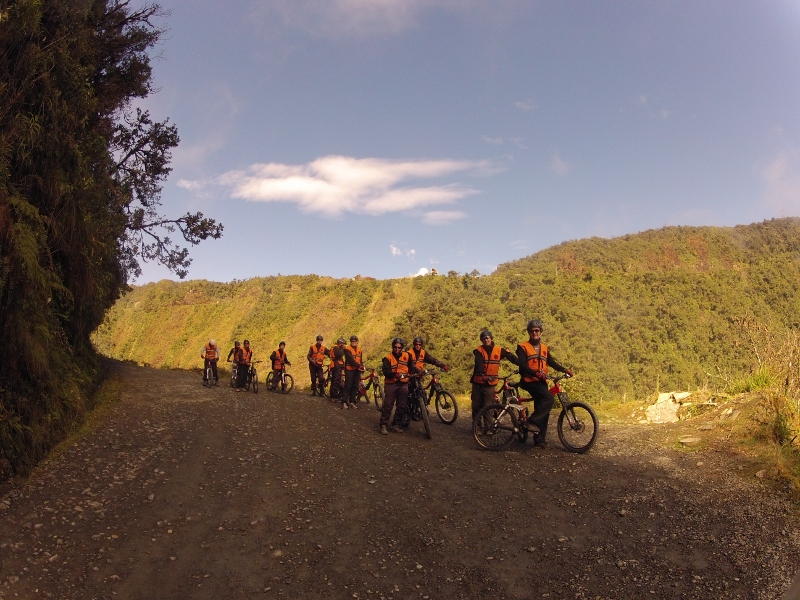
I was able to climb all the way up to the High Camp of Huayna Potosi
without using my headlamp with the light of the moon.
Another factor is night vision. I don’t mean IR or anything like that I mean the ability for one’s eyes to adapt to the light levels. Light over-exposes the rods and the end result is that you can’t see at night. If you let them adapt over 15 to 20 minutes you’ll find your vision is incredibly good at night. On a clear night, I’ve hiked by the light of the moon and been able to see everything, including the trail well enough to not need a headlamp. Of course, I always keep it on my head in case of emergencies, but most of the time it’s not even needed.
If you do wake up in the night to answer the call of nature, your eyes are already adapted to the night and chances are you don’t need a headlamp. Keep one with you in case something goes bump in the night, but don’t rely on it. If you do need a light, it doesn’t have to be very strong. Something low powered will keep you from loosing your night vision (red lenses are even better for that) and provide for the lighting that may not be there on a cloudy night.
On a recent night time summit attempt I used the Cyclops as a secondary light strapped onto my tripod for lighting my face for videos. At 27 grams there was no real inconvenience with space or weight!
Whatever your headlamp, you can lighten your battery load by saving your headlamp for when it’s absolutely necessary. Get more miles under your belt during the day and in the morning and set up camp early enough to not need a light. Consider saving space and weight by choosing a lower powered option for a headlamp, avoiding the need for it by setting up camp before dark and try to keepit powered off for more time by letting your eyes adjust to the natural light.
Do you have any examples of this or examples of when you needed a high powered light? Leave a comment below and let us know!

*All photos taken with natural lighting.

Columbia Powerdrains (with video)

About 4 or 5 months ago I had a box arrive from Columbia: A pair of their brand new Powerdrain shoes. I puzzled over what to do with them and at first look wasn’t sure they were a fit for me, but try them out I did and I found that in a very short time they became my go-to shoe for, well, pretty much everything.


The Powerdrains are somewhat of a minimalist shoe and the biggest goal they seem to have in mind is a water shoe, but in my experience they are much, much more.


Traction

If  you’re new to Columbia or haven’t seen them in a while, you’ll be pleased to know that they’ve grouped their new products into different categories within their “OMNI” line. It makes it really easy to identify the key feature of the item. For example, these shoes are part of their OMNI-GRIP line. They use a high traction rubber that sticks really well to all sorts of surfaces, especially when wet, I can testify to that after taking them twice down one of Bolivia’s Incan trails where the 500+ year old stone trail is wet, steep and in many places polished to a slippery shine.

Although not an aggressive tread, they handle smooth, wet and slippery surfaces incredibly well.

The sole is divided into 4 parts, to make it more flexible and allow your foot to curve around uneven surfaces. It works really well, but may take a bit of getting used to if you’re accustomed to hiking boots. I prefer to hike in trail runners where the load suits it and really appreciate the flexibility. It reminds me of my summers as a child where I would go whole days through trails and streams barefoot, but with the added protection of rubber and foam soles. You do have to be careful of sharp rocks as the gaps between the rubber can poke at you, but it hasn’t caused any issues for me in the couple hundred kilometres I’ve taken these on roads and trails… mostly on trails.

Hiking down an Incan path on La Isla del Sol the Powerdrains gave
excellent traction, even when weighed down by two kids.

When hiking down the Incan Trail (called the Choro Trail), I took my powerdrains, but planned to use another pair of trail runners and save the powerdrains for river crossings and slippery sections. The trail runners (ASICS) left my feet so sore and were so uncomfortable (even with my feet taped) that I switched to the powerdrains on the first day. I’ve never worn the other brand’s trail runners again. When I did the Choro Trail the second time I only took the Columbia Powerdrains and didn’t have a single  problem descending the 11000 feet on the 40 mile trail.

Drainage

Because you can’t keep any shoe waterproof, Columbia designed the Powerdrain to allow water in, but get rid of it as soon and as fast as possible. It has a really cool system to allow it to do so, utilizing the uppers, the inner sole and the outer sole.

The upper has a mesh exterior and foam interior which is dotted with holes. These allow the shoes to breathe well and water to enter and exit easily.

The sole itself has 9 holes in it that allow water to flow through from the inside of the shoe and drain out. I’ve found this to be great as the water often gets trapped in my other shoes and keeps them soggy and uncomfortable. It’s pretty fancy and works well because of the design of the inner sole of the shoe.

The screen of my Powerdrains after 3 days on the Choro Trail in Bolivia.

The inner sole is perforated allowing any water that doesn’t exit through the sides to drain into the bottom and out through the holes. If you lift up the inner sole, you can see a fine mesh attached to the sole that allows water to flow through it, but prevents any small debris from getting stuck in the drainage ports of the outer sole.

Comfort and Lacing

One of the things that made me worried about taking the Powerdrains on hard hikes was the lacing system. It uses one of those elastic pull systems, but the quality is all there. Despite my fears, it never slipped (unlike my shoes, even when using a double bow!). It always stays snug on my foot, but the elastic allows the lacing to stretch just enough when moving to keep your shoe from getting uncomfortable.

Their light weight and flexibility make them a very comfortable shoe.

Toe Cap

A huge benefit to this shoe is its toe cap. It’s a strong synthetic that keeps your toes from getting dinged up on rocks, but it does have a downside (on the 2012 model) that Columbia says they’re fixing for next year (2013). The toe cap is starting to separate on both of my shoes after a couple hundred kilometers of very hard use. Also, where the outer mesh of the shoe’s upper connects to the corner of the toe cap it has worn through from abrasion. Now, this is after a lot of hard use, and it’s really only an aesthetic problem at this point. It hasn’t compromised the structure or quality of the shoe.

That is the only real downside I have to the shoe, and that’s not much. I look forward to seeing how Columbia has planned to fix it for next year.

Overall thoughts


The Powerdrain is an excellent shoe that serves for almost every walking or hiking situation. To call it a water shoe is to insult its capabilities. They can handle rough terrain, steep uphill and downhill and are excellent on slippery terrain. The drainage system is well thought out and very effective. Oh, don’t expect the withe and yellow to stay white for very long!

I’m seriously considering taking a 2013 pair like these on the John Muir Trail next summer.

If you’re looking for a lightweight minimalist shoes for hiking and trails, especially where you expect it to be wet and slippery, check these out, you won’t be disappointed.

Jansport Carson 80 External Frame pack

 
In my early days of backpacking, I was looking for a backpack that had large capacity and was inexpensive as most of my stuff was bulky and at that point I wasn’t sure if backpacking was going to be a long term sport for me. After looking at the array of backpacks, I ended up settling on the external frame JanSport Carson 80, much due to the fact that it was cheap and it was fairly close to the only pack I had ever used up to that point (a borrowed JanSport external frame).
 
Four years on and I still use this pack, and I’ve come to appreciate and use a good number of its features. The Pack weighs in at 4 lbs, 13 oz the pack is fairly lightweight given its price (less than $100) and its 80 liter capacity. As an external frame pack, it has an aluminium tube frame that provides the structure needed to carry the weight. Straps, belts, and the pack itself all attach to the frame. The pack has 2 large side pockets, a smaller back pocket and a good size top pocket in the lid. One of the features I’ve come to enjoy is the options for loading the main compartment. You can either load from the top or unzipping a front panel that also gives you access to the sleeping bag compartment (a fabric barrier between the top part of the back and the bottom) I find myself using both in packing but also on the trail when I realize the item that I want NOW is much lower in the pack than I had hoped. I can get into the guts of the main compartment without having too much impact on the rest of my stuff.
 
There were a couple items that I found frustrating about the pack. The lack of instructions* on how to adjust this pack (or any external frame pack) meant that each trip I’d be trying to figure out new ‘tweaks’ on how to make the pack sit better. It took 1.5 years to get it ‘almost right’ and now I think I’ve finally got it. The sleeping bag compartment is also one of those items that sometimes seem to just ‘get in the way’ rather than perform some useful function.
*Checking the website, it appears they’ve been working on this since I looked years ago, with instructional videos to show how to fit and pack a pack, although it isn’t specific for the Carson 80 or external frame packs.
Check out the video below and leave some comments!

The Bottom Line:
Pros:
          Relatively cheap
          Relatively lightweight (just a little heavier than a similarly priced 55 Liter internal frame pack)
          Easy to strap things to the outside
          Large capacity
Cons:
          Utter lack of instructions on how to adjust the pack
          The bottom bar sits a bit too low
          The sleeping bag divider can get in the way
Overall: It’s a good beginning pack that can let you learn what you like or don’t like about packs (or backpacking, if such a thing can happen). Its lack of instructions can be a bit unnerving and maybe downright annoying, but its features make up for its frustrations. Its large capacity makes it easy to make use of the camping equipment you already have at home before purchasing more backpacking specific gear. If you take your family out, you know you have the space and the the ability to carry what might be a phenomenal load.
by Graeme A
The Outdoor Adventure Team

Why to pack a thermos on your next trip

It’s early morning, you may or may not have slept well and it’s cold… ever so cold. Scratch that. It’s late morning, you slept really well and you’re late to get back in the canoe to continue the trip. wait, wait… Even better, you’re planning to stop for lunch and it’s pouring rain; Your matches are wet and the anticipation of hot soup is killing you. Yah, that’s more like it. You’re hungry, you don’t want to light a fire or fetch water for your stove, but you want something hot, NOW! What do you do?

If you’re interested in a bit of creature comfort, you should probably think about packing a thermos on your next outdoor adventure. Those wonders of vacuum sealing and insulation that have been around for a LONG time and were in Grandad’s lunch kit are often ignored when making up your gear list, but there’s a reason Grandad packed it.

This could be your ticket to an easy morning at camp and relaxation when the rest of the crew are fiddling with stoves and have gone off to fetch a pail of water.


Sunrise on the Choro Trail. I took a Stanley vacuum food container on the trip to make morning meals easier.

As part of a car camping or canoe trip, day hike, car trip or even just to store a hot lunch, the old classic thermos can do a lot to make your day that much more comfortable. You can do all your water boiling at one time and still enjoy more than 1 hot meal per day.


A few months back I was sent a 20 oz Vacuum Food Jar by Stanley I’ve been experimenting with it since then and thinking of different ways to put something like this to use. It’s certainly not Ultralight gear material at 18 oz weight, but as a luxury addition to your canoe or car camping kit it’s a great little piece of gear that holds a wealth of convenience.

My Stanley vacuum food jar ready for the hot water.

Here’s a few tips or uses for your thermos. While making dinner, boil a couple extra cups and pour them into your thermos for the next morning.  You won’t have to worry about getting water or fiddling with your stove or camp fire in the morning. You can even pack up camp the night before and be ready to go early for that extra 15 minutes of fishing! If the night gets really cold, you’re set for a cup of hot chocolate to warm you up for those extra couple hours until morning! 


For all those DIY cookers and bulk buyers, you can save on waste and disposable junk by using your thermos to rehydrate your meals. Even better, you save on fuel as you just have to boil your water, pour your meal into the thermos, seal it and let it finish cooking there! 

Here are some of the features of my Stanley Vacuum Food Jar:

  • Keeps hot/cold 12 hours. 
  • Wide-mouth opening. 
  • Protective double-wall construction. 
  • Stainless steel. 
  • Rustproof finish. 
  • BPA free
  • Lifetime warranty.
In my experience, the 12 hour rating would be for a full container and probably at about sea level. When I tried it at altitude using 1/4 capacity (10000 feet where water boils at a lower temperature) it had cooled down significantly when I opened it after 12/13 hours. An 8 hour storage time would be a safe bet for keeping your food hot. At 9-10 hours it will be warm, not boiling hot.
The capacity is a big plus on this one. 20 oz is a great size for 2 hungry outdoors adventurers. The wide mouth top is one of my favorite features. I’ve been turned off thermoses in the past by how hard they are to clean out, but Stanley has certainly applied their years of experience to this one.
The Stainless steel also means that there’s no bad taste in the food, no matter how many hours it sits for. 
To top it all off, in the lid there’s a nice foldable spoon. Although it looks a bit short for the depth of the jar, the wide mouth means that you’re not likely to get goop on your hand when you’re digging out the last of your oatmeal or stew.
If you haven’t thought about taking a thermos on the trail or in your canoe, you should definitely look into the options out there and think about the convenience factor of not having to pull your stove out all the time when you need a bit of hot water.
Do you have a Stanley or thermos story or maybe another tip for those who are new to thermoses? We’d love for you to leave a comment below!

Strider No-Pedal Balance Bike – 1st Check-in (video)

The Outdoor Adventure was recently given the opportunity to let one of our younger adventurers put the Strider No-Pedal Balance Bike to the test! As this is a long-term testing process, we’ll be sharing the testing progress in segments for your viewing pleasure. So sit back and enjoy the ride, or go out and let your little adventurer take a Strider for a whirl!

I first heard about the Strider bike from a friend and her active 2-year old. He cruised around on his Strider with such confidence I knew I had to research them more! Once I watched some videos online, and browsed their website on www.StriderLife.com I knew I wanted to let Ayalah try one out. Strider graciously sent The Outdoor Adventure a beautiful green Strider and at 22-Months Ayalah was more than ready to try it out! They have plenty of information and a variety of colors to choose from on their website www.StriderBikes.com (video below)

I found the set-up to be very user friendly, and the instruction manual to be clear and concise with its wording. Of course, I still overlooked the bold lettering at the top of the page about taking the plastic wheel nut covers off after set up. I realized they weren’t just sweet pegs about halfway through the first ride, and removed them at that point without any harm done. Ayalah enjoys taking the Strider on our daily neighborhood walks, clutching the steering post close to her chest the whole way. We encourage her to scoot back on to the seat, but will let her decide when she feels comfortable enough to make this adjustment on her own. In the meantime we cheer on her every stride!

When Ayalah isn’t out on her Strider, she enjoys watching YouTube videos of other children on theirs. In fact, if we dare bring out a smartphone near her at any given time she will demand in true toddler fashion to watch videos of “bikes!” We are pleased that she too will be adding a few more videos to the mix!

Do you have a Strider for your little one? We would love to hear your thoughts and any tips you have to encourage her confidence to take it to the next level!

A Big Thanks to Strider for this awesome opportunity. You’ll be hearing more from us again soon!

Reviewed By:
Tabea B
The Outdoor Adventure Team

Hillsound Trail Crampons – Gear Review


This may seem like a strange review to post in early July, but for those peak baggers in the northwest, there’s still snow up there in them hills. I remember trying to climb Mt. Defiance in Washington last year and coming across waist deep snow in places. People were turning around and heading back down the Ira Spring trail because there wasn’t a lot of traction. Those that did go on slipped, slid and risked hurting themselves to beat the snow field. All those except for the smart ones that brought their trail crampons.


There are several different companies that make stretch crampons or non technical crampons designed for trail use. I’ve seen at least two and managed to get my hands on a pair of Trail Crampons by Hillsound for my trip to Bolivia.
Trekking around at over 15000 feet means the likelihood of hitting snow patches while on the trail is very high. I wanted something to bridge the gap between technical approaches and something I could whip out, attach to my hiking shoes/boots and traverse that field. The Hillsound Trail Crampons don’t disappoint.

Who is Hillsound?
Hillsound is a Canadian company setup in my backyard of Vancouver, BC. They produce several different Crampon products as well as some quality gaiters that I will be reviewing in another video (you can see them in use in the video review).
What is a stretch crampon?
 
Stretch crampons are a non technical traction enhancer that you can slip on over your shoes or boots. They’re used by hikers who expect to find areas of snow and or ice on the trails that could pose a danger to or prevent entirely hiking in altitude, or even early/late season hiking. They’re meant to be easy to put on and take off, but still provide enough traction.
What does the Hillsound Trail Crampon Offer?


The Hillsound Trail Crampons have 2 parts, a flexible elastomer top and a heavy duty stainless steel and high carbon steel bottom half.
The stretch harness is made of an elastic polymer that they call Elastomer. It’s flexible and stretchable and stays that way down to 60 below zero.  To add extra stability, not that I feel it was need when I’ve used them, but regardless, there’s a strap that goes across the top of your foot to add that extra bit of security.


The spikes (points) are made of nice, hard, high carbon steel that gets a good bite into snow and ice. They’re a nice 3/4 inch long or 1.5 cm too. On the bottom there’s a hinged plate that flexes with your foot to make sure you keep traction when you’re lifting your foot. One thing you need to do is dry them and oil them when necessary, or they can rust. I haven’t had any problem so far, But I can see it being seasonal maintenance, like most gear.
You may have seen other brands with a type of spring covering a lightweight elastic. This is a heavier duty, more secure “elastomer” and it has real spikes. It makes them slightly heavier at 0.7 kg or just over 1 lb, but the pay off is in durability, stability and traction.


In the video review embedded above, you can see how easy they are to put on and take off, even with awkward gloves on.
Conclusions so far
 
After blundering around in snow, it’s really nice to have a portable and easy to use crampon to slip on on the trail and give me that aggressive traction necessary for hiking on snow and ice. They’re easy to use and I will take them on future hikes for fall and spring to give me that extra bit of traction.
At $60 online, If you’re looking for something to extend your hiking season in cold and snow areas, The Hillsound crew is really working hard and producing some really nice, quality gear. If you haven’t checked them out, stop by Hillsound.com and see what they have to offer.
I’ve only used them on well packed snow and ice and there weren’t any problems. Some have reported balling (snow packing up under the middle of your crampons), so something to keep in mind. I’ll be reporting back on long term results later.
DisclosureAs said previously, Hillsound provided me the crampons at my request. All opinions are my own and what I would tell any friend.

Biking down the World’s Most Dangerous Road with Gravity

At last count, 18 people had died going down the old highway to North Yungas, a.k.a. The Death Road, on mountain bikes. It’s usually a combination of distraction, unfamiliarity with bikes or poorly maintained equipment. If it’s your life, you don’t want to cut corners.


Unfortunately, with no standardization and a desire to make money by increasing margins, this is what many of the “cheaper” companies are doing that bike down the death road. Although there have been only 18 deaths in over 10 years, there have been many more injuries as I want to talk about below.

Oh, and check out the video below that includes a wipe out on the trail!


Now let’s get this straight, your chances of dying are slim, but the chance of getting minor injuries from scrapes, falling and even sliding off the edge are higher. What your company does in this situation or why it happened will show you how good or bad your company is.


I’ve gone down twice, once with a mid end company (B-side) and once with the most expensive company (Gravity). These are the only two companies suggested in the Lonely Planet Guidebook… Plus, I’ve seen the other companies go down this road, seen their equipment and talked with a number of different people. I’ve read many reviews on a number of different trips for many different companies, but having seen many companies and ridden with two of them, I can give my opinions.


A lot of people aren’t comfortable on bikes or a lot of people are risk takers. This is unavoidable and you will have injuries with every company. What makes a difference is how the injury happens, what was done to take care of it and of course if the bike was at fault.


Biking down the death road beats up bikes. The dust gets into things, the road is incredibly bumpy and as it’s down hill, the riders are on the brakes most of the time. Chances are that this bike has been going down the road every day for the past 2 years or more. Sure, they might change the brake pads, but when they do, the cheaper companies will just put cheaper rubber back on the old mounts. It is the suggested culprit for brake failures from going down the hill.


When I went down with B-side, they were friendly and somewhat professional. I had the best bike in the bunch and I had no problems. 3 others in my group had a less enjoyable experience. Their bearings were either worn or not lubricated as they had to pedal down the hill… I’m talking a hill that I took at 60+ km an hour at times. Worse, one guy’s chain came off repeated times and then eventually the pedals stopped turning all together. And they had no spare bikes to hop on. If this is to be a once in a life time experience, do you want to be disappointed because you saved some cash and went with a cheaper group?


In contrast, Gravity, who replaces their bikes every 2 years, cycles them through maintenance after every trip. One day on, one day being reviewed and repaired by techs. No one had bike problems on the way down with Gravity.
Gravity is the first company to start offering the trip, so they are probably the most informed. Gravity spent a lot of time giving history and background to the road and even more time explaining what to expect, what to do to keep safe and what not to do if you didn’t want to end up back in the bus. They have fun, but they don’t take chances.
Gravity also trains all its guides in belaying and first aid. They carry a full first aid kit and spinal boards. Many other companies don’t. Read the reviews on Trip Advisor. Gravity has had to come to the aid of other groups recovering people who have gone over the edge, lent spinal boards, vehicles and whatever else was necessary to help out the tourists… on other groups.
There also other little things that made the gravity trip that much nicer: How informed the guides are about history and background for the area, the free buffs they let you keep, outer layers to keep you warm and lessening road rash damage, sports drinks included, first drink at the bottom is free, and the fact that they end at an animal refuge where they rehabilitate and take care of animals that have been sold on the black market (Monkeys, a caiman, turtles, parrots, and more). Oh… and they drive you back up the death road in the bus on the way home.

The number of groups that I saw with below par gear or bikes was crazy. In Bolivia you can buy any bike with any brand… spray painted on the side. There are lots of knock-offs. It looks good, but a lot of it is cheap junk. Squealing brakes or stopped regularly for repairs, this is not the way to enjoy the WMDR.

Paying the Piper


So what are we talking about? B-Side costs between bs 490 ($70 USD) and 600 ($85) depending on the time of year and how good of a negotiator you are. Gravity is a set bs 750 ($110). This is for a day trip. The big difference of Gravity is quality of gear with regular maintenance, trained guides who are experts in their field, Knowledge of guiding, free buffs, sports drinks, spare bike in case something does go wrong, water, you eat lunch at an animal refuge. Oh and Gravity invests in the community.

In the end, you have to decide. The money you save is likely cutting corners. You may be fine with a cheaper company, but you’re taking risks with your safety and recovery. Pretty much every company gives a free shirt, and many of them take videos of your trip (including Gravity and B-side, although b-side quality of video was very low) so don’t let that be your selling factor. There is a reason why Gravity is on the top of the list in most if not all guidebooks!

Ultra-Mesh stuff sack by Sea to Summit

Ok, so we’re checking in with yet another Sea to Summit Product. For those who are unaware, just go to your local outdoors store and ask for the Sea to Summit Section. at least that’s how it’s laid out in my local store.

Sea to Summit produces great quality, ultralight gear for hikers. Anything from biodegradable soap that you need only a tiny capfull of for a shower or wash dishes, to shelters, bug tents and more. The real kit that impresses me is the wide array of waterproof bags and compression sacks. I was given a few of their light weight storage and stuff sacks by the company, including the Ultrasil View Drysack and  Ultrasil Nano and as well the Ultra Mesh stuff sack which I’ll be looking at today.


Made of: Lightweight no see-um mesh, ultralight silnylon and a lightweight draw string.

Sizes and weights. There are a wide variety of stuff sack sizes to suit your mesh preferences:

  • 2.5 liter (0.2 oz)
  • 4 liter (0.3 oz)
  • 6.5 liter (0.4 oz)
  • 9 liter (0.5 oz)
  • 15 liter (0.6 oz)
  • 30 liter (0.7 oz)

As you can guess, the weighty part is the string and silnylon top and bottom. The rest is practically weightless.

Uses:
I have the 9 liter mesh sack and it’s just the right size for lightweight backpacking. I can’t confirm the capacity. I filled it with 9 liters of water and there was lots of space left. In fact I gave up trying to fill it up… bad joke. sorry.

I’ve been using them on a few of my trip happily and the mesh sack was the one that had me scratching my head at first as to what I could best use it for. This is what I came up with:

Non compression items. As a ditty bag for just keeping stuff organized this is great. A way to keep all of 1 type of thing together, like packaged food or snack bars, toiletries, cook set, etc.

Old clothes. I like to keep cleans and dirties in separate bags, but the dirties could use a bit of airing out. If you want to give that Merino wool a bit more time to breathe, why not hook it on the back of your backpack and take advantage of that summer breeze?

Bear sacks. For areas where hanging food and smellies is permitted, this is a great little bag as it’s light weight and comes in a wide variety of sizes.

Fish net? Ultralight is the king of multi use items. Why not make yourself a tenkara net on the trail and get the most out of 0.5 oz?

Bug net? Oh, and while the mest is tight enough, you’d need at least a 15 liter bag to fit your (my)  head in it.

Do you use mesh stuff sacks? What have you found them most useful for? Oh, and take a look at this video for a brief look at this cool tool!

Ultra Sil View drysack by Sea to Summit

If you haven’t noticed, Sea to Summit gave us a bunch of stuff to review and I am happy to be putting it through its paces. Next on my list is the super cool Ultra Sil View drysack. This little baby boasts 3 significant features: Cordura fabric, a View window and a super light weight.

First out, this is a bit heavier than the ultra sil nano we looked at previously, but that is because of their choice of cordura, a heavier duty fabric, and the clear view port for seeing what is inside… I guess I could stop there, especially if you know Sea to Summit’s reputation, but for the sake of sharing what my feelings, read on!


I really like their Waterproof nano, light weight drysack (1 oz for a 13 liter bag), but for those of us who are forgetful and don know where they packed Xyz, this is worth the extra weight (1.5 oz for the 8 litre model I got).

Let’s start with the window. Itś made of TPU and RF welded on. I didn’t know what that all meant so I took a look. TPU is a plastic Thermoplastic polyurethane. Say that fast 5 times. That stuff is supposed to be elastic, abrasion resistant, as well as grease and oil resistant. I’m guessing they chose it to go along with Cordura’s durability

The RF welding is a process that bonds the materials and leaves the join as strong as the material itself. That is supposed to translate to being free of weak spots, something you don’t want on a drysack. It looks and handles great IMHO and I don’t see that window breaking any time soon… But don’t worry, we’ll be doing a long term review as well.

So let’s move onto the Cordura. They’ve chosen the growingly popular cordura fabric for this view line (comes in 1,2,4,8,13,20 and 35 litre models). Although it’s been around since 1929, cordura has only recently come into my radar (read 1-2 years). It’s known to be strong and durable, resisting abrasions, scuffs, etc. They’ve siliconized it to make it waterproof to give that much needed dry feature of drysacks. he he he.

This pack is almost double its ultra sil nano cousin of the same capacity, but clearly designed for harder wearing and better organizational skills. Still, at 1.5 ounces, you’re not suffering by turning to this for longer or rougher trips. Especially if you’re not easy going on your gear.

If you haven’t seen this new line, check it out on Sea to Summit’s Ultra Sil View page.

Pluses: Heavier duty fabric and a nice view port to keep track of where everything is.

Downers: Results in a slightly heaver weight.

My conclusions: For light, but not ultralight hikers, you need to check this out for yourself.

Check out a first impressions take I did on the ultra sil view here:

Ultra-sil Nano Drysack by Sea to Summit – Gear Review

When it comes to backpacking, there’s one thing I hate, and that is stuff that gets wet in my backpack… Especially if it isn’t supposed to be wet. Stuff Sacks are good and drysacks are better. Sea to Summit‘s line of Ultra-sil Nano drysacks is not only good or great, it’s excellent.


When you see drysacks, they usually fall into one of two categories: DWR or silnylon. DWR stands for Durable Water Resistant. It’s a water resistant finish that is sprayed onto nylon and which results in a temporary  and limited water resistance. Depending on the brand and quality that resistance could be enough for you, but it’s not guaranteed to keep your stuff dry. Also, It does wear off over time. Silnylon on the other hand is completely waterproof. They take silicon and they impregnate the nylon with it resulting in something completely weatherproof and much longer lasting than the cheaper DWR coated fabrics.

Usually, this would make the silnylon a heavier choice, but because of their choice of fabrics, the Ultra-sil drysack from Sea to Summit is SUPER lightweight. I mean really really lightweight. You have the benefits of silnyon, but without the weight. To give you an example, the 13 liter bag that I have weighs in at only 1 ounce. That’s much lighter than the DWR bags I’ve purchased in the past. Now obviously it will be a bit more delicate, but not much: and so far, it seems like a worthwhile compromise.

Sea To Summit carries a full range of sizes for their ultrasil nano drysacks, ranging from 1 liter (at 0.5 ounces) all the way to 35 liters (at only 1.5 ounces). If you like to keep your stuff organized and dry, but don’t want to carry extra weight, this is definitely something you should check out.

As time goes on I’ll be letting you know how the bag holds out to normal backpacking use, but it’s definitely making it into my pack for this summer’s excursions!

Oh and it’s so light weight, it can double as a beachball when you’re bored at basecamp!

Have you tried out Sea to Summit gear before? Can you recommend any other sea to summit gear that’s worth adding to our pack?

Vapur anti-bottle – Gear Review

A little while back, I was sent an unbottle from a company called Vapur. Actually, it’s more of an anti-bottle. It’s a vessel for holding water, anyway, and in addition to being BPA free and light, it is also packable when not in use. It’s the Vapur Element.

I’d been keeping a casual eye on the battle between hydration bladders, nalgene users and plastic bottle users and was aware that there was a growing trend to these half bag, half bottle options. I had been meaning to pick one up to try it, and fortunately for me, Vapur sent me one to try out.
It may go against what it stereotypically means to be a guy, but I read the instructions before trying it out. (pausing for the gasps of amazement to die down). The first thing that struck me was that it’s BPA free. I know this is becoming the standard, but it’s still something I look for in a drinking vessel. It’s got to be something that I can keep long term and that won’t break down and make me sick.
After that the cool dishwasher safe feature caught my attention. One thing that prevents me putting electrolyte drink powders in my water bladder is the difficulty of cleaning. I can’t get the smell out and I can’t scrub the inside out! I’m looking forward to putting drink mix in their and then trying out the dishwasher friendly results!
Although it looked tough, I was kind of concerned about how it would hold up under a hot dishwasher’s breath, so I devised a hard wearing test. I poured near boiling water in it several times on an 3 day outdoors trip and it didn’t get weak or damage any seams. Hey, it even served as a good hot water bottle!
Apparently you can freeze it as well and use it as an ice pack… I smell a test coming on!
This made in the USA product also has a really neat nozzle or head. It shuts solidly thanks to an inside seal and firm squeezing didn’t cause any leaks. It has a carabiner type ring on the top that can be hooked on to your pack or even directly on your belt and it doesn’t disturb me at all while I walk. That same loop can be used to whole the rolled up antibottle tightly to save extra space in your pack.
Oh and another benefit was that by blowing it full of air I had a really nice, soft pillow for sleeping on at night.
Although I haven’t completely abandoned my water bladder, I am impressed with how compact and lightweight these vapur elements are. I definitely will carry one with me this summer to help me decide what will work best for me and I would definitely recommend it to anyone that is looking for an alternative to that heavy nalgene bottle!
Do you use a Vapur or similar product? What do you think? Would you recommend it to others?

The Fire Puck – Gear Review

A little while ago a company contacted me via youtube asking me to take a look at a product called “the fire puck”. It’s supposed to be a versatile firestarter that can be lit without other ignition sources and that burns hot and long. I decided to try it out for the first time on video and I was happily surprised at the result (Scroll to the bottom to see the video!).
 
The Background

The idea is simple. A weather resistant fire starter made with 65% organic materials that burns at 1400 degrees. The purpose is starting fires. The benefit is that it doesn’t need a lighter to start it and it stays burning for a long time, even in adverse conditions.
 
The Experience
 
So I tried an experiment. I thought I’d see if it could boil 2 cups of water using just that. It gave me a reason to get out and try it and see if it was worth taking on my survival trip.
 
Following the directions was easy.
 
Remove the Label –This is made of plastic and serves to keep the top and bottom on. The plastic doesn’t appeal to me as it is the only part that isn’t burnable. I think that it would be a better choice to use an adhesive paper tape for this part.
 
Locate the Striker –The Striker is easy to find on the top cap and is easily large enough to use as a striker.
 
Strike on the Starter Button –This works almost too well. I didn’t need to put much work into striking and immediately it started shooting flames. I even had to step back as the flames crept into a jet and shot a good 12 inches up above the puck.
 
Thefire puck continued to burn for at least 2 minutes more and remained burning quite strong. It didn’t boil the water, but it heated it up until it was uncomfortable to the touch.
 
My thoughts
 
Be careful. Once this lights, it gets hot very quickly. You don’t have to worry ignition difficulties or how long it lasts. This thing burns for a good 2 minutes at least and the heat is intense enough that it should ignite even damp tinder (if it hasn’t completely destroyed it by the time its done). It’s very effective and something to keep on hand for emergencies if you’ll be needing a super duper fool proof fire starter.
The Video