Home / cooking

cooking

Culinary Adventures – Delicious Food in the Outdoors #Trailtime

One of the most memorable aspects of my outdoors experiences is the food. Whether it was the day before we picked up our food resupply on the John Muir Trail and I was down to a pack of dry rice and a snickers bar (that I boiled for breakfast), or the 3-day Bushcraft/survival trip where I got sick of eating trout (no matter how I  cooked it), or the pizza that we scarfed down on the Choro Trail in Bolivia, food always plays a vital role, and often a delicious one.

So, to get us salivating and to take a video walk down memory lane in preparations for this Thursday’s #Trailtime twitter chat (Thursday at 3PM PST) with the Sierra Trading Post, I’ve compiled a list of some of the more memorable experiences that I’ve had that involved food. For more ideas, check out this post on the Sierra Trading Post Hub for some great (and easy) camping meal ideas.

Feel free to watch what you like and ignore what you don’t, but I’d love to hear your stories about the most memorable food experience you’ve had on the trail or at camp.
How to Make Bush Tea

There was a time when my kids loved watching survival shows. The result was many wonderful lessons learned to keep them safe in the outdoors. My son put those skills to practice by making me his own version of Bush tea. While I don’t recommend mixing this drink for yourself, this video is too cute to miss!

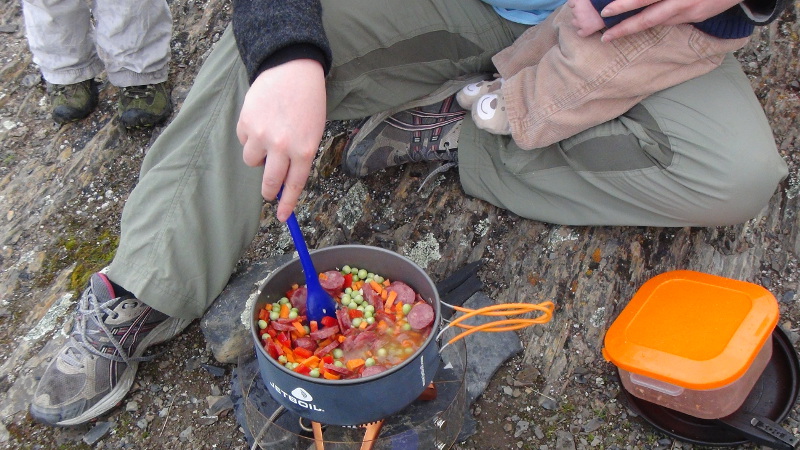
Family Alcohol Stove Cooking

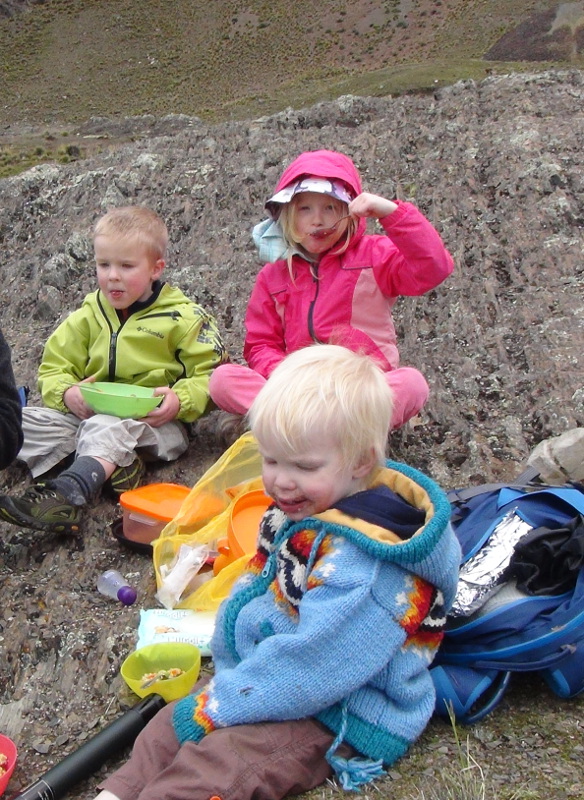
I went through a phase where  I cooked anything and everything on an alcohol stove, from pasta, to pizza, to orange cream cake (in an orange peel) and even chocolate bundt cake. Check out this video for a look at a family picnic in the Bolivian mountains and at least soak in the amazing views of the mountains in the background.


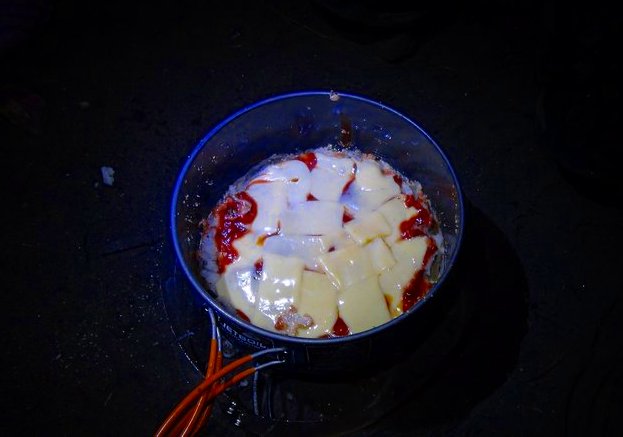
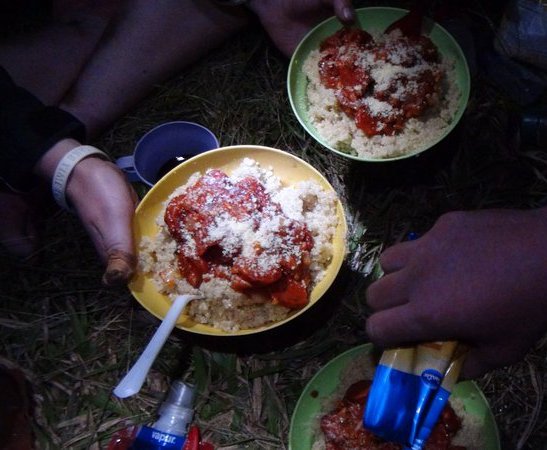
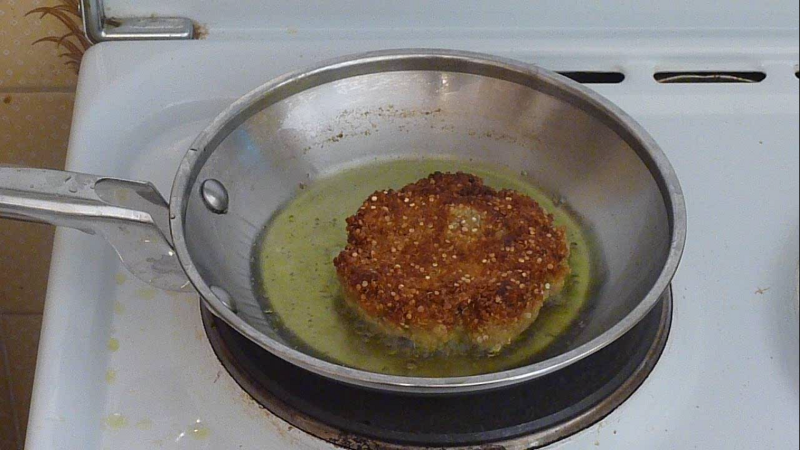
Deconstructed Trail Pizza:

It doesn’t get much better than this. Pizza made with Gouda and Italian sausage after a long day of backpacking?

Biltong (South African Beef Jerky)

Okay, we can’t quite make Biltong the way they do in South Africa, but this is our take on the classic recipe. It was one of my early videos, so it’s a bit more cringeworthy, but watchable nonetheless. My wife usually has to make two batches, the first gets eaten before we even leave to go hiking and the other one usually keeps us through the first two days at least (we buy several roasts worth).


Survival Trip Highlights

You may not like bushcraft or survival, but if you like food, check out this video and see some fun ways to impress your friends by cooking trout on the trail.


Well. now that you’ve wasted an hour or so watching videos about food on the internet, why not go start planning your next culinary adventures, check out some tasty outdoor meal ideas on the Sierra Trading Post Hub: and Be ready to chat about Food at 4pm MDT Thursday July 17th for #trailtime.

Oh, and have you ever tried Trail Sushi?

Why we dehydrate and prepare our own meals

As we start heading towards backpacking season, I figured it was time to talk about dehydrating your own food. A week or two ago Gina Begin asked around about what we did and why for this #TeamSierra post on Dehydrating your own camp meals at the Sierra Trading Post.My wife pulled out a complete article explaining our journey in dehydration, so I figured I’d share it.

Please feel free to weigh in with your experience.

Well… our favorite dehydrated food over-the-hills-and-far-away is home-made biltong (South-African-style jerky). We also LOVE upside-down pizza (http://www.theoutdooradventure.net/2013/02/deconstructed-trail-pizza-for-a-crowd/), adding cubes of organic all-natural chicken stock, dried sausage, and dehydrated veggies to instant brown rice, quinoa, or instant Idaho potato mash (one variation: http://www.theoutdooradventure.net/2013/03/trail-cooking-quinoa-sausage-soup-for-a-crowd/), and high-protein gluten-free homemade pancake mix with brown sugar.
3addvegetables

The chicken chilli and bean chilli recipes I used for our family camping trip were both from A Fork In The Road or Another Fork In The Road. The chicken recipe was tasty, but I think next time I’ll just make my favourite bean chilli recipe (ground beef dehydrated separately), dehydrate that, and serve it over instant brown rice.

I read somewhere that pretty much any stew, chilli, or sauce can be dehydrated. I had trouble dehydrating oily sauces, for example, a sauce containing coconut milk (disaster!). We also had trouble reconstituting stews with bits in it larger than a small bean; it took longer than we were willing to wait. I suppose that this could be solved by using a thermos and starting the reconstituting process in the morning so that it is ready by the evening, but that seems to be going against the point of light-weight, low-bulk foods.

choro 10 pizza

I suppose my main motivations for preparing the meals myself are:

  1. I feel like I’m saving money,
  2. I know that the food is higher-quality,
  3. I know exactly what I’m feeding my family,
  4. I feel like I’m being more eco-friendly by cutting down on packaging, and
  5. because I like the challenge of learning new things!

For these reasons, I feel like it is definitely worth it. Yes, it did take very careful planning to make sure everything was dehydrated in time. I started about 10 days before our 3-day family trip and used a spreadsheet to plan out the use of the dehydrator. Some things take more than 12 hours to dehydrate properly, like mango roll-ups for example.

choro 17 quinuaital

When Paul goes out on his own, or if we went without the kids, I feel like we would use pre-packaged meals more often, because it would be less cost-prohibitive and it would feel special, like as if we were going out to a restaurant. 😉


Alternavites Kids

One of the struggles about backpacking with kids is not getting enough fresh fruits, etc. for the kids. As a treat and a try out for the kids we took along some Alternavites Kids vitamin mixes.

Alernavites vitamin powder can be used as juice mix, to add to smoothies or even eaten straight up as a powder.

OzettePT1-pic1

When we headed out on a family backpacking trip (with four kids) our plan was to mix the pouch into the kids’ water bottles. We let them choose between the two flavours (Strawberry Bubble Gum and Raspberry Cotton Candy) and were about to add them to the bottles when they said they wanted to try them straight up! The two older ones loved them and wanted more, while number 3 gave the “yucky” expression. I wouldn’t take number 3’s opinion too seriously though as he normally rejects food the first time he tries it!

I should mention that Alternavites Kids are made without aspartame, corn syrup, gluten, dairy, wheat, eggs, soy, peanut, shellfish, fish or tree nuts. As a Gluten free, corn free, dairy free family that can be a deal breaker!

I like the idea of having a convenient way to get vitamins into the kids while outdoors, especially if it can be consumed in a number of different ways. I would definitely take them for the kids on future trips as a way to make sure they have the vitamins they need to stay healthy and energy to enjoy themselves.

A special thanks to Alternavites for sending me these to review.


Cheesy Bacon Taters – Backpacking Recipe

When it comes to backpacking meals it’s important to pack meals that are lightweight to pack, taste great and are easy to cook. In preparation of hiking the John Muir Trail this summer, we’ve been testing easy backpacking meals in our Campsite Cooking Meal Series. We’ve tried backpacking recipes with rice, quinoa and pasta. In the below video we tested out a really easy backpacking meal called Cheesy bacon Taters.


As you can see, this lightweight backpacking meal is easy to cook in the backcountry. Follow these instructions to try it on your own.

At Home:

Mix the following ingredients in a plastic bag.

1/2 cup of instant dry milk

1/2 cup bacon bits

1 1/2 tablespoons dried parsley

1 1/2 tablespoons dried onions

a dash of salt and pepper

On the Trail:

IMG_3474 - Copy

Boil 2 cups of water. Remove from heat, add one package of instant potatoes and stir. Add the contents of the spice bag you mixed at home then add two sticks of string cheese. Be sure to cut the string cheese into small disks about the size of a dime, that will help them melt quicker. We used string cheese because it can go a day or two without being refrigerated. Stir all of the contents until the cheese has melted and blended in with the other ingredients. Then enjoy.
If you liked this recipe, be sure to try our other campsite cooking meals? Our previous backpacking and car camping meals include: Trailside Chicken & Rice, Sausage & Mash, Backcountry Pizza, and Dutch Oven Breakfast Burritos.We found this backpacking recipe to be really easy, inexpensive and very packable for a backpacking trip. We recommend you give this meal a try on your next trip to the backcountry. If you do try it out, leave a comment below to let us know what you think of this recipe.

by Andy Hawbaker

Trail Cooking: Quinoa-Sausage Soup for a crowd

Serves 4 adults

Ingredients

4 Spanish-style smoked chorizos or smoked sausages

1 to 2 cups dry, pre-washed quinoa (2 cups for a thicker soup) (any color)

1 tsp. Thyme

1 tsp. Salt (or to taste)

4 large cloves garlic, finely chopped

1 to 2 carrots, finely diced

1 to 2 cups peas

1 red bell pepper, finely diced

(celery could also be finely diced and added to the mix, about one stalk)


About 6 cups cold water


(The vegetables can be dehydrated for longer storage.)


Instructions:

1. Have ready to hand about 6 cups cold water.

Frying the sausage

2. Slice sausages and toss into 2.1 or larger pot. Stir quickly.

5Souping

3. Working quickly, toss in vegetables, quinoa, and 2 cups of the cold water.

4. To keep at a simmer, keep adding cold water (gradually). Keep stirring to prevent sticking.

5. Add thyme and salt to taste.

Quinua Sausage Soup

6. Simmer about 15 to 20 minutes.


We found once the soup started to simmer, we could leave it, adding cold water and stirring every couple minutes or so, and as long as it remained fairly soupy, it did not stick. We used a bit more than 2 cups quinoa, and towards the end it became more of a very thick stew instead of a soup and started to stick to the bottom of the pot. We managed to turn the flame down a bit (just shy of being extinguished), but we had to keep stirring to prevent cold spots along the sides of the pot. This Jetboil seems to work best on medium or full flame. Enjoy!

7eating

Looking for a good deal on a Jetboil? Use the following link for a good discount from Sierra Trading Post. http://stp.me/JetboilHeliosStove

Deconstructed Trail Pizza for a Crowd

A couple weeks ago I took some friends down the Choro Trail in the rainy season. To combat the discouragement of wet weather we decided to pull out some awesome meals using the Jetboil Helios that I picked up from the Sierra Trading Post.

Yes, I had made a simple trail pizza for one person, but cooking for a crowd is more demanding, and requires a bit more creativity, and a bigger pot.

Want 25% off Jetboil gear at the Sierra Trading Post? Use this link: http://stp.me/JetboilHeliosStove

Paul’s Deconstructed Trail Pizza for 4 hungry backpackers – Makes 6 to 7 – 7.5” pizzas with a 2.1 Liter Jetboil Helios pot

Here’s the Ingredients you’ll need:

  • Pre-mixed quick dough
    • Dry Ingredients
      • 2 cup flour
      • 3 tsp baking powder
      • 1 tsp salt
    • Wet Ingredients
      • 2 cups water
      • 3 tbsps oil – for bread
  • Toppings
    • 4 x spanish sausage (or equivalent in pre-packaged pepperoni)
    • 1 lb mozzarella or other prefered cheese
  • Tomato Sauce
    • 2 x 6 oz package of tomato paste/sauce
    • 1 tsp Garlic
    • 1 tsp Oregano
    • 1 tsp Basil
    • 1 tsp Thyme
  • For the Pan
    • 3/4 cup corn meal
    • 7 tbsps oil

Prep:

  1. Mix tomato sauce ingredients together in a bowl and let sit
  2. Mix pizza dough dry and wet ingredients together and let sit.
  3. Slice Spanish Sausage into 3/16” to 1/4” thick rounds.
  4. Slice cheese into 1/16” slices.

Cooking:

The biggest challenge of cooking this recipe is keeping the bottom from burning. To overcome this I changed other recipes and processes, including corn meal and putting the sausage on the bottom.

  1. Add 1 tbsp of oil to the pan, rotating the pan until the bottom (and sides up to 1 inch high) are coated.
  2. Sprinkle with corn meal until there is a thin layer of corn meal on it.
  3. Line the bottom of the pan with sausage slices until you have 1 complete layer.
  4. Pour over enough dough to juts cover the sausages.
  5. Put the pot on the stove with lid on top.
  6. Let cook for 3-5 minutes or until the dough has cooked.
  7. Remove from heat and apply tomato sauce mix to the top of the pizza.
  8. Cover with sliced cheese.
  9. Return to the heat with lid on top and let cook for another 1-2 minutes or until the cheese has melted.

Serving:

The real challenge with this pizza is removing it from the pot. The corn meal helps. My best success is the sumo drop. With the lid on the pot and your hand on the top lift the whole pot, flip it and stop on the way down. Just like getting the ketchup out of the ketchup bottle, this same action will pop the pizza out of the pot and into the lid. Then, you can just remove the lid and eat off it like a plate.


Check out the video below for an example of how to do it and to see how much everyone enjoyed it!

Good eats and cold feet – rainy season on the Choro Trail

When some friends came over to visit from various parts of the world, I knew I had to take them on the Choro Trail… even if it was the rainy season.

We ended up being caught in a snowstorm at around 16000 feet and slipping down the Incan paving stones in the rain. To help make up for the weather we brought along a Jetboil Helios and made some gourmet meals. It was an awesome trip.

Here’s a video of day 1, which brought us from the cold mountain tops to a semi-tropical campsite. Food was Peanut Pad Thai and deconstructed pizza. I also got some time to try out my Sony Action Cam in the river too.

A special thanks to Sierra Trading Post for the Jetboil Helios and Mountain Hardwear Versteeg. They were awesome. Expect a full review in the near future.

Take a look and let us know what you think.

All video is with my new Sony PJ580v Handycam or Sony Action Cam.


1 Can Side Burner Alcohol Stove

I felt it was time to post an instructional on how to make an alcohol stove and keeping it even greener: Just use 1 can. I’ve used this design many times and I find it to make a more efficient stove than using 2 cans because of how the inner wall works.

This design can be used for any tall can whether it be the energy drinks like monster, the red bull style cans or full sized pop cans. The only thing is that you need to be extra careful while cutting not to make mistakes.

See the video below and continue for the instructional:

What you need:

  • A tall beverage can, whether that’s a beer can, energy drink can or other, it just needs to be the tall version
  • A ruler
  • an exacto knife or other blade
  • a pair of scissors
  • a marker
  • pliers
  • a lighter
  • and a push pin
Mark and Measure:

Now the first thing you’ll want to do is to measure your can. You’ll want to divide the length by 3 as you’ll be making 3 pieces for the stove. The can I used was just over 6 inches so I measured and marked at regular intervals around the can 2 inches from each edge.


Pop the Top:
Before you cut the can you’ll want to remove the top. To do that you’ll need the exacto knife or craft knife. You’ll be scoring the channel around the inside edge of the top of the can. Keep working your way around until you’ve almost cut through. Next, push through with the knife at one point and work your way about 1/4 of the way around the channel. The next part is cool. Just push near where you’ve cut and the whole top will start to tare long the scored line. It’ll pop off and you can move on to the next step.


Cut it out!
Next you’ll want to cut the can into its 3 pieces. I use the exacto knife to cut along the dots that I made while measuring until I have about an 8th of the can to go. Then I take the scissors and finish off.
Now, you’ll notice a seam on the can from where they printed the colors on. Cut up the seam until you reach the other line you drew with the marker. Next use the scissors to cut along the other line all the way around. That’s all the cutting you’ll need to do. You now have 3 pieces and just have to connect them all together.
Both pieces of the can are the same diameter so what I like to do is take the bottom piece and crimp the edges with the pliers. I twist and bend the edge in so that the upper can will slide onto the top.
Pull Push it all together:
Once that’s done, you can see how the stove will be put together. You coil the middle section of the can inside the bottom piece to make an inner double wall and then slide the top portion over them both.
If you find it hard to fit the cans together without damaging them, try heating the upper piece of the can with a lighter. This will make it expand and will give you 10 seconds or so to slip the pieces together.
The inner wall needs to slide into the channel on the inside of the top and bottom pieces of the can. I tap the two cans together and then check the inner wall guiding it into the upper channel so that it makes a good seal.
Let’s Jet:
Now that it’s together we just need to mark the jets. The key to the stove are jets that are high enough in the can to prevent the fuel from leaking and low enough to allow the jets to continuously heat the stove. It’s usually between half an inch and 3/4 of an inch from the top of the can. I spacing these jet about half an inch apart. On the narrow diameter cans try 1/2 a centimeter or 3/8 inch apart.
That’s it. This stove is pretty quick and efficient. On my first run it boiled 2 cups in a little under 5 minutes. It did a liter in 7 and a half. Using the wider cans like this you can easily boil 2 litres of water without refilling it.
Thanks for checking this out. Please let me know what you think. Please comment like, dislike and or subscribe! We’d love to see a video response showing your stove in use.

Quinua Burger – Trail Food and Meat Alternative

Today’s blog post is about food and something I encountered a lot of in Bolivia – Quinua. People prepare Quinua in many different ways, but I came across Quinua burger in Bolivia that is a mix of rolled and pre-cooked quinua with some other ingredients to hold it together. It wasn’t bad at all and it was high in protein… for a herb. Take a look at this video and read more about what it’s good for.

Quinua is what people call a complete protein. A complete protein contains adequate proportions of the 9 essential amino acids necessary for ones dietary needs. Yup, still a mystery, but at least it’s supposed to be good for you!

If you’re WF (Wheat Free), GF (Gluten Free) and DF (Dairy Free) like my kids are, you’ll really appreciate this as well as it’s easy to take with you and is very easy on the system.

Not only does it boast that, but it has a high amount of protein. An equivalent quinua burger product to the one I bought in Bolivia lists the following, including 12 grams per 75 gram serving or about 30% protein! That’s important for hiking, especially on longer trips!

The recipe is simple, making it an easy meal on the trail:

For 5 burgers or 25 small croquettes

  • Pour the contents of the box in a bowl.
  • Add 250 ml. of warm water and let it sit for 5 minutes (you can add a little more water if the mix seems too dry)
  • Give form to the patties and cook them 2 to 3 minutes on each side in a bit of olive oil.
That’s it.
So, Do you eat quinua on the trail? What’s your favourite way to prepare it?

Backpacker’s Pantry freeze dried meals – My Favourite!

Probably the quickest and easiest way of cooking on the trail is with Freeze Dried meals. Your meal, as many of us know, comes pre mixed in a reflective, resealable bag and only requires boiling water. You just mix it well and thne seal it and in 5-15 minutes you’re ready to eat. The waiting time is a great opportunity to set up camp or chat with friends… or just plain relax after a long day of hiking. Fortunately, because of all the money invested in this market, you can get pretty much whatever you want!
Unfortunately, not all brands are created equally. Some are far inferior and don’t hydrate properly, others just become a mix of goopy slop (kind of like that lunch you left in the bottom of your backpack in elementary school). I’ve received free samples from several different companies with mixed results… including one that I could barely finish and then barely keep down (avoid freeze dried asparagus).
However, some brands just seem to have gotten it right. They know what they’re doing, they take care with recipes and quality of ingredients… and the results are just incredible. That has always been the case with me for Backpacker’s Pantry. I’ve never been disappointed with any of their entrees. They have a great taste and texture every time… Even when I’ve prepared them at high altitudes (over 9000 feet) they’ve rehydrated correctly without any crunch… that wasn’t supposed to be crunch. I’ve been so impressed with them, that I went out and bought their Vegan 2 person, 3 day meal kit for next year’s John Muir Trail hike (#JMT2013 on twitter).

As I mentioned, a while ago I was sent a variety of their freeze dried meals by Backpacker’s Pantry to try and another set to giveaway (see entry form below). They had even had a vegan meal in there (Pad Thai). Not only were they the envy of my hiking buddies, but it was some of the best hiking food I’ve ever tried.
The reason I bought the Vegan 2 peron, 3 day meal set was because it comes with 2 Pad Thai meals. Although it take a bit longer to prepare (20 minutes) it was well worth the wait. It comes with a big pack of peanut butter and another pack of peanuts to add to the rice noodles and other ingredients. In the end you have something that rivals a decent Thai restaurant.
The Santa Fe style chicken and rice was something I tried on a hike down the Choro Trail. I didn’t know what to expect, but it was incredible. I know hunger is always a factor in taste, but the portion was so big I had to stop half way through. I woke up later that night and ended up polishing it off. I just couldn’t stop myself.
There were other meals as well that were equally as pleasing and I won say too much more because a lot of it depends on one’s individual tastes. Personally, I don’t think you’ll go wrong with any of the entrees!
I just want to say I’m not a huge desert fan. On a hike with a bunch of guys I decided to share around a pack of Dark Chocolate Cheesecake. I admit that it doesn’t have the consistency of cheesecake, but all in all, everyone who tried it was pleased with the taste. If you’re someone that doesn’t like to go without dessert, check out their line of freeze dried desserts.
Have you tried Backpacker’s Pantry? What are your experiences? Do you have a favourite meal?

Spiral Dogs for your next barbecue

A couple weeks back we had a barbecue with a bunch of friends and as usual, there were some obstacles to overcome. I’m no stranger to the barbecue (we smoked a pig for new years) but it’s the simple things that get me. Here are some of the insurmountable tasks I had to brave for our hot dog lunch:

  • The dogs are always to short for the buns
  • The hot dogs tend to dry out or cook too well on the outside while being raw in the inside
  • There isn’t enough space to put toppings in those cheap-o buns
I had seen a video a while back (see below) which I thought would not only serve practically but be fun for the kids among the group. It proved a success and entertained the adults, too! It’s the Spiral-cut weiner and I’ve included chow.com’s video to show you how it worked.
It’s definitely a fun way to present the simple hot dog lunch and has many benefits:
  • The spiral cut opens up the center cooking the dogs more evenly
  • The spiral cut when cooked expands to fill the foot long buns
  • The gaps in the dog end up providing extra space for toppings like ketchup, relish, mustard, mayonnaise, relish, mustard, ketchup, barbecue sauce, onions, cheese wiz or whatever you want to put inside
Anyway, Take a look and try this out on the weekend or whenver you next have friends around for a barbecue!

5 min Trail Pizza Recipe for the Alcohol Stove

One thing that people have accused alcohol stoves of is a lack of versatility. I’ve been working on proving that wrong with Cake recipes, etc. and now with a simple 5 minute pizza recipe from scratch! This recipe works great with lightweight frying pans or pots. You can adapt the recipe to your own pot to make it work.

I tried it out on my recent 3 day trek down the choro trail and it was great, although my choice of sausage was poor.

So Let’s look at the recipe.

Tools:

  • 5 or 6 inch frying pan or pot
  • bowl to mix ingredients
  • Spoon
  • Small Alcohol stove (I used a side burner)
  • Aluminum foil to cover the pan.
Recipe:
This pizza uses a basic quick bread recipe. I’ve divided into Wet, Dry and Pan ingredients.
Dough Ingredients
  • Dry Ingredients
    • 0.5 cup flour
    • 0.75 tsp baking powder
    • 0.25 tsp salt
  • Wet Ingredients
    • 0.75 tbsp oil
    • 0.5 cup water
  • Pan
    • 1 tbsp oil for greasing the pan
    • 1/3 cup of corn meal to prevent the dough from sticking to the pan while baking.
Toppings:
  • Pasta sauce
    • 0.25 cups of tomato paste (some stores offer it pre-packaged in bags)
    • Spices (oregano, basil, garlic to taste) use Italian Seasoning if you prefer
  • 2.5 oz Cheese (I prefer a harder cheese like a dambo or gouda as it lasts longer than mozzarella on the trail without getting all oily)
  • 2 oz pepperoni or smoked sausage
Recipe:
This recipe assumes you’ve premixed the dry ingredients and packaged them for the trip. On the trail all you’ll need to do is:
  1. Pan
    1. Prepare the pan or pot by oiling liberally the inside of the pan on both the sides and bottom.
    2. Sprinkle corn meal all over the inside of the pan, turning the pan until it is evenly coated.
  2. Dough
    1. In small mixing bowl, add water and oil to the premixed dough mixture.
    2. Spread dough carefully out as much as possible in the bowl and then transfer to the pan.
    3. Finish spreading out the dough evenly in the pan until it reaches the edges.
  3. Toppings
    1. Spread tomato paste around the pan with a spoon, stopping 1/4 inch from the edge to prevent the sauce from burning while cooking.
    2. Sprinkle spices over the pasta sauce.
    3. Slice pepperoni thinly and place over sauce.
    4. Slice cheese thinly and cover pizza.
Cooking
The biggest challenge for this recipe is not burning the bottom of the pizza. The oil and corn meal help, but the biggest factor is the addition of water to the alcohol. Using a stove like my 9 gram double wall energy drink stove this is what I do:
  1. Cover pizza with tinfoil and seal the edges as much as possible.
  2. Fill 9 gram stove half full of alcohol.
  3. Add 12 – 15 ml of water to the stove (I carry a 5 ml (1 tsp) syringe with me, the type used for children’s medicine)
  4. Light stove, and when the jets start coming out the side, Place the pan directly on the stove.
  5. Allow to cook for 5 to 6 minutes covered.
  6. Remove from stove and leave covered for 5 minutes to finish cooking and allowing cheese to melt.
  7. Remove aluminum foil, slide out of the pan and enjoy!