So nobody likes to wake up on the cold ground to find out that their expensive sleeping pad has sprung a leak. Nope, nope. Well, I had used my Klymit Xlite for a lot of nights, around 65+. At about night 55 it started to leak and by night 65 I was having to overfill it and still it was soft 8 hours later. I can’t really blame the pad, after all 3 kids playing with it means that you toy with disaster.
Well, I decided to document my experience finding and fixing the leak on video. If you want to jump straight to the video I’ll have it embedded below.
After watching or reading, please let us know if you have any tips, products or experiences about patching a pad on the trail!
For those of you who just want the facts I’ll divide it into two parts: finding the leak and fixing it.
Finding the leak
Now-a-days, most sleeping pads are using lighter and lighter weight fabrics… yes fabrics. The Klymit uses what looks like a ripstop nylon. That’s why it weighs only 6.1 oz. The bottom is heavier, but you still need to be careful and change some of the traditional ways of finding and marking leaks.
Your best bet is to inflate the pad and submerge it in water until the tell-tale line of bubbles ascends from somewhere in the pad.
If the leak is in the valve, try cleaning it with a damp cloth and later with a tooth or bottle brush. If that doesn’t work you’ll have to hope your sleeping pad is still under warranty!
Don’t use soap or chemicals!
I used a set of small weights to keep the pad submerged!
I know, when finding a leak in a car or bike tire the old soap and water trick are used. You’re taking a risk that you’re going to remove some finish on the fabric with the possible result of causing more leaks in the short or long term. Be particularly careful with detergents.
The same thing goes for marking the leak. Don’t use a marker to mark the hole. At least not on the inflated part of the pad. Sharpies and other markers have various chemicals that may damage the sleeping pad. It’s better to mark a glued section or just tie a string around the part where the leak is. Usually you can see the leak once you find it.
Let it dry
Obviously you’ll need to wait a few hours to let the pad dry. If you’re on the trail, make sure you do this in the AM so by lunch you’ll be able to patch it in time for a good night’s sleep.
Deflate it!
this should be obvious, but if it’s inflated air will bubble through the adhesive and create a leak!
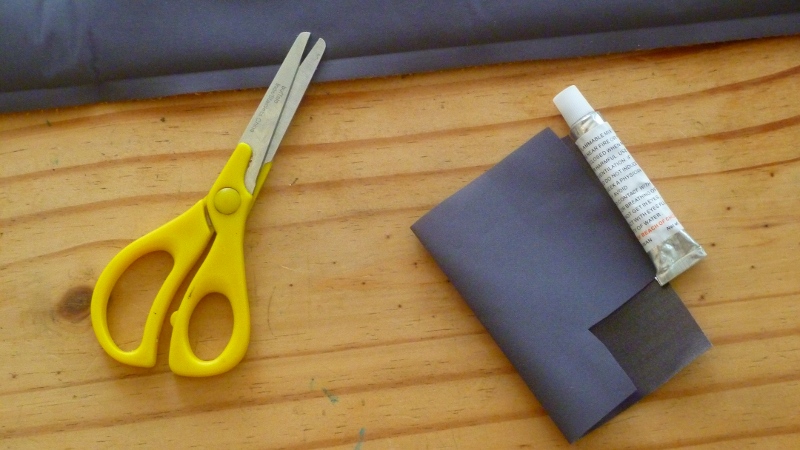
Cut a patch
Klymit comes with 2 patch types, one for the top and one for the bottom. Choose the right one and cut the patch to cover the whole with enough space to make sure you can seal it well. I like at least half and inch all around.
Apply adhesive
Before you head out on the trail, make sure your adhesive tube hasn’t dried out. If you’ve used it once already just open it and make sure it hasn’t dried or jellied.
Do you apply it to the patch or pad? Either or. It may be easier to apply it to the pad, but it can be tidier to apply it to the patch. Just make sure you apply a liberal amount so that it can be absorbed and still have enough adhesive to bind the patch to the pad.
A little pressure
Just make sure you continue to press, tap or hold the patch on until it binds. Sometimes it feels like it won’t stick, but it will if you just hold it down for long enough (10 seconds is recommended, but you may need more).
Let it be
Make sure it has time to cure. If you’re backpacking, strap it to your pack if it’s sunny and just let it cure so that by nightfall you’ll have a fully functioning pad.
Thanks for reading, please share your stories, tips or complaints below!
 The Outdoor Adventure Giving you tips, tricks & recommendations to help make adventuring in the Outdoors fun, safe & exciting for you and your kids.