Home / blog (page 4)

blog

A change of theme

Today is a very special day for myself and my wife and it warrants its own post. It’s my wife’s birthday!    We’re planning on doing some things as a family and so this is the post for today. Feel free to leave your birthday wishes below as she’s the one that lets me keep up my outdoors adventures and she comes along when she can.

So here’s a couple photos of some of our outdoors adventures over the past 8 and a half years of marriage!

Our first family backpacking trip with our first child. BC, Canada
Winter Ice fishing! BC, Canada

Waterfall hike, Mindo, Ecuador
Making chocolate in the Amazon, Ecuador
San Juan Ferry, Washington State, USA
Valley de las Ánimas, Bolivia
A Jungle Tour in the Tropics of Bolivia
Tiwanaku, Bolivia

 I hope next year is filled with just as many adventures! Happy Birthday!

Celebrate the outdoors by sharing your adventure

The Nature Conservancy of Canada is celebrating 50 years. The parks and outdoors are staying green and clean, meaning there are more opportunities and less obstacles to get outdoors and enjoy them.

To Celebrate this landmark, the NCC wants you to get outside and encourage others to do so by sharing your story. They’ve set up a page where you can share your outdoors adventures on an interactive map and see stories from others who are doing the same. The more stories, the more you’re getting out, the more stories there are to read and the more likely you’ll be inspired to do the same.

So head on over to the Time for Nature sub-site and share your story and upload a photo or two. Want some ideas? Why not View the stories that have already been submitted? It doesn’t matter if it’s in Canada, US, or some other country, just start posting your adventures and encourage family, friends and co-workers to do the same. Let’s celebrate the fact that our outdoors are clean, safe and beautiful by getting out and enjoying them.

Once you’ve done, we’d love to read yours, so tell us where it is in a comment below and we’ll go find it!

Biking down the World’s Most Dangerous Road with Gravity

At last count, 18 people had died going down the old highway to North Yungas, a.k.a. The Death Road, on mountain bikes. It’s usually a combination of distraction, unfamiliarity with bikes or poorly maintained equipment. If it’s your life, you don’t want to cut corners.


Unfortunately, with no standardization and a desire to make money by increasing margins, this is what many of the “cheaper” companies are doing that bike down the death road. Although there have been only 18 deaths in over 10 years, there have been many more injuries as I want to talk about below.

Oh, and check out the video below that includes a wipe out on the trail!


Now let’s get this straight, your chances of dying are slim, but the chance of getting minor injuries from scrapes, falling and even sliding off the edge are higher. What your company does in this situation or why it happened will show you how good or bad your company is.


I’ve gone down twice, once with a mid end company (B-side) and once with the most expensive company (Gravity). These are the only two companies suggested in the Lonely Planet Guidebook… Plus, I’ve seen the other companies go down this road, seen their equipment and talked with a number of different people. I’ve read many reviews on a number of different trips for many different companies, but having seen many companies and ridden with two of them, I can give my opinions.


A lot of people aren’t comfortable on bikes or a lot of people are risk takers. This is unavoidable and you will have injuries with every company. What makes a difference is how the injury happens, what was done to take care of it and of course if the bike was at fault.


Biking down the death road beats up bikes. The dust gets into things, the road is incredibly bumpy and as it’s down hill, the riders are on the brakes most of the time. Chances are that this bike has been going down the road every day for the past 2 years or more. Sure, they might change the brake pads, but when they do, the cheaper companies will just put cheaper rubber back on the old mounts. It is the suggested culprit for brake failures from going down the hill.


When I went down with B-side, they were friendly and somewhat professional. I had the best bike in the bunch and I had no problems. 3 others in my group had a less enjoyable experience. Their bearings were either worn or not lubricated as they had to pedal down the hill… I’m talking a hill that I took at 60+ km an hour at times. Worse, one guy’s chain came off repeated times and then eventually the pedals stopped turning all together. And they had no spare bikes to hop on. If this is to be a once in a life time experience, do you want to be disappointed because you saved some cash and went with a cheaper group?


In contrast, Gravity, who replaces their bikes every 2 years, cycles them through maintenance after every trip. One day on, one day being reviewed and repaired by techs. No one had bike problems on the way down with Gravity.
Gravity is the first company to start offering the trip, so they are probably the most informed. Gravity spent a lot of time giving history and background to the road and even more time explaining what to expect, what to do to keep safe and what not to do if you didn’t want to end up back in the bus. They have fun, but they don’t take chances.
Gravity also trains all its guides in belaying and first aid. They carry a full first aid kit and spinal boards. Many other companies don’t. Read the reviews on Trip Advisor. Gravity has had to come to the aid of other groups recovering people who have gone over the edge, lent spinal boards, vehicles and whatever else was necessary to help out the tourists… on other groups.
There also other little things that made the gravity trip that much nicer: How informed the guides are about history and background for the area, the free buffs they let you keep, outer layers to keep you warm and lessening road rash damage, sports drinks included, first drink at the bottom is free, and the fact that they end at an animal refuge where they rehabilitate and take care of animals that have been sold on the black market (Monkeys, a caiman, turtles, parrots, and more). Oh… and they drive you back up the death road in the bus on the way home.

The number of groups that I saw with below par gear or bikes was crazy. In Bolivia you can buy any bike with any brand… spray painted on the side. There are lots of knock-offs. It looks good, but a lot of it is cheap junk. Squealing brakes or stopped regularly for repairs, this is not the way to enjoy the WMDR.

Paying the Piper


So what are we talking about? B-Side costs between bs 490 ($70 USD) and 600 ($85) depending on the time of year and how good of a negotiator you are. Gravity is a set bs 750 ($110). This is for a day trip. The big difference of Gravity is quality of gear with regular maintenance, trained guides who are experts in their field, Knowledge of guiding, free buffs, sports drinks, spare bike in case something does go wrong, water, you eat lunch at an animal refuge. Oh and Gravity invests in the community.

In the end, you have to decide. The money you save is likely cutting corners. You may be fine with a cheaper company, but you’re taking risks with your safety and recovery. Pretty much every company gives a free shirt, and many of them take videos of your trip (including Gravity and B-side, although b-side quality of video was very low) so don’t let that be your selling factor. There is a reason why Gravity is on the top of the list in most if not all guidebooks!

The Evolution of my 3 day 2 night backpacking list

Recently I’ve been whittling away at pack weight to bring down my solo hiking pack size and weight to a more manageable load.
My overloaded pack for our first father – daughter backpacking trip. We brought too much, but at least she was comfortable!

I’ve been away on a couple weekend hiking trips (2 nights, 3 days) and I’ve gone light, but not too light. They were both first time trips and I didn’t want to go overly light, but at the same time I took an extra couple things to try out along the way. So, I wanted to share my recent gear list to make myself sit down and plan for future cuts.

For reference, I used this for my recent trip down the Choro Trail that starts peaks at 16000 feet and drops to 4400 feet and a tropical area.  I expected to share my shelter with another guy.
This type of exercise is really good as it shows where you can improve. I recommend this for everyone. All you need is your gear and a simple kitchen scale.

The Basics – 6 lb 10 oz
A previous iteration of some of my gear
  • Backpack
    • Platypus Origin 35 liter backpack – 1 lb 14 oz
  • Sleep System
    • Vaude Icepeak 150 down bag – 1 lb 7 oz
    • Doite close cell foam pad – 7 oz
  • Shelter system (2 to 3 people)
    • Golite Cave 2 Tarp – 1 lb 3.5 oz
    • Golite Nest Mesh Tent – 1 lb 10.5 oz

The Extras

  • Stuff sacks – 2 oz
    • Sea to Summit Ultra Sil Nano 13 L WP – 1.25 oz
    • Outdoor Products 5L DWR – .75 oz
  • Cooking – 11.4 oz
    • 1 can energy drink stove – 0.5 oz
    • Stanley SS pot – 7.7 oz
    • Stanley Insulated cup – 3 oz
    • Lighter – 0.2 oz
  • Clothing * Thermals worn on 1st day – 3 lbs 15.4 oz
    • Polarmax PMX hoody  – 14.2 oz
    • Polarmax Compression tights – 6 oz
    • Golite Beartooth down jacket – 16 oz
    • South American knock-off Rain Jacket – 18 oz
    • Lorpen Merino wool socks – 2 oz
    • Wool sleep socks – 3.4 oz
    • Fleece gloves – 4 oz
  • Hydration – 6.75 oz
    • Geigerrig 2l – 5.5 oz
    • Geigerrig 50 gal filter – 1.25 oz
  • Gagets and Kit – 1 LB 5 oz
    • Compass – 1.8 oz
    • Cyclops LED headlamp – 1 oz
    • SOG Aegis Knife – 3.2 oz
    • SPOT Messenger – 5 oz
    • Survival kit – 4.5 oz
    • First Aid – 4 oz
    • Sea to Summit Wilderness Wash – 1.3 oz
  • Photo Videography – 1lb 7 oz
    • UL Tripod – 13.2 oz
    • Panasonic Lumix – 6 oz
    • Batteries and cards – 4 oz
All in we’re talking 14 lbs 9.6 oz before food, water and fuel. Depending on climate things could be lighter, but in a varying climate I like to keep my bases covered. I plan to invest in a more comfortable sleeping pad that is also lightweight (just hit 30 and I can feel the discomfort of closed cell foam). I’m also planning on making a bivvy when I get back from South America to save the weight of my mesh tent.


Tick-Tock: the grenades of the outdoor world

You’ve heard it all before, but I want to say it again: don’t mess with the tiny tick. 

Ticks and tick-borne diseases are found all over the world. Don’t fool yourself: disease-carrying ticks have been found not just in northeastern United States (hotspot for one tick-borne disease, Lyme), but all over Canada and the United States, including the southeastern US, and Australia, Europe, northern Asia, Latin America, and some parts of Africa

Bite prevention, early detection and removal (together) are the key. Ticks transmit their explosive diseases within or just after 24 hours after biting. There are over 300 different pathogens with which the various species of tick can infect a human, causing sometimes life-long, life-altering, chronic, and painful consequences. The symptoms of some of these diseases (such as Lyme disease, Babesiosis, Anaplasmosis, Rocky Mountain spotted fever, Ehrlichiosis, and Tularemia) are frequently confused as being symptoms of other diseases, such as MS, fibromyalgia, Chronic Fatigue Syndrome, rheumatoid arthritis, or lupus, to name a few. Not fun! Be aware!

I know several people who are suffering or have suffered tick-borne diseases, one a little kid who is still struggling with the debilitating pain of vicious diseases transmitted to him from a single tick bite in 2006, 6 years ago. Back then, I had never even heard of tick-borne diseases. He did not receive the treatment he needed right away and the symptoms became chronic. Where he lives in the Okanagan valley of British Columbia, Canada, there are few doctors who are educated in the types of diseases he has. He and his family have to travel over 6 hours to a doctor in Seattle for treatment. The drugs he must take daily sometimes cost over $800 out-of-pocket a month. Sometimes he is in so much pain, the normally active kid can barely move.

If you’re anything like me, witnessing this and understanding the danger just makes you want to panic and lock yourself inside with cans of DEET, but, really, we can accept and respect this danger just like we have accepted bears and skin cancer. We must intelligently prepare ourselves and our families to be aware and to be ready to prevent and deal with it.

What ticks look like: 

Black-legged ticks, male and female
nymph and adult stages.
From wac.450f.edgecastcdn.net

There are two stages in which a tick is dangerous to humans, the tiny nymph stage and the adult stage. In the nymph stage, they look like freckles that move, or like poppy seeds. In the adult stage they are easier to spot.
Other links to help with tick ID:

Pocket identification card for dog ticks and deer ticks 

Pictures of common North American ticks and their geographic distribution in the US (these pictures also apply to Canada, because, as far as I know, ticks don’t need passports to cross the border).

A thorough description of ticks found in North America and the more common diseases they are known to transmit.

Black-legged ticks, various
stages of growth.
From lymedisease.org

Really, it doesn’t matter if you can correctly identify the species of tick. Although some believe that only the black-legged (deer) tick and western black-legged tick should be tested, I believe that regardless of the type of tick, you should deal with them the same way… all species can carry diseases.

How to avoid tick bites:

  1. Let’s all say it together: PREVENTION IS BETTER THAN CURE!
  2. Avoid leaf-litter, tall grass, logs, stumps and bushes. They like nice, moist spots. They can’t fly. Stay in the middle of trails! Where there are animals like deer and mice, there are usually ticks. Ticks are most active from April to October in North America, especially after mild winters. Watch this video to see how ticks get on you by brushing against shrubs and long grasses.
  3. Wear long-sleeved shirts and long pants. Tuck pants into socks (yeah…). Don’t wear sandals. Ticks usually are brushed onto your legs and then tend to climb up. Spray 30%+ DEET product on clothing or treat clothing with permethrin, especially shoes, socks and lower pant legs (good for about 6 washes). Just don’t get DEET or permethrin in your mouth, eyes, hands, etc! Some outdoors clothing can be bought pre-treated with permethrin, good up to 70 washes. Natural repellents apparently don’t work.
  4. To make detection easier, wear light-coloured clothing. Check and remove clothing carefully. Place clothes in a pile on a hard surface and ticks should make their way to the top of the pile. Putting clothing in a dryer on high heat for about half an hour should kill ticks.
  5. Check yourself every day with a small mirror and a fine-toothed comb. This is probably the most important step for yourself, your kids and your pets. Check especially your hair, armpits, groin, ears, belly button, toes and backs of knees – all the nooks and crannies. It might seem like a pain, but trust me – I’ve seen what suffering from tick-borne diseases looks like. THAT is pain. Shower as soon as you can to wash off unattached ticks.
  6. Tick-proof your yard, especially if you live near woods. Click here and here for suggestions.
  7. Talk to your vet about protecting your pets.


What to do if you find an attached tick on your body:

Less than 50% of those infected
remember having a tick bite
or a classic bullseye rash.
However, if you DO have
bullseye rash, see a doctor
IMMEDIATELY!
From knowlyme.com

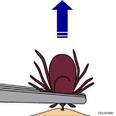
  1. Remove tick safely with fine-tip tweezers (the kind with pointy ends). Grab the tick’s head as close to your skin as possible and slowly and steadily pull (do not twist). The first time I had to do this, I was surprised about how tenacious the little guy was. It took a bit more time than I expected. Be sure to remove any bits left behind with the tweezers. There are also nifty tick-removal tools, such as the Pro Tick Removal System, which we carry in our outdoors first-aid kit. Wash hands and disinfect bite site and tweezers (like with an alcohol pad). Photograph the tick for your own records. 
  2. Test tick. Place tick in a plastic zip bag with a lightly-moistened paper towel. Some Canadian testing labs ask for a small, rigid plastic container, like a  ilm canister. Label the bag with your name, date, site of bite and how long tick was attached. 
  3. Send the tick away for testing. Friends who have struggled with tick-borne diseases tell me that some testing facilities are better than others. One that is recommended is IGeneX labs. There is also a Canadian testing protocol found here. Most people just have the tick identified and tested by a lab, health department or veterinarian. Sometimes the fees can be upwards of $35, but it is worth it. 
  4. Watch for symptoms, such as a rash (especially a bulls-eye rash, but this only occurs in less than 70% of victims of Lyme disease; some of the other diseases can also cause rashes), fever, fatigue, headache, dizziness, mental confusion and “fogginess”, swollen lymph nodes, muscle and joint pain, numbness and tingling, and chills. Write down any symptoms and photograph any rashes. Typically the symptoms show up around 2 to 30 days after the tick has helped itself to your blood. 
  5. If you think you might have contracted something, contact your doctor right away. Not all doctors are tick-borne disease savvy, especially in Canada, and some of the diseases are difficult to test for and diagnose, but early accurate testing, diagnosis and treatment are essential to prevent chronic problems. Some believe that regardless of symptoms, some, especially children in higher-risk areas, should be given pre-emptive, preventative treatment. Common diseases carried by ticks in North America include not only Lyme disease, but Babesiosis, Anaplasmosis, Rocky Mountain spotted fever, Ehrlichiosis, and Tularemia, all of which may need specific treatment. Typically, people are given a 6-week treatment of the oral antibiotic doxycycline or something similar for Lyme disease, but this does not treat the other diseases. I’ve been told by the experienced that having the tick tested and recording all symptoms helps for a more accurate diagnosis.

For more specific information about the various tick-borne diseases:  

Center for Disease Control 

American Lyme Disease Foundation 

California Lyme Disease Association (easy-to-read chart of diseases and symptoms, but not as thorough as the other two links) 

A place to start to look for a tick-borne-disease-educated doctor (aside from asking your own doctor) may be: http://knowlyme.wordpress.com/doctors/ or http://www.lymedisease.org/resources/referrals.html

Further info:

Two of the best, general, easy-to-navigate sites about ticks and tick-borne disease:

Informative list of links related to ticks for those who really want to dig: http://www.nlm.nih.gov/medlineplus/tickbites.html).
Great little succinct PDF pamphlet about ticks and tick-borne disease prevention: http://www.mass.gov/eohhs/docs/dph/cdc/lyme/prevent-disease.pdf 
Excellent CBC (Canadian) article about tick-borne diseases: http://www.cbc.ca/news/health/story/2009/06/04/f-lyme-disease-ticks.html
Naomi Osborn, The Outdoor Adventure team

Happy Birthday, to me!

Well, Today I turn the big 3-0 and rather than reflect on my life I thought I’d just share a poem from my brother to celebrate the big day!

Ode to Paul, my Spanish-speaking brother,
Of brothers bilingual I have no other.
That is not all that makes you unique!
Did I ever mention your sneakers wreak?

Ode to Paul, the wilderness survivor,
Livin' off the land, a naturalist kaniver.
Supposedly finds plenty of au natural food,
But his shoelaces are gone and leather shoes chewed.

Ode to Paul, the pan-pipes player.
(Actually a "peaceful silence" slayer)
No Zamphir when he sits down to play.
No wonder the wilderness game runs away!

Ode to Paul, he has the last laugh,
In La Paz sipping coffee from a coffee carafe.
The GPS tracker for 'findmespot',
Is really attached to an alpaca he caught.

Ode to Paul, and kids and Naiom',
Missing you lots, please come home.
But meanwhile you're there, enjoy your stay,
All the best, on your Bolivian Birth-day!

Away on the Choro Trail

Sorry for not posting a new article on my normal posting schedule, but As a present to mark my 30th birthday, my wife let me hike the Choro Trail. It’s a 57 km (45.5 mile) hike from up in the Andean Mountains, down to tropical Coroico in Bolivia. It has an overall vertical drop of about 3 1/4 km (2 miles) and is something that I’ve been hoping to do for a long time.

So, what to do in your spare time? Well, you could head over to Seattle Backpacker’s Magazine to watch a video and read a review of the SPOT Messenger that I’ll be using to check in from the trail with.

You can check in with my progress on the trail or if you really want, you can enter to win some new hiking boots over at hiking the trail, or if books are your thing, why not enter to win an illustrated guide to hammock camping?

La Paz to the Jungle – Boliva Trip 2012


Thanks to our reviewers and writers, you probably haven’t noticed that I’ve been in Bolivia for a while now, even if I’ve kept quiet about it. I figured I’d start to tell a bit about our adventures abroad, starting with a recent trip we took to an area of Bolivia called Los Yungas.
 
Although technically pretty high up (6000+ feet or 2000 meters) because of its location close to the equator, los Yungas is a semi-tropical area that boasts lots of butterflies, rainforests and if you’re lucky enough to see them parrots, spectacled bears, deer and more. The real appeal for us was that it is only 2-3 hours out of La Paz.
The only problems you are likely to face are related to wash outs, but as long as you don’t hit the rainy season you should be ok. Even if you do though, they’ll have crews out there to fish it ASAP (as was the case when we visited).
 
The Trip
 
Once we left La Paz, we started our ascent to a mountain pass where we crossed the Cordillera Real. At close to 5000 meters and with jagged peaks and deep valleys, it makes quite the trip.
 
If you’re not used to the altitude of La Paz, or maybe even if you are, you’ll probably get light headed at this point. Take photos of the high mountain lakes and water reservoir that serves La Paz. Or, take a gander at the locals herding llamas (pronounced Yah-mahs) and alpacas around.
 
Once you hit La Cumbre (the summit) you’ll start to see cyclists heading down on their way to the Death Road to Coroico. Its amazing trip and you end up passing through a long tunnel to get there. If you brave the traffic and crazy drivers you’ll definitely be rewarded.
 
When we got to Unadavi we had to turn off the nice, paved road and onto the gravel path that is littered with small streams and boulders (it was good that we bought new tires).  In less than an hour you descend from the summit down to about 2000 meters and it’s astonishing how much it changes from barrens to thick jungle forests where parrots fly across in groups and butterflies can be seen everywhere.
 
The Hotel
 
This is the point where we reached our destination: Hotel Castillo del Loro.
 
It’s the only Castle in Bolivia and despite how it looks, it isn’t that old. The President of the Country back in 1935 had it built as a family home and place to invite foreign dignitaries. The problem was that this was the same president that started the war with Paraguay. He used prisoners of war to open access to the area, drag stones out of the river and then put together this fancy, 5 story building.
 
Well, after foreign nations stepped in and helped Paraguay Bolivia lost the war it started and the then president was forced into exile. He locked the doors and it stayed unused for some time. It wasn’t until the government started giving land back to the locals in the 50s that it became used for anything.
 
Currently, they are renovating it to turn into an adventure tourism center with lots of trails to waterfalls and precarious bridges across fast flowing rivers (look for the follow up article to see some videos of that).
While we didn’t think much of the hotel, the food was decent and we really enjoyed what we came for: the hiking.
 
Take a look at the video of the trip from La Paz to the hotel:


Spring into Adventure Gear Giveaway Announcement:

If you’re finally thawing out from the winter or still looking for that last remnant of ice and snow, this is for you. Technically it’s spring and we want you to Spring into adventure with us. Did you see what I just did? Did you catch that clever play on words? Of course you did, but now you just want me to get on and tell you why this is important:

For the last couple months, We at The Outdoor Adventure along with in no particular order: My Life Outdoors, Wilderness Dave, A Little CampyHiking the Trail and Trail Sherpa have been working together with a whole bunch of outdoors companies to bring all you guys more than a month of giveaways.

That’s right, every week, starting March 15th, we’re going to be starting a new giveaway with an awesome prize package! Each week we have a new theme and a whole bunch of gear to offer to 2 happy peeps in North America.
Get yourself hyped by checking out the prizes below, start following our blogs so that you’re the first person to know about that weeks giveaway and read the upcoming reviews on the blogs so you can start imagining where you’d use this awesome gear! I counted 39 prizes; that’s pretty slick!
Here’s the rundown:
March 15th COLD Week
There is still snow up in those hills and we know it. Plus, if you’re planning to get in a summit attempt or two this summer then you definitely want to check this out.
Grand Prize:
Polarmax Comp Tech 4 Fleece Base Layers
Minus 33 Wool Balaclava
Beyond Coastal Travel Kit
Alpine Aire Food Kit
Second Place Prize:
Goat Head Gear – Sole Spikes

March 22nd SURVIVAL Week
This kit will set you well on your way to surviving outside longer. Don’t believe me? Check this out:
Grand Prize:
Adventure Medical Kit Ultralight Watertight 0.7 oz Med Kit
Adventure Medical Kit Origin Survival Kit
Gerber BG Survival Parang
Beyond Coastal Travel Kit
Buff USA Merino Wool Buff
Innate Storage Sack
Second Place Prize:
March 29th Sea to Summit Week
I know, you’re already salivating. Salivating over the prospect of getting your hands on awesome backpacking gear from Sea to Summit’s (including their new 2012 line that literally just came out), plus a merino wool buff, Alpine Aire Foods dehydrated meals, and Beyond Coastal products! 
Grand Prize:
Sea To Summit Ultra-Mesh Stuff Sack
Sea To Summit Ultra-Sil View Dry Sack
Sea To Summit Ultra-Sil Sink
Sea To Summit Ultra-Sil Bucket
Beyond Coastal Travel Kit
Buff USA Merino Wool Buff
Alpine Aire Food Kit
Second Place Prize:
Sea To Summit Ultra Nano Dry Sack
April 5th Digital Week:
I know, you’re the tech type. You get outside and you like to put it on the web for all to see. This is a cool mix of both worlds that will give you that extra motivation to document those trips and share them with the world!
Grand Prize:
A free Sherpa Site for 1 year
Yodel App
Buff USA Merino Wool Buff
Second Place Prize:
April 12th Backcountry Week Finale
You’re not satisfied with 4 weeks so we give you 5 weeks of giveaways. We’re rounding it all off with our biggest prize package yet. Probably enough to share with a friend… but that’s up to you.
Grand Prize:
Sports Science Hybrid Clothing
Merrell Shoes via the Nature Shop
GearPods Backcountry Kit
Trek Light Double Hammock with Hanging Kit
Gerber Octane
Beyond Coastal Travel Kit
Alpine Aire Food Kit
Second Place Prize:
Merrell Shoes via the Nature Shop

Summit plans for July

I’ve mentioned it several time on twitter, the sierra trading post hub and other places that I’m planning to hit a few summits this summer in Bolivia. I even have a few leads for companies that may be interested in contributing gear to the trip. I’ve been trying to prepare all the gear I need and to get in better shape to make the summits. I tried to hit the above peak (Illimani) in 2010, but without success. I didn’t do enough prep to be ready.

Here’s the two trips I’m pretty much guaranteed to hit: Huayna Potosí and Illimani. Here’s a bit more info on the trips and what gear recommended by the guides to bring.

Huayna Potosí is a 2-3 day trip to a summit of 6088 meters (or 19973 feet) and is meant to prep me for Illimani.
Day 1: Transport to the start where a short hike is done from the Basecamp (a stone building called the refugio). There’s a 1 hour hike to the glacier and then 3 hours of Ice climbing practice before heading back to camp for the night. 4900 m (16 000 feet).

Day 2: There’s a 3 hour trek up to the high camp (5200 m or 17 000 feet) where another refugio is. Then it’s an early night to be ready for the summit attempt.

Day 3: An early start (1 am) for the summit attempt. They suggest 6 hours to get to the summit. After that we return to basecamp and then back to La Paz in the afternoon.

Illimani is a 3 to 4 day trip, but with more hiking to get to the base and high camps. The finish altitude is 6438 m (21 122 feet).

Day 1: Starting at 3800 meters a 1-3 hike is made to the base camp at an altitude of  4400 meters.

Day 2: A long day with a hike of 5 hours going up to an altitude of 5500 meters.

Day 3: Another early morning (1 am) for a summit arrival of sunrise. Then it’s all the way back down (or possibly an extra day if you want to take it slow).

What’s needed

The guides are prepared to provide some of the gear and at this point I don’t know how much I want to invest in gear beyond what is needed. Obviously I would like to get all the gear, but I’ll probably pick up a couple items that the guides are prepared to provide as I’m unsure of the quality. To make plans, a little while back I spoke with the guide company I plan to go with for my trips (www.travel-tracks.com) Here’s what they suggested:

Gear I need to bring:

  • Backpack (at least 55 liters)
  • Daypack (for the summit attempt)
  • Trekking shoes (for the approach)
  • base layer
  • Fleece layer
  • Insulation layer
  • Insulated hat
  • Inner gloves
  • Headlamp (extra batteries)
  • Sleeping bag
  • Sunglasses
  • Snacks
  • Sorojchi pills
  • Coca leaves to chew
  • Entrance fee: 10 bolivians (equivalent of $1.25)
  • Water
  • *for illimani a down jacket is recommended
Gear the guide are prepared to provide:
  • hard shell Jacket
  • hard shell pants
  • ski mask
  • outer gloves
  • Crampons
  • Ice axe
  • harness
  • boots
  • helmet
  • gaiters

I’m pretty much set with the gear needed, I just need baselayer pants for the trip.

Hike Report: Imbabura, Ecuador

They say a humming bird beats its wings 600 times a minute and can fly up to 34 miles per hour. These amazing creatures rely on their rapid strokes beating against the air to keep their tiny bodies afloat. That is why I was astonished when I crested the 4300 meter high (14 000 feet) ridge and saw a tiny black bird hovering in one place, despite the blowing wind and rain, to pull a bit of nectar from a tiny mountain plant. Ecuador really does offer the unexpected and seemingly impossible.

The previous night we had driven up old cobble stone roads that probably had been there since the Spanish first came to Ecuador, in vain seeking a small hostel “Casa Aida” in the small pueblo of La Esperanza that was mentioned in the guide book… the guide book that I had forgotten. After numerous stops, detours, turn-arounds and questions to the locals in my broken Spanish we finally hit the right place and after a phone call managed to wake la señora that runs the hostel. After getting set up, putting the transport in the garage and getting enough cell signal to make a call to the family to say we were ok (hard to do when there’s an old volcano in the way of the cell tower) we tried to get in a few hours sleep before heading out in the morning for the trek.
The next morning we got up and were fed a fortifying breakfast of pancakes and jam, coffee and a few other things. We paid a couple dollars for the lunch she put together for us, bought a souvenir and then headed on our way.
We drove up to the trail head on a very windy, bumpy road and parked the car and asked a local to watch the car for us.
The trail started fine, but as we were heading up around mud huts and across other trails, it was quite hard to determine which route we were supposed to be going on. Add to that the fact that I and my friend were out of shape and trying to fill our lungs with the thin air that was offered to us at a starting altitude of 3200 meters (10 500 feet).
30 minutes later we asked a 10 year old boy who was plowing furrows with a milk cow. He gave us a jabbed his finger in the general direction of the mountain and we were on our way.
So many of the mountains in South America are like that. Small tracts of farm land creep their way up the almost vertical sides of the mountains and the locals, starting at young age begin eking out a simple existence on these green but difficult hills. At one point Imbabura was permanently crested with snow… less than 50 years ago in fact. A man who lived at the bottom of the hill used to ascend every day with his faithful burrow to chip away at the snow and ice so he could sell the Ecuadorian equivalent of snow cones several thousand feet below the summit. He’d probably still be doing it if there had been snow there still.
About half way up the hill, the clouds started to roll in, bringing a cold mist that chilled us. It was this mist that allowed the semi tropical plants to grow up there, but that also made the trail muddy and slippery. Countless cutbacks brought us exhaustingly closer to what we thought was the summit, but every few cutbacks a sign taunted us of the meters that still lay ahead.
When we reached the ridge where the little hummingbird darted back and forth, seemingly mocking us, we stopped for lunch and assessed the situation. What lay ahead, walled off by thick cloud and mist was what the guide book had called a “knife edge” of the volcano, that separated us from the summit we were determined to reach. We would begin to see more of this  “knife edge” as the clouds parted every now and then to give us a break from the rain and hail that poured down from not to far above us.
A small bird watching us as we break for lunch at the start of the ridge.
I haven’t mentioned the dog. Probably belonging to a local farmer, it had taken upon us to both mock and guide us (guiding us when we didn’t need him and mocking us when we did). Tirelessly it would plod ahead, until I figured we had him beat.
After precariously shuffling along a ledge in what appeared to be the only way up we reached what seemed to be a 15 feet vertical rock face. It was at that point I thought I couldn’t responsibly go further. If I slipped I would have fallen off that ledge below and although we couldn’t see how far I had to fall, I didn’t want to take that list. It turns out it was very far… I only know because at the top the clouds parted for a second and revealed a drop off, followed by an almost vertical slope below.
Completely soaked from the rain and sleet, the wall and I sized each other up. Slowly and carefully I went up, trying to remember every snippet of the 2 or 3 climbing wall sessions I had taken almost 10 years ago. Just one more hand hold and I was about ready to let out the shout of relief and triumph… when I saw the dog. he was waiting for me. Looking down at me with tongue out, as if to say, “good job you silly human!”


It turns out as hindsight off reveals that there was a much easier route that could have delivered us from such danger. There was no reason to stop though so on we went and within 20 minutes hit a rocky outcrop. Someone had decided to remove the sign that stated the altitude, but that didn’t matter. At that point we just wanted to take a break. We ended up feeding our furry companion the remnants of our lunch, grabbed a photo that could have been taken anywhere and started the just as treacherous descent.
The dog left us at that point, but we didn’t care. We were filled with a sense of triumph that we had summitted a 4630 meter (15 200 feet) volcano in a foreign land… until we realized that anyone of the abuelos y abuelas (grandfathers and grandmothers) in that pueblo had probably done it a dozen times… in half the time. Regardless though, it was an incredible feat and the next morning, as the clouds cleared and we saw the naked, rough peak jutting out from the plain around it I knew that this was an amazing country and found a deep respect for those who lived there and farmed there and flew there.
Endnote: This was a hike that I did back in 2010 with a friend from Canada.

Tree Hugger and Permaculture Magazine feature my video

First off a big thank you to Permaculture Magazine (http://www.permaculture.co.uk) and Tree Hugger (http://www.treehugger.com) for featuring a DIY video I did about a year ago on a DIY backpacking high efficiency wood stove. It’s currently getting over 1000 views a day as a result.

To all those who found the blog through them, welcome! We’d love to have you stick around and check out some of our other DIYs or one of our other articles.

If you haven’t seen the features, here they are:

http://www.treehugger.com/clean-technology/build-ultra-efficient-diy-wood-gasifier-backpacking.html
http://www.permaculture.co.uk/videos/diy-how-make-backpacking-wood-gasifier-stove

If you have seen them, check out our clean burn attachment video that shows how to make it burn even cleaner! http://www.theoutdooradventure.net/2011/04/diy-improve-that-portable-backpacking.html

If that isn’t reason enough to stick around, we’ve got some giveaways planned in the next two months that you’ll definitely want to keep an eye out for, featuring brands like Jetboil, Buffs, Trek Light and more.