When it comes to memory cards, organization has not been one of my strong suits w. Typically I shove the 3 or 4 memory cards that I have into my pockets for backpacking. Sometimes I’d use a ziploc bag, but mostly I just fumbled around hoping that I had the right card and that it was empty. This summer I have some longer trips planned, 2 weeks on the John Muir Trail, 1 week on Bowron Lakes, a couple survival trips and a lot more memory. I picked up the Pelican 0915 Memory Card Holder to take up the challenge.
The Pelican 0915 is a shock proof, water resistant (waterproof in my opinion) made of polycarbonate. It’s simple, functional and practically bombproof. It holds 12 SD cards, and underneath those it hides space for another 6 mini SD cards and 6 micro SD cards. It has a place where you can hang it or put a lanyard through so you don’t lose it and well… that’s pretty much it.
It’s a simple tool that I know I can trust to keep me organized while keeping my memory cards safe and dry. The only potential downside is that it weighs a bit over 3 ounces. That’s not much, and a sacrifice that I’m prepared to make, but gram weenies would probably leave this behind.
Specs
Stores 12 SD cards, 6 mini SD cards and 6 micro SD cards
4.79″ x 2.25″ x 0.55″ (12.2 x 5.7 x 1.4 cm) (interior dimensions)
3.3 ounces
Insert liner for absorbing shock and protecting memory cards
Backpacking with a family presents a conundrum. Even if one has an ultralight philosophy it still results in heavy loads. One has to cut down on weight as much as possible, but still ends up carrying all of the gear for (in our case) 4 kids. This means that an UL backpack just won’t cut it. Because of that, when I was shopping for a backpack a couple years ago I opted for the Vaude Astra II: a 65 liter backpack that is built for hauling weight comfortably.
An example of how the weight adds up was on a father-daughter backpacking trip with my almost 5-year-old daughter. It was her first 3-day backcountry backpacking trip so I had to make sure I had everything and more to make her comfortable… and want to go backpacking again. Sure, she had a daypack with snacks in, but I had all the meals, more snacks, fuel, sleeping pads, survival gear, first aid kit, tent, sleeping bags, more food, lots of extra clothes, bear spray, cordage, fishing rod, most of the water, etc., etc., etc… oh, and 2 small, collapsible chairs. My pack weighed much more than the others we went with, despite the fact that I packed my golite tent, UL closed cell foam pads and mini alcohol stove. Weight was a guarantee, but the Vaude Astra II made it as comfortable as one could be lugging around everything minus the kitchen sink.
The Astra II is a highly padded and adjustable pack. It uses a heavy duty velcro system for adjusting the torso size from small up to an XL. It uses a sturdy internal frame and ample padding to make one happier about the fact they are carrying a lot of weight.
The back padding is not only comfortable but breathes very well. There’s a ton of space for ventilation so you stay cool when you’re lugging all that extra gear.
The 55 + 10 is a reference to its ability to hold 55 liters in the main pack and an extra 10 in the lid. The lid itself can be removed, but it leaves a 5 inch tall flap of fabric to flap in the wind.
Almost everything is easy access in this pack. First off, there’s a separate sleeping bag compartment that opens from both the outside and inside. On the back of the pack there’s also a double zipper that starts at the top and unzips all the way down to the sleeping bag compartment allowing access to everything inside the pack. Underneath the removable lid there’s a cinch to close the main pack for extra security and for when you don’t take the lid with you.
There are two very large side pockets with zips. I can fit my Vaude Ice Peak 150 sleeping bag in one side with room to spare. Below the side zip pockets there are elastic pockets that can fit smaller items. The downside is that once you fill up the zip pockets it’s almost impossible to get items in and out of the elastic pockets below.
There are plenty of straps to cinch down the pack for carrying smaller loads and attach stuff to the outside of the pack, but honestly the I feel the straps are too long and a bit too heavy duty. You could cut a couple ounces off the weight if you shortened them and used lighter duty webbing and buckles. On the back there are loops for trekking poles and/or ice axes as well.
One more thing. On the bottom of the pack there’s a pocket for the built-in rain cover. The more dexterous among us can even take it out and put it on the pack without even taking the pack off. It connects inside the pocket with a snap, but can be completely removed if one so desires. My pack came with a high visibility orange cover which would be useful for signalling in an emergency.
For versatility and heavier loads, the Astra II by Vaude is a good pack that provides capacity and comfort. I continue to use it for family trips and it’s sturdy enough that I don’t have to worry about lending it to friends.
Pros
Comfortable
Highly adjustable
Included rain cover
high capacity
carries heavy loads
Easy Access
Hydration compatible
Cons
Heavy (4 lbs 15 ounces avg)
Webbing (straps) are too long
Elastic Side Pockets are hard to access when side zip pockets are used
No hip belt pockets
The Vaude Astra II hasa MSRP of $199.95, but can be purchased at the Sierra Trading Post for $129.95.
One of the challenges of backpacking with a family is finding a cook system that gets the job done quickly. Enter the Jetboil Helios.
The Jetboil Helios is a canister stove system with 2.1 liter pot that shares the Flux ring technology that made Jetboil system famous. It’s been on the market for at least 5 years now, but is still popular because of its functionality, capacity and ability to handle cold weather extremely well.
Check out the video down below to get a better look at the system. Oh and if you’re looking for a Jetboil system, use this link to get 25% off at the Sierra Trading Post. http://bit.ly/16M7N85 I do not get a commission for purchases made through this link.
Jetboil Helios Specs:
2L FluxRing® Pot with neoprene cozy
Pot-supporting burner base
Push-button igniter assembly
Fuel can stabilizer
Snap-on windscreen
Lid and bottom covers that double as plates (lid makes a good ‘flying disc’ for added fun around camp)
28 ounce weight
Optional 3 liter pot
MSRP: $149.95
All-in-one
If you’re a fan of all-in-one systems this is a great choice. It comes with a wind screen that snaps onto the stove base and the pot slips onto the stove that creates a very stable connection. In addition to all that you can take it all apart and fit the stove, stand, windscreen, canister and canister stand into the pot together for storage. You may want to carry an elastic band to stop the handles from flapping around.
A Cold Weather Stove Where it steps apart from regular canister stoves is how it uses an inverted canister and pre-heater to keep it working efficiently in cold weather. Inverting the canister means you don’t have to worry a bit low pressure from either cold temperatures or low fuel. As long as there is liquid fuel in the canister it will get carried along to the stove and the heat coil will vaporize it and turn it into gas to be burned.
This stove has been around for years and yet I saw someone describe a newer copy-cat stove at the OR show as “new and innovative”. There are a couple stoves on the market that now make use of this concept, which just shows that the concept is tested and proved.
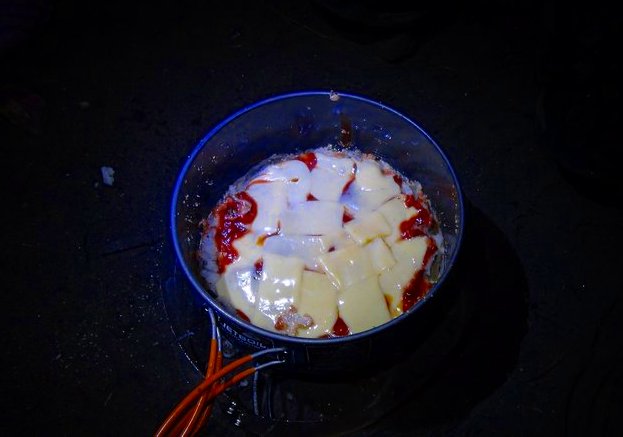
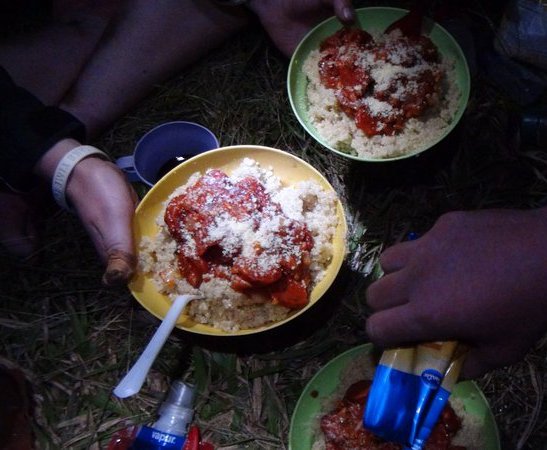
Good for the Backcountry Gourmet
The Helios has a fine adjust for better control of fuel flow and temperature for simmering and greater flexibility with cooking options. I found it a bit of a challenge when I started using it as there’s a time delay in how the stove responds to adjustments. There is a decent amount of fuel in the fuel line so it can take 10 seconds or more before you notice a change in the stove. For example, once you turn it off completely it will continue burning off fuel for a good 10 to 15 seconds. That said, I’ve managed to
bake pizza,
simmer pasta,
cook quinua,
fry fresh meat and vegetables,
and more on this system.
It works very well on a large number of meals for those of us who like to be adventurous with our cuisine. Oh, and I frequently use the lid and bottom cover as both cutting boards and bowls.
Flux Ring Efficiency
Anyone familiar with Jetboil stoves will know about the Flux Ring Technology. There’s a heat exchanger on the bottom of the pot that captures the heat from the stove and transfers it into the pot. This is what makes the Jetboil series efficient and gives a more even temperature across the bottom of the pot.
You need to have the stove at a medium to high temperature to take advantage of this. I tried a very low flow for the stove and it was boiling in the center and cool on the outside. I did have the typical burn spot in the middle of the pot that comes from not having enough water or not stirring the food well enough. It can be avoided by continuing to add cold water. That also helps maintain a simmer while you cook.
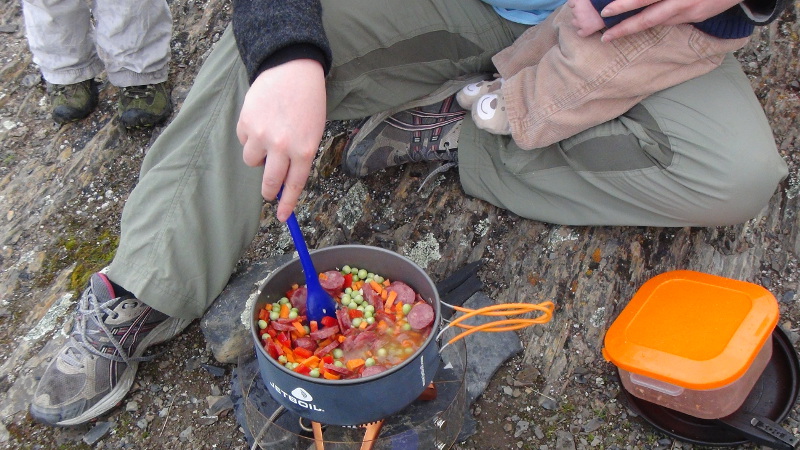
Who is this for?
I feel I need to emphasize that this is not an ultra-light, solo system. It’s built for group cooking. I’ve cooked for four adults with this setup and two adults and four kids. Everyone was full afterwards.
It’s also a good choice for those of us that want to try fancier foods on the trail. With a bit of practice one can depart from the typical freeze-dried meals and indulge in some more complicated and more tasty meals that the solo Jetboil systems can’t handle.
Take a look at the video below and leave a comment telling us what your favourite stove system is and what your thoughts are on the Jetboil line.
Disclaimer: I was given this system by Sierra Trading Post and asked to provide an honest review of it. All opinions are my own and what I would tell a friend.
About 4 months ago the mail was opened to reveal a bandana/buff to review call the “Hoo-rag“. Now, I have found bandanas to be useful in the past, particularly as they help to protect my neck from the sun while out on the trail, but this was an opportunity to put a bandana through a rigorous daily test… cycle commuting in the middle of winter.
Now, for those who aren’t completely familiar with what we are talking about with a bandana/buff, it is essentially a 18-inch long tube of thin fabric that has horizontal stretch but is fairly rigid vertically. It can fit over your head and can be twisted/tied/adjusted to several looks. On the Hoo-Rag packaging the graphic shows what would be the 6 most likely used ways of wearing the Hoo-Rag.
What I also found is that when you take the Hoo-Rag out of its packaging, you may notice a graphic hidden by the sticker showing some of the other, less common (Or less useful) ways of wearing the Hoo-Rag. I did not notice the graphic on the package for my own but did notice it on one I bought for my dad.
So, having received the Hoo-Rag, I began to wear it on my regular 5 mile cycle to work. In the Pacific Northwest, weather can change quite frequently and I found the Hoo-Rag to be useful in all of them. On the warmer days it kept the sun off my neck or the sweat out of my face. And as the winter set in I began to cover more and more of my head, and in particular covering up my ears. This is wear the Hoo-Rag impressed me the most. Not only was I able to easily put a helmet on over top of the Hoo-Rag, but my ears hardly cooled at all in spite of the weather near freezing. In contrast, last year at this same time I was wearing a fleece balaclava under my helmet. The weather recently dipped a few degrees below freezing, which finally made it too cold to wear the Hoo-Rag on its own and forced me to find another layer. Overall, I found the performance of this bandana to be very impressive.
Now, the points raised so far are probably true of many bandanas, so what makes the Hoo-Rag different?
A couple items in particular about the Hoo-Rag:
1) After a couple runs in the wash, the Hoo-Rag is fairing better than another bandana I have of similar design.
2) There are several well thought out patterns to choose from, making it very likely that you will find a design you like.
As good as the Hoo-Rag is, I did find a few things that would have been a bit better.
1) The Hoo-Rag is simply a couple inches too short. I cannot keep my head and neck both covered with the Hoo-Rag, which I found disappointing. An extra couple inches would go a long way to distinguish the Hoo-Rag from similar bandanas in the marketplace.
2) After a while the top and bottom curl from the fabric stretching. This commonly happens to bandanas of this style, and is a bit of an annoyance as the curl gets more pronounced.
Overall, I have found the Hoo-Rag a pleasure to use even though it is just a little shorter than what I would like. The design and uses are perfect for my normal outdoor activities (cycle commuting, backpacking) and the pricing is reasonable among similar buffs/bandanas. However, while the Hoo-Rag works well for me, I didn’t consider it to be extraordinarily different from other bandanas or buffs that are available. Ultimately you will want to choose what works for you, and for me the Hoo-Rag works very well.
As many of you know, The Outdoor Adventure has a youtube channel with just over 2300 subscribers and 1500 daily views. Because people seemed to like our most popular posts of 2012 article, I thought I’d do the same for our youtube videos. Take a look below to see what was watched last year on our channel.
We do post some content that doesn’t make it onto our channel, so if you don’t want to miss anything, I recommend stopping by BCOutdoorSurvival on youtube.
In 2012 we had over 600,000 views and to make it interesting we’ve taken the top videos and divided them into categories: Gear Reviews, DIY, and Survival and Primitive skills:
Top Gear Review Videos of 2012:
Swiss Ranger Aluminum Military Stove – This old stove can be picked up for $10 and is just plain amazing. They put a lot of research into the design, and it shows.
JetBoil Zip – The solo, bare-bones model of the popular Jetboil system was obviously on a lot of people’s wish lists. What can we say? Stoves are popular.
Top DIY Videos of 2012:
Penny Alcohol Backpacking Stove – This was one of our first videos so we apologize for the quality. It seems though, with the economy suffering people wanted to save money on their backpacking gear… either that or they’re all just pyros.
DIY: How to Make a Backpacking Wood Stove – This easy instructional involving a couple of cans from canned goods turns out a highly efficient stove with afterburner.
DIY Axe Body Spray Stove – Take a simple axe aeresol can and reuse it. It makes a decent little alcohol stove. Plus, it keeps more junk out of the land fills.
Top Survival and Primitive Skills Videos of 2012:
How to cook a fish on a stone – You can’t get a clearly title than this, can you? Oh, and the fish was delicious!
How to start a fire with water – This instructional using only water and plastic wrap was quickly picked up by both Treehugger and Lifehacker and got over 25000 views overnight.
DIY: How to Make an Emergency Desalination Still – My goal with this was to put together a means for distilling dirty or salty water with what a person normally carries on a backpacking trip. It works, even if desalination is notoriously time consuming.
Patagonia contacted me a few weeks ago to see if I wanted to review one of their books. Yes, that Patagonia, and yes, they sell books… eBooks. After looking through the Patagonia book list, I remembered something; one of my twitter buddies is a climber who lives in his Patagonia Nano Puff and works in the digital publishing field. I thought I’d hand the review over to Darren R to see what he thought. Read to the end to find out how you can win your own eBook from Patagonia.
a review of Fred Beckey’s 100 Favorite North American Climbs
by Darren Rettburg
Did you know that Patagonia publishes books too? I was asked to do a review on one of their eBooks. The book I reviewed is Fred Beckley’s 100 Favorite North American Climbs, By Fred Beckey.
What’s it about? In this book Fred gives you route tips, natural history and climbing lore from 100 of his favorite climbs and makes a few honorable mentions of some other climbs. Fred has more first ascents than any other north American climber and has written definitive guides to climbing in the Cascades.
After an introduction by Barry Blanchard, the climbs are broken up into eight different sections, (1)Pacific Northwest, (2)Alaska, (3)British Columbia Coast Mountains, (4)Canadian Rockies, Selkirks & Bugaboos, (5)High Rockies, (6)Sierra Nevada, (7)Southwest Desert, and (8)The Appalachian Mountains & Mexico. For each climb you get:
The mountain’s elevation
First ascent of the mountain
First ascent of the route
Grade
Recommended gear
time (the average it takes)
the best season to climb
Information and regulations
Magnetic Declination on Compass
Maps
and References
That’s followed up by a few paragraphs to a few pages filled with either history, a story, or some other information about the particular climb. Finally each climb wraps up with information on how to access the climb, the climb’s route, the descent, and finally the beta and caveats.
Purchase and Downloading
I got my eBook straight from Patagonia’s page on My Tablet Books. Purchasing and downloading is like any other site you buy products from. Once you download you eBook you are able to download it again if you need to by logging into your account you make when you purchase the book. You can use any of the major credit cards to pay and you even have the option to use PayPal.
Installing on Your eReader
The file you receive from Patagonia’s page on My Tablet Books is an EPUB file. My Tablet Books has step by step instructions on how to instal your EPUB file onto the iPad, iPhone, iPod Touch, Android Device, Kindle, Sony Touch or My Pocket Touch, Nook, Sony, Kobo Devices, or even your Mac or PC. I immediately installed my eBook onto a Nook. I transferred the file into my documents folder on the Nook and it was ready to go. I then Installed my eBook onto my iPad and into iBooks, just by dragging and dropping it into the library in my iTunes. I also followed the instructions on how to install the eBook onto my Android phone. I had to download the free app that was recommended, then transfer the file to my phone. Finally out of curiosity, I converted my EPUB file to Kindle’s native mobi file and then sent if off to my kindle account to see how it would look on my devices through Kindle’s readers and a Kindle Fire. Because the mobi format doesn’t support as much functionality as an EPUB, if you do this with your file, don’t expect to get a fully function eBook. I’ll discuss the results I had later with doing this.
eBook Functionality
With the Nook and iBooks on the iPad, installing was a simple drag and drop. The book functioned and looks fantastic on them both. The native table of contents, something that you will quite often find doesn’t work on eBooks, works nicely. The headers and text all show up correctly and each climb starts on a new page.
For the Android operating system it was tested with the Aldiko book reader app on an HTC One phone. For the most part it looked good except that the main headers for each climb showed up as regular text. Everything else looked great. This particular app was sluggish and slow to respond for me. I wouldn’t want to read a book like this on my phone anyway. Others may not have a problem with it.
For the Kindle device and readers I tested the mobi file I converted from the EPUB file, The only real issue was that the native app table of contents wasn’t working. Everything else looked and functioned good. One surprise I found was that the native table of contents worked on the computer. That was unexpected!
When it comes to the functionality the Nook and iBooks on the iPad worked, dare I say perfectly, and were easy to install. I would love to have this book for these two tested devices.
My Thoughts
I really like this eBook. It’s packed with amusing anecdotes, notes, history, pictures, topos and great stories. There is plenty of information in this book to keep the adventure researcher busy for hours. The introduction gave me a fantastic account of Fred Beckey and his back ground. The sections for each of the climbs gave me plenty of valuable information to decide if that is a climb I would like to do. This book would be a great place to start if you are looking for your next climbing adventure.
With the history about the climb, the description of the route and the descent, I’m given enough if formation to figure out if it is a climb for me. Many of the climbs include climbing route topos. While the physical book looks to have these on a full page, the eBook does not. They are placed in-line with the text and not one of them takes up the whole screen. If you want to get a better view, you can select the topo like any of the other images in the eBook and zoom in on it.
The image quality is too poor for anything larger than the size it is in the text. At the size they are in the text most of the info on them is unreadable. This, to me, makes them useless. If they took up a full screen like they take up a full page in the book I could see them being more useful in the eBook. Since I am on the topic of the images in the ebook, the issue with the topo maps is similar for the rest of the images. While they look fantastic and greatly add to the book, when you select them and zoom them to full screen to admire them, you find that their quality is poor at that size. This is a common issue across the board with all ebooks I have found. Until things change with the market and with the publishers I don’t see this getting any better. (I could explain more about it but this is about this particular eBook and not the industry so I won’t bore you with the details)
That said, this eBook is on par with all other quality eBooks. I found the information valuable. There is plenty of readable text and stories for me to sit down and browse through, along with plenty of information to start research on a climbing route. I think this is a book that any armchair adventurer could enjoy. There is so much in this eBook that even if you are not a climber and love reading about adventures you could enjoy this eBook. I often find myself just sitting down and just browsing through the book, looking at the pictures, maps, and reading about some of the climbs.
I feel this book works on both your research book shelf and your coffee table. For a list price of $14.95 for an ebook I would be hard pressed to buy this book in the eBook format. That is a premium price for an eBook. Granted it is a large book with a massive amount of content, the issue with the images would keep me from purchasing it in eBook format for the premium price. If I were to pay that price then find the images the way they are, I would be disappointed. The book is great and I would definitely purchase it in the printed format.
With 2012 over, I wanted to revisit the gear I used and reviewed in 2012 and give you a summary of what I liked, what I didn’t, and any change of opinion on a particular product. Sometimes a few months can shake out the bugs and show us what is REALLY made of.
I’ve divided the gear I’ve reviewed into 3 categories: Best of 2012, Middle-Of-The-Road, and Needs Improvement. Continue below to Read more.
BEST OF THE BEST
Tilley Tec-wool Hat – Gear of the Year This water-resistant wool hat with fold-down ear warmers is both stylish and functional. This is my fall, winter, and spring Tilley. It dresses up well and yet is at home on the roughest trail. It even has a lifetime warranty!
Treksta Assault GTX Hiking Boots – The nestfit design meant no break-in time at all. This is my go-to hiking boot for heavy loads or when I need more ankle support. I like them so much, I bought my wife a pair of Trekstas for next summer. The odd, offset lacing system is no gimmick.
Vapur Anti-bottle – This is my go-to water bottle on day hikes and weekend trips. Although late to the soft-bottle market, Vapur made some important improvements: the bottle is more durable than other soft bottles I’ve tried and easier to pour and open. The spout is the best I’ve seen for ease-of-use for soft bottles.
Sea to Summit Ultra Sil View dry sack – This ultralight-weight dry sack is made of durable Cordura fabric and comes with a view port on the side. It is my favourite of the Sea to Summit dry sack line. Nothing beats being able to see what’s in my bag without having to open it up and remove its contents.
Klymit X-lite – At a surprisingly comfortable 6.1 ounces, this sleeping pad packs down to the size of a Red Bull can! This is a close second for gear of the year. Aside from being a bit delicate (something that all inflatable sleeping pads are), it is definitely going to be a permanent component of my ultralight gear system. It sprung a leak after 60 nights of use, but I was able to repair it easily with the included kit. I’m planning on picking up the ULA equipment AirX which is designed to use the X-lite as a back pad.
Columbia PowerDrains – I was honestly disappointed when I received these… until I started wearing them. They have outperformed my expectations. With effective Omni-Grip and super comfort on even steep, wet, and rough terrain, I’m looking forward to next year’s model. After almost a year of hard use, it developed holes in the upper and the toecap started separating. These flaws have been eliminated in the newer versions of the shoe.
Kahtoola K10 Crampons – I’ve been extremely impressed with these crampons. The multi-directional spikes made for good traction and the leafspring design made these remarkably comfortable. They were impressive on steep slopes and slippery snow.
Geigerrig Rig 700 Balistic Nylon – What made this hit the best of the best list is the innovative pressurized system.This will be a constant companion on cycling trips.
Quality Gear
Sea to Summit Ultra Sil Nano dry sack – It is waterproof and almost weightless. Even for ultralight backpacking, this is worth bringing along for the benefit of organized and dry gear. After several outings, the clip developed a crack, but it still holds together and keeps my stuff dry. If you’re rough on gear, this may not be for you.
Fold-a-cup – Hugely underrated. This fun little no-frills folding plastic cup weighs an ounce and folds down small. Although purchased for my kids, this finds its way into my pack on solo trips where space and weight are a factor.
Hillsound Trail Crampon Pro – A heavier-duty Trail Crampon with forward pointing spikes. Another great hiking crampon that stands up well to snow and ice. They would have made Best of the Best, but on my boots the front points weren’t long enough to be useful. I also felt the K10s had the edge on traction.
Spot Messenger 2 – On Backcountry adventures this is almost always in my kit. This handy device made my wife feel comfortable sending me into the depths of South America. The ability to track progress and send messages to say “I’m OK” is a huge comfort. The downsides were its effectiveness with low battery. It doesn’t always send messages if the battery is low (even if it says it does). Bring a spare set of batteries for emergencies! The progress tracking feature drains the battery in one day. Cyclops Atom Headlamp – Nothing impressive, this lightweight headlamp is cheap and lightweight. It makes it on my short UL trips, but it isn’t for your night hiking or early summit attempts.
The Fire Puck – Ok. This was just plain cool. A great resource for starting fires in emergencies or just to show off in front of friends when you start the barbecue!
Discovery Trekking Wicking Towel – More of a travel tool, their smaller versions would be great for ultralight packing. It dries out quickly, but doesn’t absorb water as fast as I would like.
Stanley Adventure Cookset – Very reliable and convenient, I take this with me on day trips when weight is not an issue. Designed for car camping, this sturdy pot with lid and set of 2 matching insulated cups is a great luxury. The Stanley quality and warranty mean I’m not afraid to be rough with it.
Sea to Summit Ultra Sil Mesh sack – A nice lightweight mesh bag for storing your dirty clothes or things that need to air out. Nothing fancy. I take it along on trips for dirty socks, etc.
Hillsound Trail Crampons – A reliable traction source for slippery conditions. For all of those off season trips or walks where you expect to encounter ice and snow. I can’t fault these crampons, I just prefer something more aggressive like the TC Pros or Kahtoolas K10s.
Polarmax PMX hoodie and Comp Tech 4 Tights – a super comfortable, moisture-wicking base layer by American Polarmax. I’ve used this on more than one winter expedition with great results. The thumb holes should be better positioned, but a good product overall.
Needs Improvement Stanley Vacuum Food Jar – This is relegated to car camping and canoe tripping. It’s too heavy to take backpacking and the fact that food is cold 8-10 hours latermeans that it is best for preparing lunch at breakfast time. It’s a great concept and I love vacuum flasks, but I expect more.
Golite Cave 2 tarp – Golite gear is known for being Ultralight, but after a few years,I still struggle setting this one up. There are too many tie out points and I find the trekking pole setup is a two-man job. Also, the supposedly compatible Nest mesh tent usually sags and sticks out from under the edges of the tarp. It’s a nice tarp, but too much work for me. It’s actually no longer sold; it has been replaced by the Shangri-la line of tents.
Vapur Quenchers – We were sent this after the Anti-bottle. Designed for kids, the nozzle made this a no-go. I didn’t review it, instead sent my thoughts to our contact. My tough 6-year-old couldn’t open or shut the pop top. Even I struggled with it. I’ll take functionality over fashion any day.
Gear reviewed by our team
Here are other items that were reviewed by our other reviewers that I personally didn’t get to try but are worth a look:
Winter Gear
Tubbs Mountaineer Snowshoe – Our reviewer loved these so much that he has since bought sets of Tubbs snowshoes for his whole family! That’s a great testimony when you consider the investment of snowshoes for 6 people!
Health and Hygiene
Beyond Coastal Sun care – We put our pickiest natural products reviewer on this one and she had some great things to say and some question marks. If you’re a natural skin protection person or have kids, you should read this review!
Cooking and Eating
Jetboil Zip – A bit of a jigsaw puzzle, this lightweight, bare-bones solo stove system from the Jetboil brand is what you expect from jetboil. Functional and fun. This was lent to us by The Gear House. Check them out for great deals on outdoor gear.
Packing
Jansport Carson 80 External Frame Pack – If you’re looking to do some heavy lifting on your next backpacking trip like any parent with multiple toddlers would and don’t want to dish out a lot of money take a look at this pack.
Sea to Summit UL Sil kitchen sink – Originally not impressed, I gave this to someone else to review and keep. After reading their experiences I’m kicking myself and will be buying one for next summer’s adventures.
Sea to Summit UL Sil Bucket – Another super lightweight item that packs small and can be used for hauling water, food, fruit and more!
Survival
SOL Origin Survival Tool – Put out by Adventure Medical Kits this little survival kit boasts a variety of good survival tools minus a first aid kit. The concept is neat, but the price was a bit high for my tastes.
AMK waterproof/ultralight medical kit – Another great product to take backpacking. A pre-made kit for those who don’t like to DIY, it has pretty much everything you need for basic self-repairs on shorter trips.
Clothing
Terramar TXO Base Layers – Watch the video and you’ll see our reviewer’s thoughts. Terramar makes a wide array of base layers. We’ll check in with our reviewer in a few months to see how he weathered the winter. From what we’ve seen, he’s been very happy!
Merino Wool Buff – Our reviewer had only positive things to say about this buff. Buff is a go-to brand and merino wool is a go-to natural material. Put that together and Buff produced a stellar product!
Sport Science T-shirt – Our reviewer loved this for quick drying odor-resistant activities. I use mine for daily tasks and trips in town. It’s not quite a technical base layer, but it beats cotton any day!
Carhartt Flame Resistant Twill Coveralls – I’ve damaged enough pants and shirts doing some mundane task after work to know that a good pair of coveralls is a must. Our reviewer agreed and found these to be much more comfortable than the typical “my name is Bob” pair that you typically see.
Footwear
Snuggly Toes – If you’re looking for some toe luxury try these felted alpaca fur inserts. This cottage product from USA alpacas are a treat for cold feet.
Gadgets and Gear
Strider Balance Bike – If you’ve ever had to teach a kid to ride a bike you know the worst part is when the training wheels come off. Strider got it right by teaching kids to avoid them in the first place. We’re excitedly waiting for the next update from our little reviewer!
Not every outdoor adventure involves ultralight gear. Sometimes the DIY project or job around the house calls for something a bit more robust. That’s why when Carhartt contacted us about trying something from their Twill line our reviewer Graeme snapped up the opportunity to get a pair of Coveralls for review.
Carhartt Flame Resistant Twill Coveralls Review
by Graeme – The Outdoor Adventure Team
When asked to do a review of a set of flame resistant coveralls from Carhartt I was a bit sceptical. It brought images to my mind of the old blue coveralls the grease monkeys wear with the white badge saying “Hi, My name is Bob”. Don’t get me wrong. I am quite the grease monkey myself and am always interested in good quality work wear. The problem is I used to own coveralls and they were either too baggy, too tight in the wrong places, didn’t breath, or just generally uncomfortable. The worst part of course being the dancing jig you needed to learn in order to be able to disengage yourself from the outfit. My experience with Carhartt is very limited, only having an old insulated work jacket given to me by a friend which has been great. I wear it everyday doing chores around the farm and can’t seem to wear it out. So with this experience I thought I would like to give the coveralls a try.
When I recieved it the first thing I noticed was the colour and style. A far cry from the blue monkey suits I used to have. The Carhartt coveralls are well designed and from an initial reivew seem to be well put together. Upon trying it on I was immediately impressed by the comfortable fit – no tight spots or binding. The cut of the coveralls enables full range of motion no matter what the task. I have used them while performing those awkward reparis with arms buried to the shoulders in the engine compartment and also general duties around the farm, running tractors, cutting wood, hauling water etc. The convenience of being able to throw them on over my night clothes at 2:00 in the morning when popping out to check the sheep and lambs is great.
There are ample pockets and easy access and easy to use buttons. Other comparable coveralls I have found to be very awkward with button holes too tight making one-handed opening and closing near impossible. I like the zipper front and velcroe closures, though the velcroe doesn’t look like it is very strong.
Over all they are great and I wear them nearly everyday doing chores. I even threw them over my suit when I had to run to the animals just before heading off to church.
I really like them and I would get another pair when these wear out, though if they hold up like my old Carhartt jacket that I got used 10 years ago, it will be a long time before another pair is needed.
As most are wrapping up their year and enjoying time with their family I thought I’d keep this post simple and do a recap of my highlights and your favourite posts.
But those are just some of our highlights, now on to the most popular posts of the year. Some of these were posted last year, but stayed high in the rankings.
Help me plan a survival trip – We received some good tips and a lot more people checking out what we did after the fact.
SAS Survival Handbook review – This is my favourite reference book for survival skills. If you don’t have it, you should.
Can you start a fire with water? – I was told this was not possible by a survival school. I’m not going to ever attend their school. It was picked up by Lifehacker and Treehugger.
Backpacking wood stove – One of my old tutorials that still hits a spot amongst the backpacking community.
What does this say? Although many of you come to read about our backpacking, hiking and family related posts, as one can tell by the multitude of survival, doomsday and prepper shows on TV, survival and DIY skills are always popular. I believe the skills are universally applicable and that it’s always good to have the knowledge in your head so you can stay safe in an emergency.
If you haven’t seen our plans for next year, take a look on the right side of the page for some of our biggest trips that we have planned!
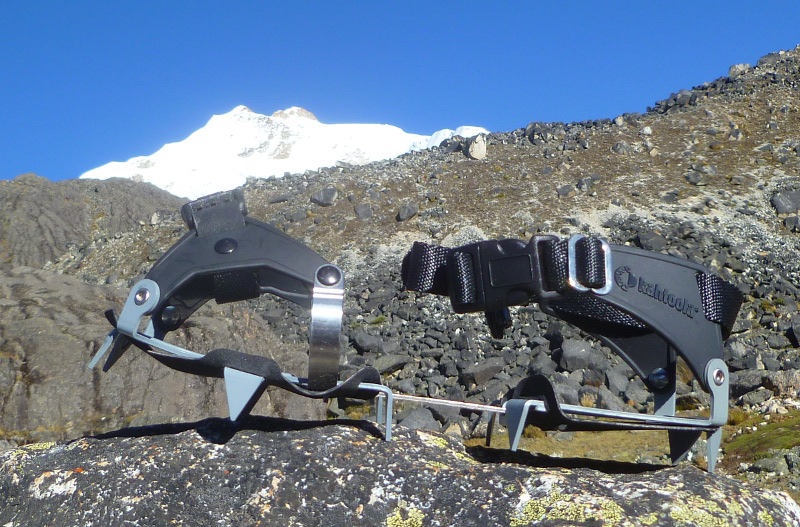
A few months ago Kahtoola contacted me and asked me to test out their newest hiking and trail crampons, the Kahtoola K10. Having know of the brand for a long time, I wanted to try out their response to the snow and ice covered trails that so frequently hamper my outdoor adventures in the off season.
Let’s be honest. Where I like to hike, I’m usually limited to 2 to 3 months of snow free trails. Anything that can get me out more is a boon. A 9 to 10 month off season unless I want to hike in the coastal areas is not an option in my books. I also don’t want to switch over to full winter gear or technical equipment if I’m only chancing snow or ice or will only be hitting on the shady side of the peak I’m bagging.
Trail or hiking crampons are designed to fit that need. They are supposed to fit on almost all types of shoes or boot, be light weight, flexible and compact and give you good traction.
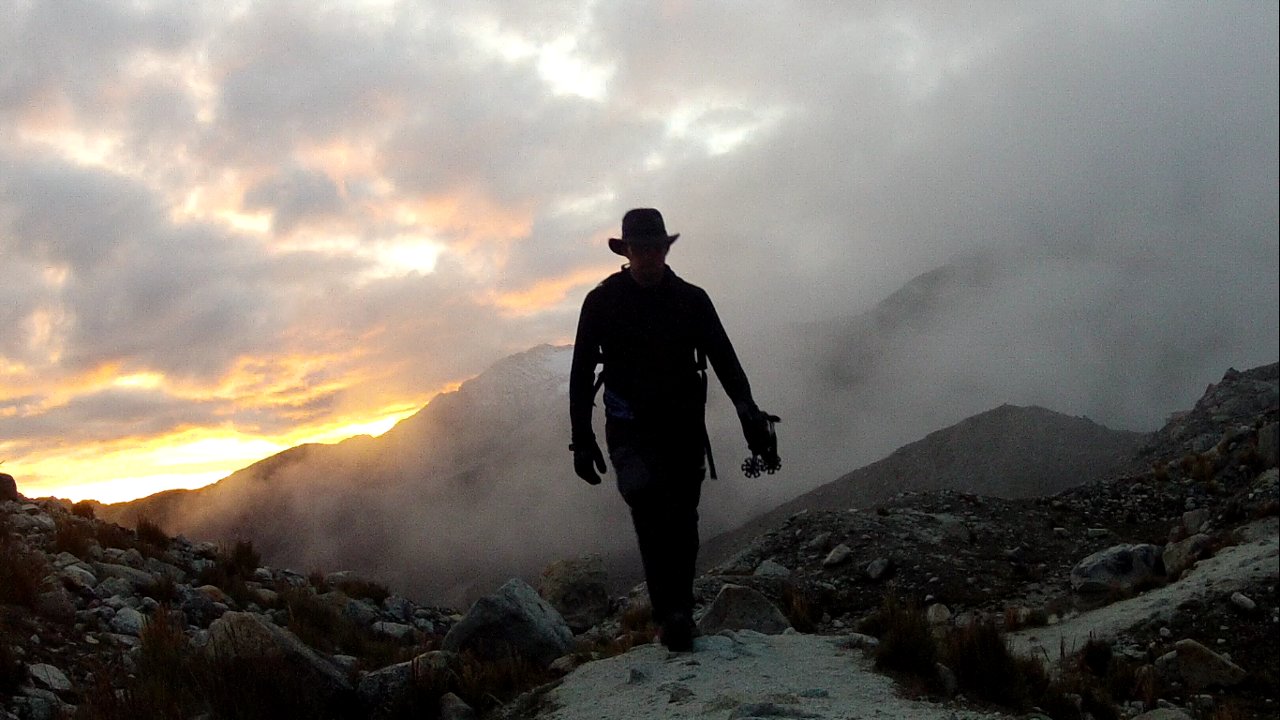
Read on to see how they held up, check out the video and see some amazing views of Bolivia where I tested these crampons.
So, How does the K10 do?
Fits almost all types of shoes or boots?
For off season hiking I find myself turning to my Treskta Asault Hiking boots. They’re a great boot as you’ll see from the review, but they do have an oddly shaped toe box. I have another pair of trail crampons and they struggle with the shape. Not so with the K10s. The design allowed them to adjust to my boots and trail runners with equal ease.
Quick-Fit?
The K10 employs what they call a Quick-Fit system. They’re medium duty straps with buckles. The buckles are very sturdy and hold together well. I cinch the down very hard and they have never slipped or come off or undone.
They use heavier duty buckles which make it a bit more difficult to undo, but I think it was a good choice to avoid them breaking or becoming undone when you’re hiking.
The one thing I noted was that the straps were a bit long for my boots. Once I cinched them down there was a lot of leftover. I understand this is to allow for much bulkier footwear (like snowboarding or ski boots) and they’ve dealt with the extra by providing an elastic loop that any extra strapping can be doubled back into. If you’re only going to use them on hiking boots or shoes then you can deal with this by simply cutting the straps to size.
Adjustable?
The K10 Crampons are adjustable and fit men’s US size 6 to 13. They fit Women’s US size 7 to 14 for regular footwear. For something heavier duty like a Pac Boot they fit as low as size 5 and up to a size 10 1/2. Adjusting them is best done at home. Although it’s straightforward and tool-less, you do have to take off the neoprene Snow Release Skins to do it and that’s difficult.
They fit down to a size 7 Ladies, which is good for my wife, but only barely. If you’ve got smaller feet you might want to try the KTS crampons.
Anti-Balling?
The Snow Release Skins are claimed to be the lightest weight anti-balling system on the market. They serve to prevent snow build up under the ball of the foot which could effectively defeat the purpose of the 3/4″ spikes. They don’t look like much, but they really do a good job. Once the snow comes out and the snow gets stickier you’ll be glad you put the on. They do weigh almost nothing so no need to leave them at home for weight concerns.
The skins are a 2-piece set-up for each foot. You slip them over and around each spike on the crampon. Once you get them on they’re very snug and aren’t going to come off easily, but putting them on was a bit of a pain. I had to pull out a pair of pliers and work away at it. For me it was a one time thing as I set them up at home. If you plan to do it on the trail or lend them to someone with a different shoe size, just bring a multi-tool and a bit of patience.
Leafspring? This isn’t a car!
I must say I find the leafspring concept is pretty intelligent. It’s like you’d see on a car. If you don’t know what I’m talking about, just ignore me or check out this wikipedia page. Basically it uses 2 lighter weight metal strips to connect the two parts of the crampon together and allow for support and smoother movement of the foot. When you bend your foot it makes flexing your shoe easier while still providing a strong and supported connection between the front and back of the crampon. Kahtoola is so confident with the quality of the design they offer a Lifetime warranty on the leafspring.
The spikes themselves are 3/4 inch tall and there are 10 of them They’ve gone for a nice wide design and placed them at different angles around the crampon. I have 2 other pairs of trail crampons, including a pair with longer spikes. I felt the combination of width and the varying angles made these just that much more secure on snow. wide spikes great for digging in to slippery and even very steep terrain. I felt very stable due to how kahtoola placed the spikes in different direction to reduce slipping.
Weight?
At 21 ounces for a pair the k10s are one of if not the lightest trail crampons of this style (not including things like microspikes). I don’t feel they’ve made any compromises in quality in keeping the weight down that much. If that isn’t light enough, try their KTS Aluminum crampons which shave off 2 ounces to weigh in at 19 oz a pair.
I struggle with all crampons as far as packing. I usually am reduced to strapping them on the back of the pack with spikes out to prevent damaging things in my pack. It also serves to intimidate anyone that is hiking too close. That said, they claim a packed size of 8 5/8″ x 3 1/2″ x 4 3/4″. That’s because you can slide them together when not in used to save a few inches on length.
1 percent for the people
Oh, kahtoola is also a member of 1 percent for the people. The contribute 1% of sales to help preserve indigenous mountain cultures worldwide.
Conclusion
I was sceptical of the K10 when I first tried pulled them out of the box, but when I stepped foot on snow for the first time my opinions had changed. They’re a great, lightweight hiking crampon that’s easy to put on and take off on the trail. They flex really well making walking easy with no need to adopt a funny gait like you would with technical crampons. The Quick-Fit binding makes them easy to tighten onto your foot and easy to take off.
It’s easy to see that kahtoola has taken their experience with hiking crampons and put what they’ve learned into the K10 to make a great all-round hiking crampon that I know I will be recommending to you and others.
K10 Crampon by Kahtoola
Features: Quick-Fit Binding
Material: 4130 Chromoly Steel
Spikes: 10 x 3/4″ multi-directional
Weight: 21.1 oz (598 g)
Pack Size Inches: 8 5/8″ x 3 1/2″ x 4 3/4″
Fits: Men’s US 6-13, Women’s US 7-14
Fits Pac boot: Men’s US 5-10.5, Women’s US 5-10.5
Warranty: 3 year on the crampon, Lifetime on the Leafspring
Disclaimer: I was given a pair of K10 crampons unsolicited, but this did not affect my opinions in my review. All are my own and recommendations are the same as I would give to any of my friends.
Seeing as this is a book review… it seems that a written report is in order
Over the last few years of backpacking, I have come to feel that I carry way to much ‘stuff’ in my pack. Granted, I have made a lot of improvements over the past few years, shedding a lot of unnecessary clothing and keeping my “extra” food to a reasonable level. Still, in spite of that, I struggle to come out with a packed weight less than 45 lbs… and I can now say from experience that after 10 miles and a few thousand feet of elevation gain, that I am still carrying too much weight.
For this reason I leapt at an opportunity to read the “Ultimate Hiker’s Gear Guide” by Andrew Skurka. I figured can only benefit from the experience of someone who has several thousand more miles on the trail than me, and this assumption proves generally correct in the case of this book of “tools and techniques to hit the trail”
The book is divided into three sections. The first 19 pages focuses on the definition of a hiker and outlines the necessary knowledge and mental preparation required to be able to get the most out of hiking.
The next 162 pages focus on gear. This section provides a very comprehensive look at every major piece of hiking gear, providing a comparison of the different options available and occasionally a critical look at popular gear that’s available (for example, double wall backpacking tents and waterproof-breathable fabrics).
The final part of 22 pages lists out example hiking scenarios and give an idea of what you would find in Andrew Skurka’s pack when planning a hike in the Appalacians, Arctic or even a desert.
In spite of the fact that the first section is a mere 19 pages, I found it to be an extremely valuable read. The importance and value of proper preparation cannot be underestimated, and it is useful to see some of the sources that I can rely on to get reasonable information. Beyond that though is what a hiker (or ultimate hiker) values in the outdoor experience. The constant forward progress that is made from first thing in the morning to the end of the day is very valuable, going at a pace that enables the hiker to appreciate the outdoor surroundings while knowing that at the end of the day a lot of ground will have been covered (more than a normal hiker would) and that there is opportunity to explore much more remote wilderness than might be otherwise available. To reach this an ultimate hiker is mentally prepared to rarely be 100% comfortable, but sufficiently geared and prepared to safely enjoy the best the outdoors has to offer.
The gear section is something of a mixed bag, but ultimately full of valuable gems of knowledge. Andrew provides a very detailed and comprehensive view of every major piece of gear, providing useful comparisons of the strengths and weaknesses of different pieces of gear (think “Down vs. Synthetic” sleeping bags, “Double-wall vs Single-wall vs Tarp” tents and “Wood vs. Canister vs. Alcohol” stoves). At the end of the day he makes a few judgement calls, but what you generally find is that there is little gear that Andrew will ‘never’ use, but rather that it depends on the conditions of usefulness.
A few sections that I found particularly interesting and worthwhile was the sections on Food, Shelter, and Footwear. After reading the food section I decided to follow a bit of Andrew’s reasoning and packed a lot of chips and chocolate to the Washington Enchantments in order to have a higher fat diet for more energy. Overall I found myself sufficiently filled though I found my chips crumbled a lot and would not easily pack down.
The last section of sample gear lists I found to be useful, though I only glanced through it. It is something to be aware of as there, but I realistically wouldn’t read it unless I was planning a hike that conformed to some of the conditions outlined. What I found of considerably more value was HOW this lists are organized. Lists are very valuable and its useful to see how someone else organizes theirs to see how I might improve mine.
Along with several anecdotal stories sprinkled throughout the book, I found the Ultimate Hiker’s guide to be a nice read. I would consider Part 1 a section worth deliberate straight through reading, as it contains valuable information even if it is review or even ‘common sense.’ Having the planning and hiking techniques written on paper makes me think about it more, and in many ways I wish this section was a bigger. The gear section is great for random reading, where you want to take a few minutes break and consider your gear. Being away of the breadth of material covered is helpful so that whenever you ask yourself “what sort of material might be best for the rain” you can find the section at the time it interests you most. While the specific gear recommendations will become dated with time, it does give an idea of relative cost to get particular pieces of gear. At its extreme, if you want to look like Andrew Skurka (if only in gear) that option is available to you, but overall, this book enables you to make very educated decisions about the gear you need to meet the conditions you may face along with a few bit of advice on where its beneficial to spend more money (think footwear) vs when going on the cheap is perfectly workable (think alcohol stoves).
The final word:
I found this book to be a great read with a little bit for everyone. The first section, while short, is by far the most valuable overall. The gear section can sometimes be a bit over-technical (part of the ‘bit for everyone’) but provides a ton of useful charts that I will refer back to for a long time to come. The final gear lists are useful, but much more useful as a guide to record and weigh your own gear.
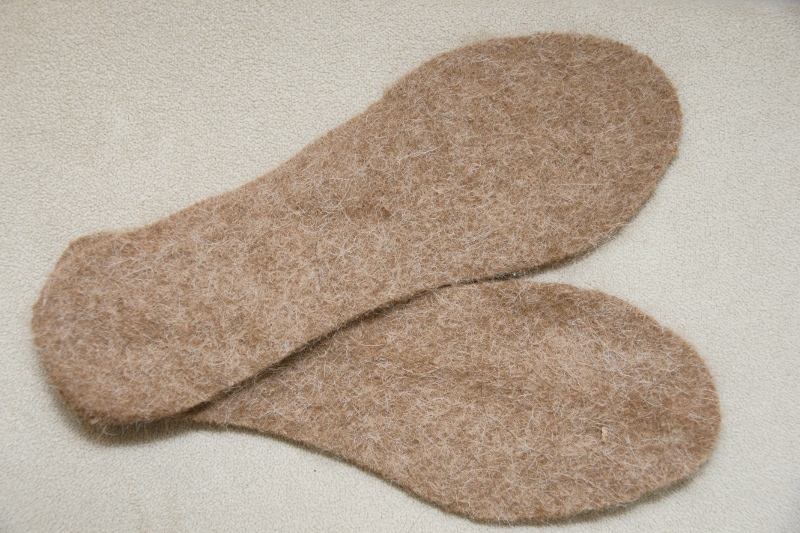
Spoil your feet this winter by keeping them toasty warm no matter where they are. At work, at church, on the trail or knee deep in mud, there is one thing that keeps your toes warm no matter what you are wearing.
Meredith Kuhl from Springtime farms sent me a pair of Snuggly Toes to review, and I couldn’t wait for the weather to get cold enough to try them out! I have tried them in boots, I have tried them in sneakers, I have tried them in flats, I have tried them here and there and I like to wear them anywhere! My favorite way to wear them is at home inside my socks (I am not a slipper person), which keeps my feet warm despite wood-floors and an energy-conserving-husband in my house.
These soft and sturdy shoe-inserts are made from wool from happy little alpacas at Springtime Farms. With cute names such as Glacial Mist and Painted Face these foot warmers help support family owned farms. Something about buying stuff from animals with names makes it that much more special!
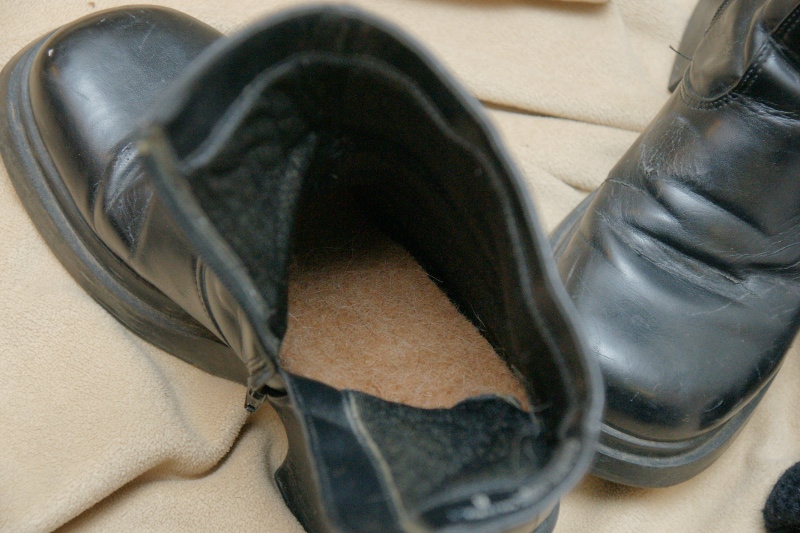
The Snuggly Toes foot warmers should fit in almost any closed toe shoe that has a little wriggle room. Crocs, rain boots, sneakers, flats, slippers, hiking boots or even inside your socks, your toes will be toasty and yet no one will know (except maybe to notice that you whine less about your cold feet). As these foot warmers slip into your shoe, it will be your toes little secret until you start telling your friends what is different this winter.
If you are like me and are sensitive to both cat and dog fur, never fear! I have had no reaction at all to the naturally hypoallergenic fiber of alpaca wool.
When they get dirty, toss them into your washing machine and wash on a cold cycle then hang them up to dry. There is no need to worry about any colors bleeding in the wash or into your shoe as the fibers are all natural.
The only down-side that I have found with these foot inserts is that they shed a little.
These lovely foot warmers will last many cold winters and cost $39.99 for adults and $14.95 for children, with free shipping. Visit their website: http://www.snugglytoes.com Thamar A The Outdoor Adventure Team
 The Outdoor Adventure Giving you tips, tricks & recommendations to help make adventuring in the Outdoors fun, safe & exciting for you and your kids.