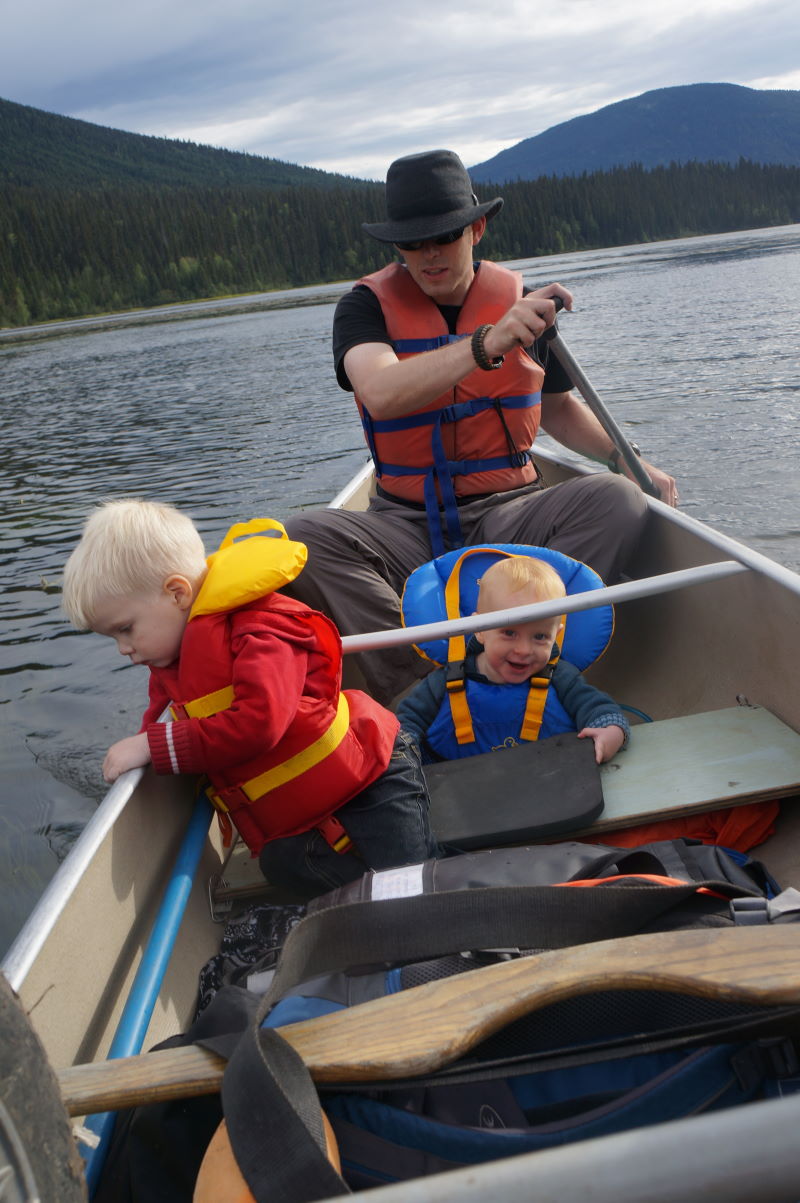
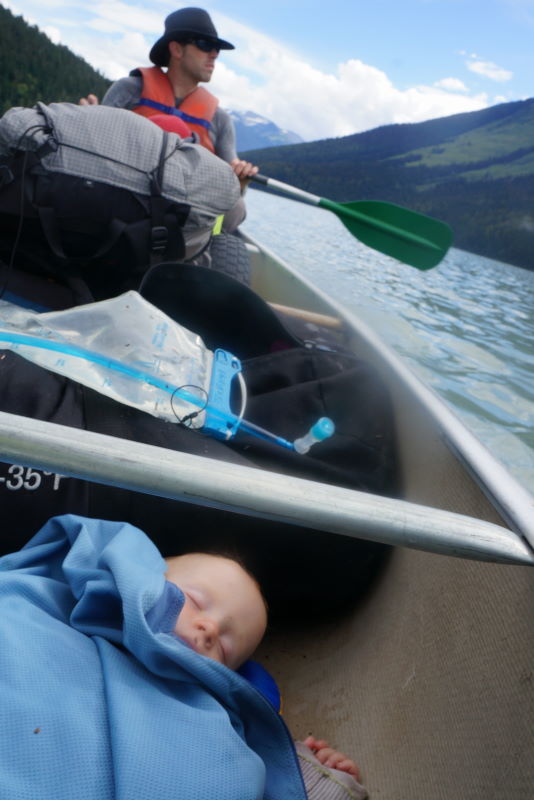
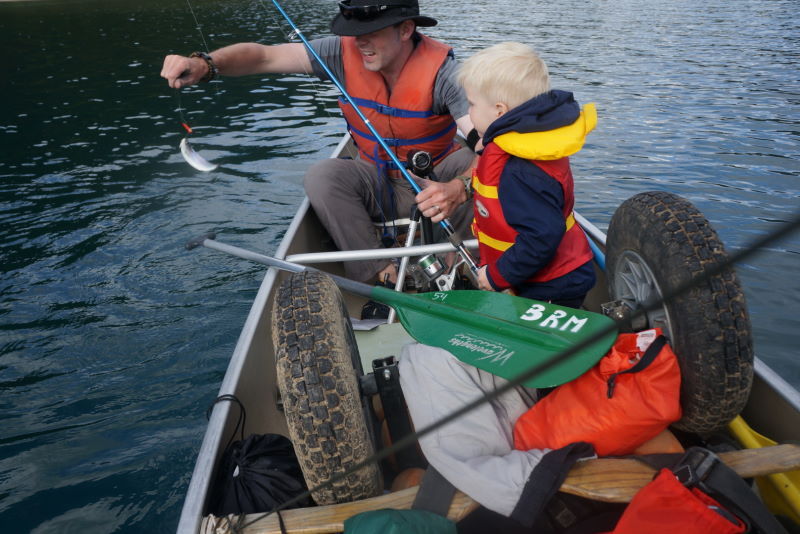
This summer we did something crazy… and had a blast doing it. We took our two youngest kids (3 years old and 1) on a week long canoe and portage trip through the Bowron Lakes.
To be honest, it wasn’t that crazy as we had a bomb-proof Clipper 18′ 6″ canoe and used a canoe cart (dolly) to pass the portages. We kept our gear light so that the weight was low in the boat and of course, we all wore lifejackets.
The length of the canoe and lack of a keel meant tracking on the lake was a challenge, but it had the huge benefit of being virtually unsinkable. For example, on our approach to camp on Sandy Lake we hit some pretty large waves side on. Even being hit sideways, not a single drop entered the boat. Not only that, but we were stable enough to set up a sail (the winds were strong enough to cut a day off our trip!)
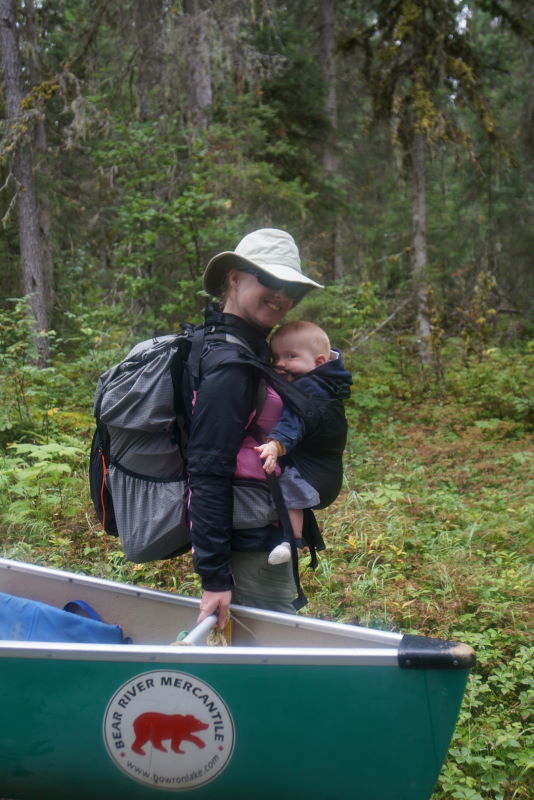
To hit the portages, we carried our backpacks on the back and child carriers for the kids on the front. Out of interest, we used a Boba Air and Onya Outback. The Boba Air was the ultralight option and the Onya Outback offered lots of padding and comfort while carrying heavier kids.
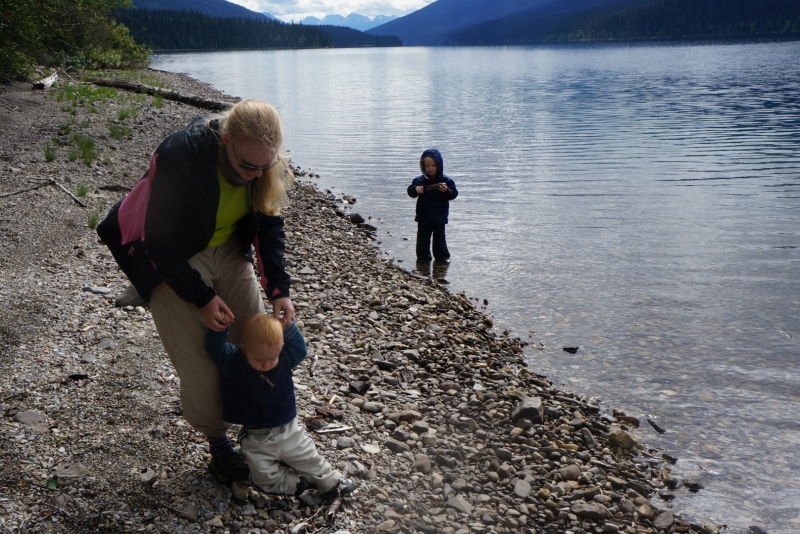
This trip was largely focused on the kids. They were kept busy with toys and a comfortable seat to let them nap if needed. We did take breaks about midday to let them stretch their legs (and let our 3 year old soak himself through while playing in the water).
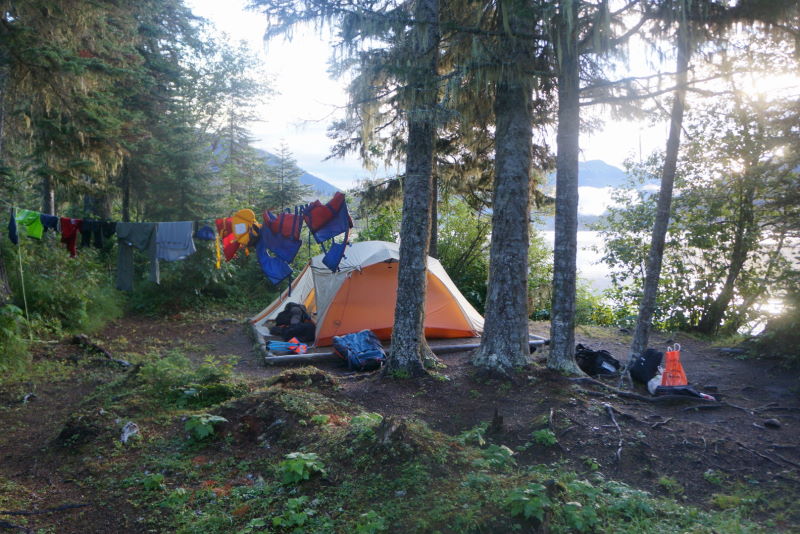
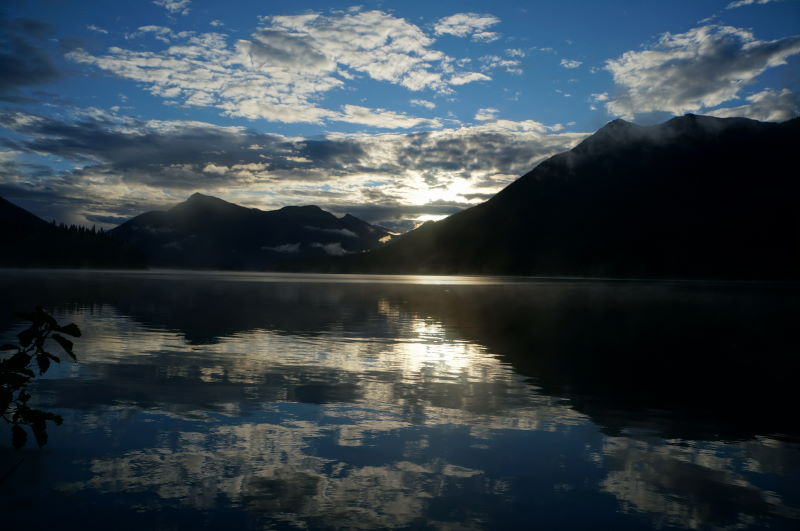
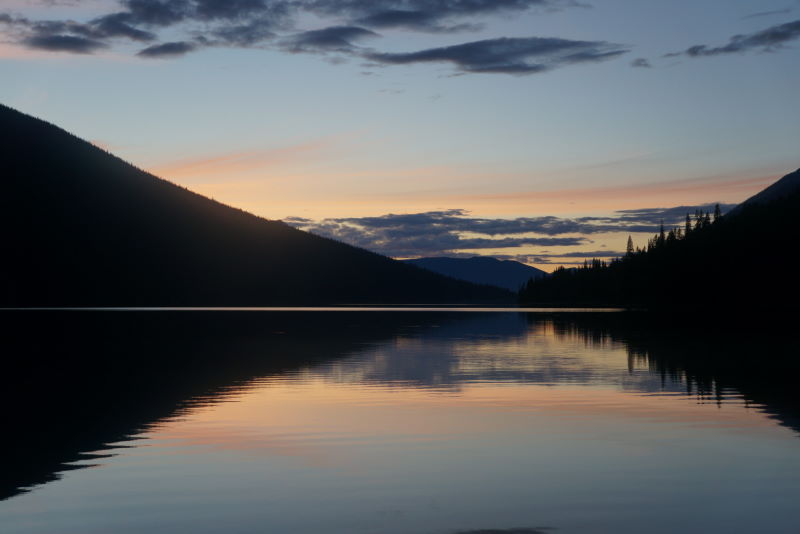
Campsites are amazing on the circuit. There’s enough privacy and community at the same time. and the views are incredible.
We took off before 9 every morning and paddled and portaged until about 4 or 5 (although we stopped early the day before heading down the river).
Even though the weather was sometimes inclement, the views were amazing and we only once came off the lake to avoid trouble.
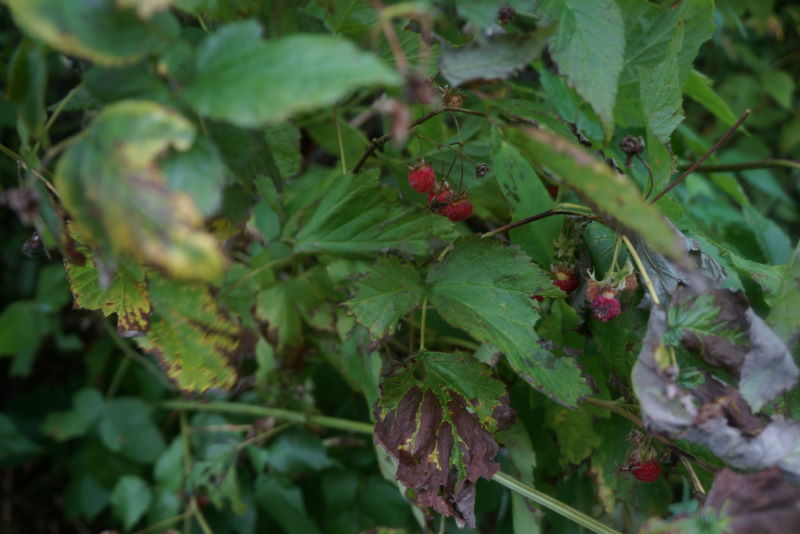
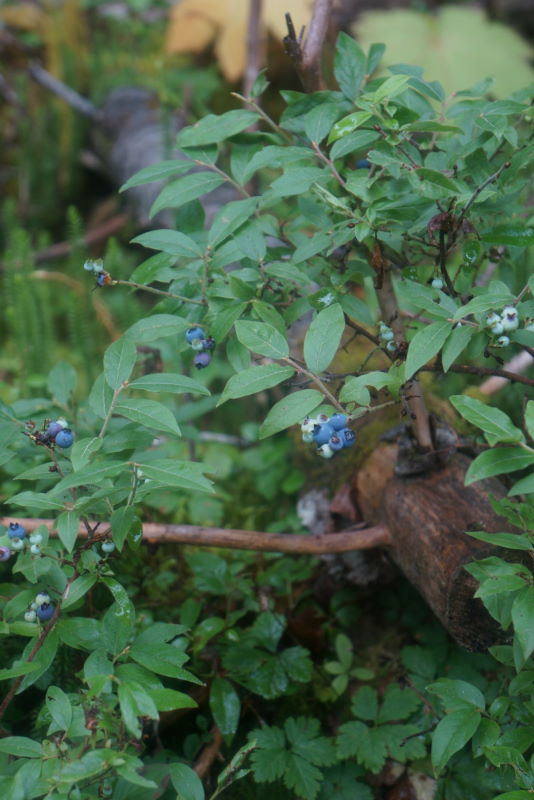
Going in the end of August was a great choice as there were an abundance of berries to keep the kids busy while we setup and took down camp.
Fishing wasn’t great as the fish were deep, but we did manage to catch a few. We even saw some salmon in the lake and going upriver to spawn.
This summer we did something crazy. We took our two youngest kids on the adventure of a lifetime. With my moderate canoeing ability and my wife’s only basic paddling experience, we had an amazing trip. Hopefully we’ll do it again.
Check out this video of our experience and consider heading out on the Bowron Lake Canoe Circuit soon with your kids.
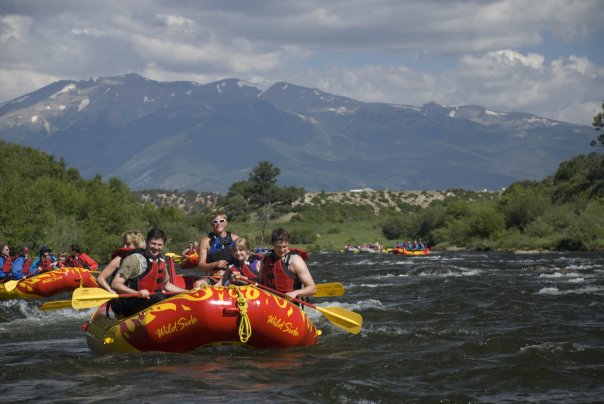
A summer is not complete without a fun family trip. This year, you’re looking to do something more exciting and outdoorsy than previous years. Maybe you have always wanted to experience whitewater rafting, but are unsure if your kids can handle the trip. Here are some things you should know about whitewater rafting and if you should bring your kids on the trip.
Before you plan your trip, ask the whitewater rafting outfitter of your choice what the age restrictions are for whitewater rafting. Typically, children as young as four years old can enjoy a whitewater rafting trip, but outfitters will generally suggest six years or older for their trips. You can always go for a half-day rafting trip to ensure that the young child does not get too tired or too scared for the duration of the rafting.
Taking kids out on a first rafting trip requires a slower, gentler rafting time. Plan a trip where there are plenty of stops so you can reassure your child that they are safe and make them comfortable if they seem to be uptight and worried. Class 1 and class 2 are the perfect levels of rafting for children of all ages, giving them little engagement but still the thrill of whitewater rafting. Remember that tiny waves to you might feel like giant rapids to a child.
Safety is always the most important to all rafters, but it comes a bit differently with younger rafters aboard a raft. They must have a certified life jacket that fits them perfectly, according to their age and weight. They also need a helmet that fits them and is proper for them in order for the helmet to keep them safe.
Keeping a child comfortable is the most important part to make rafting enjoyable for them. They might be scared and nervous about the idea, so you will want to inform them of what they can expect well beforehand, and keep them by your side during the trip. It is easy for a little kid to get scared while whitewater rafting.
All in all, you can take your child on a whitewater rafting trip as long as they fit the rafting outfitter’s criteria. If the company does not have strict rules, keep in mind how old your child is and how well they will be able to handle rafting a river. Taking a newborn baby along for rafting is not the best idea, whereas your five year old might have a blast during the whole trip.
About the Author
American Adventure Expeditions is pleased to bring you this article on can I bring my child on a rafting trip. American Adventure does river rafting in Colorado, and primarily do Arkansas River rafting trips. If you are interested, check out their website today.
This year I’m planning on doing another survival trip. I’d like your help in making some realistic plans. My brother has already told me he wants to go, but aside from being resourceful, he doesn’t have much experience with survival skills.
Essentially I’m looking for your advice on:
What type of scenario I should try to simulate?
How many days should I go for?
What gear should I take with me?
Should I self-rescue?
I’m looking to practice and learn new skills and I think this is the best way to do it. I always bring a GPS Spot messenger for these types of trips as well as some emergency gear that I’m not allowed to touch unless it’s a real emergency. I have a wife and 4 kids to look after so I have to mitigate risks.
Last years trip was Spring in the Canadian forests. I went out for 3 days (2 nights) to a mountain lake where temperatures dropped to freezing at night. This year we’ll be going out in Summer, but from there I’m open.
Here are the highlights and below them is the actual series. Please leave your comments and ideas below so we can work this out.
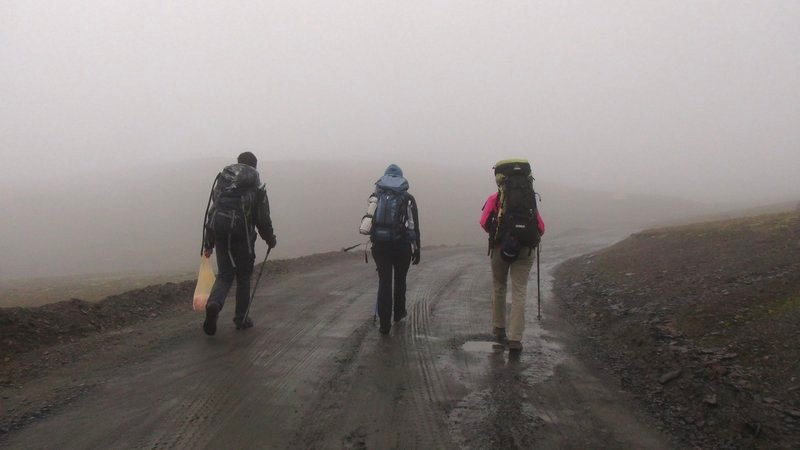
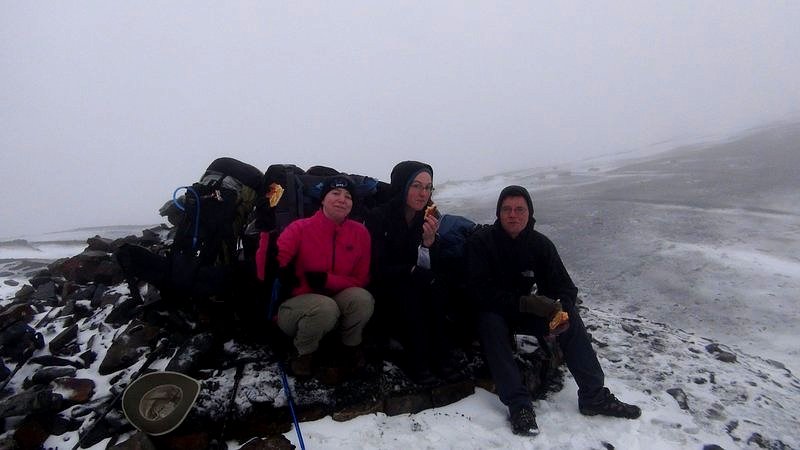
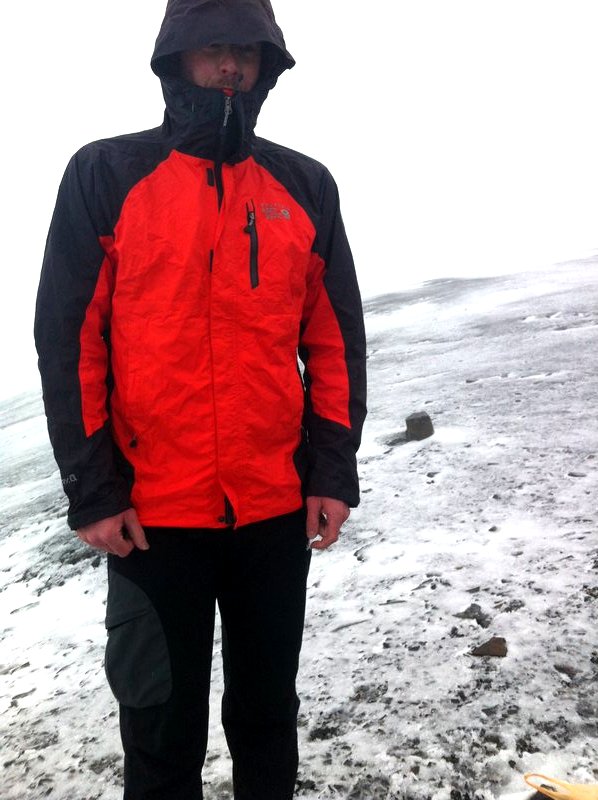
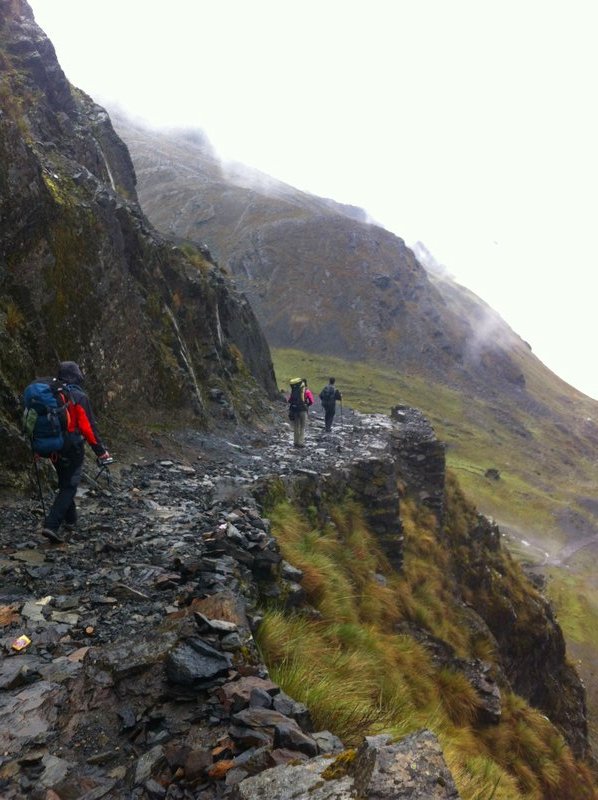
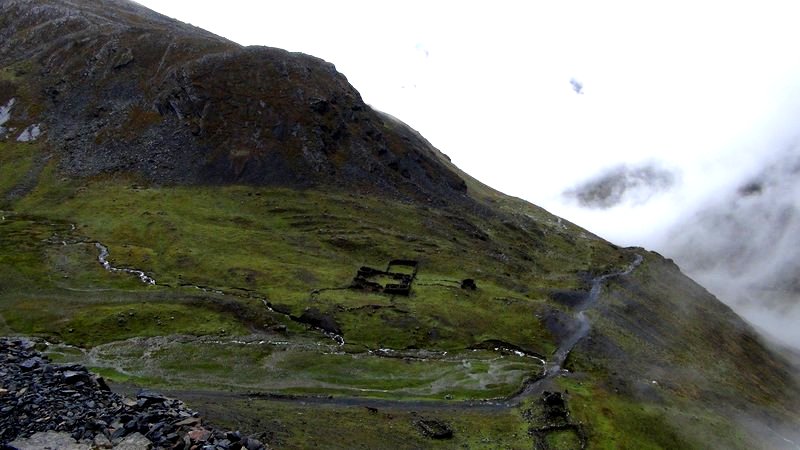
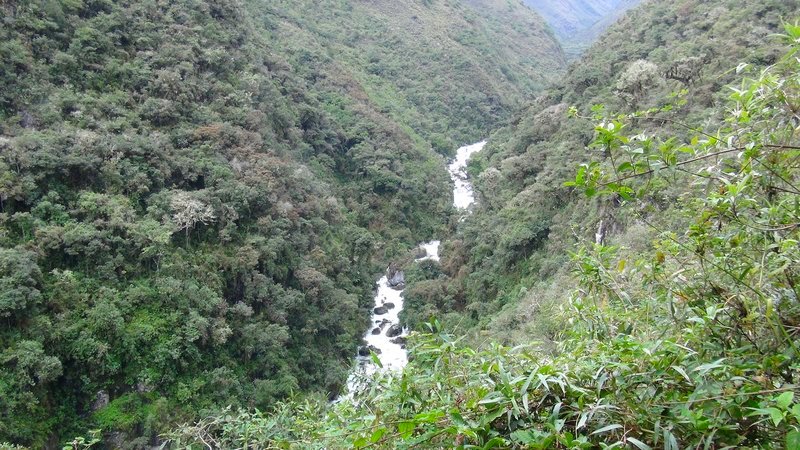
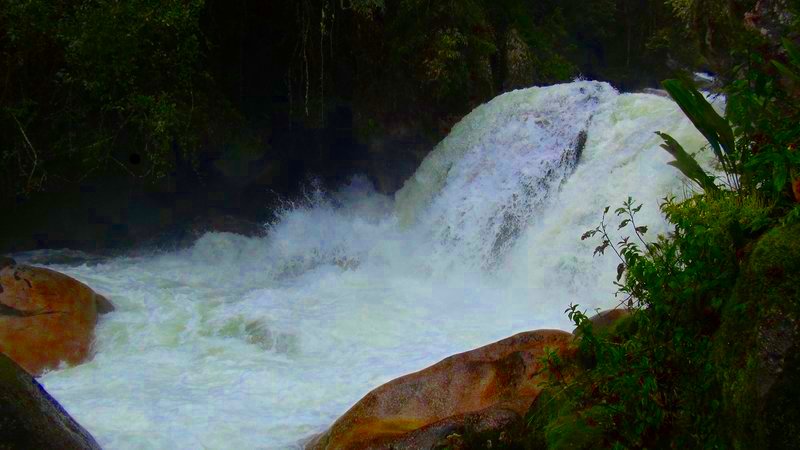
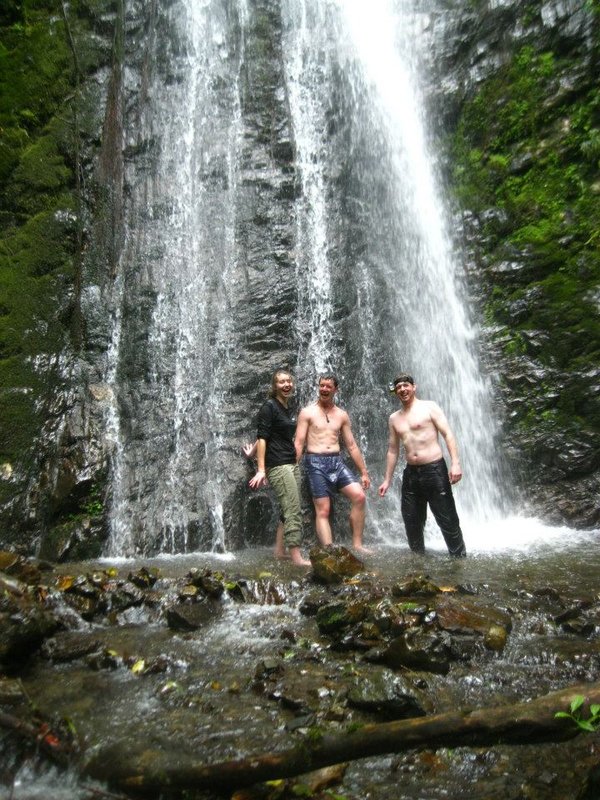
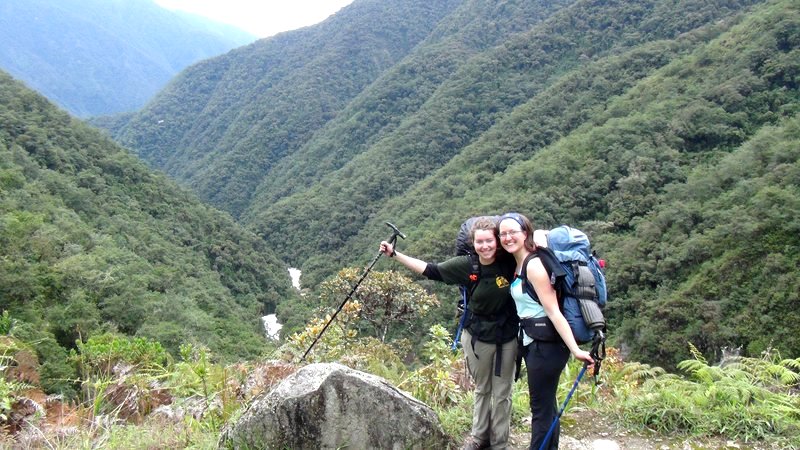
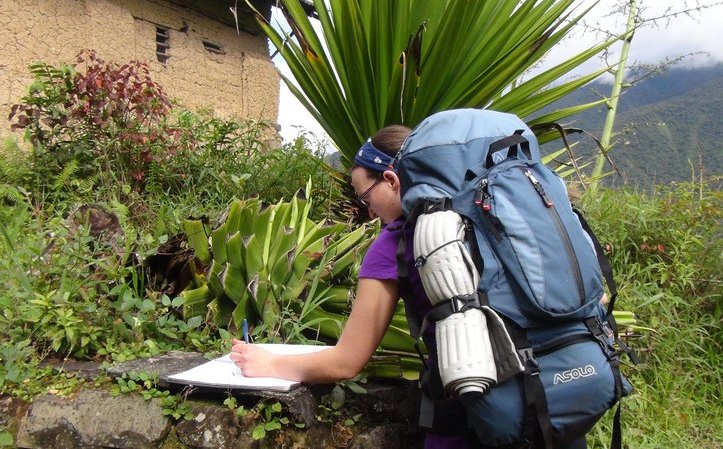
On Monday we left on a 3-day, 50 km hike that started at 4800 meters in the Andean mountains and ended in the tropics. We went in the off season and got some great memories. I thought I’d share the experience in photos.
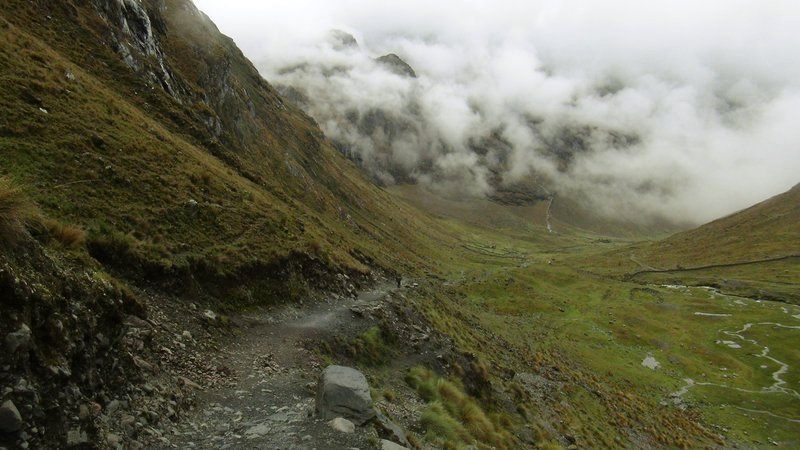
We headed from the trail head towards the summit at about 7:30 a.m.
As the mist cleared, we saw that the previous night had left the pass dusted with snow.
An unexpected snowstorm cut our breakfast short.
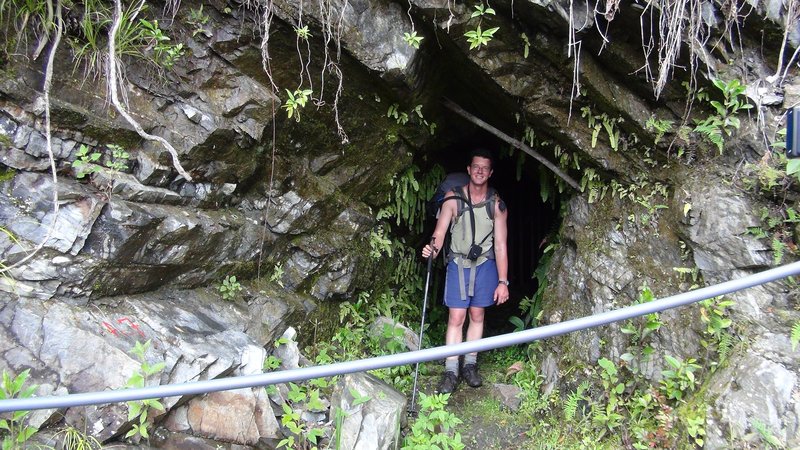
After dropping out of the clouds, we saw the ancient tambo or wayside inn.
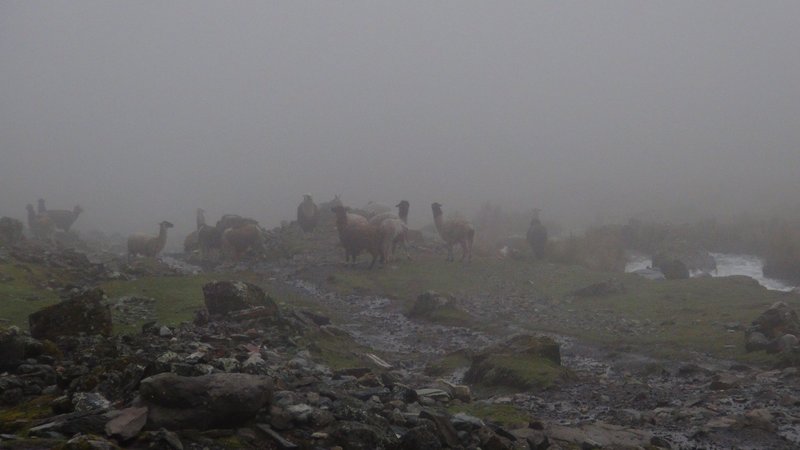
llamas in the mist.
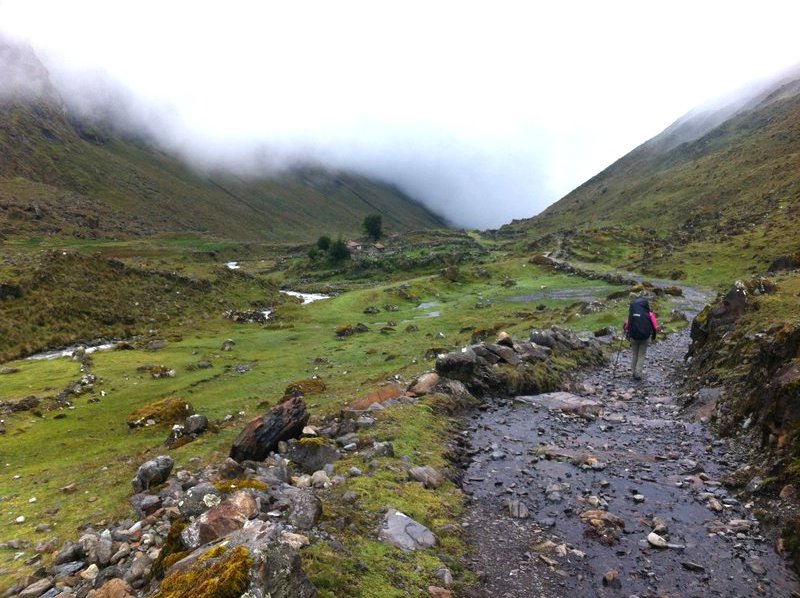
The trail quickly changes from barren summits to semi-tropical cloud forest.
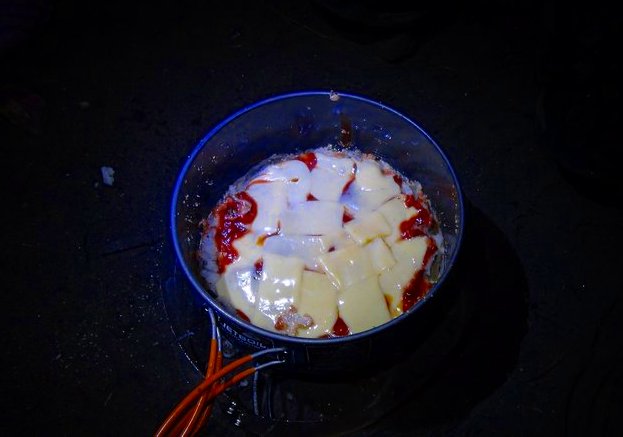
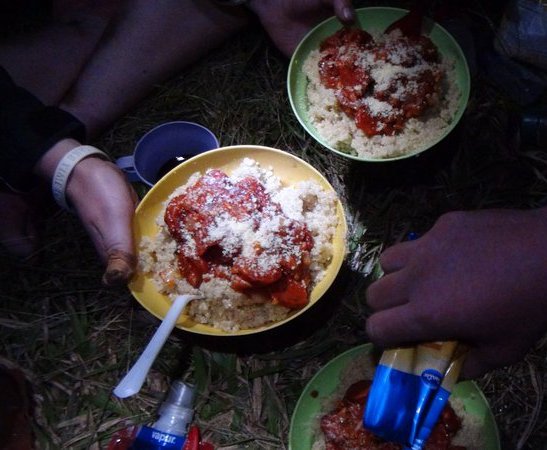
Deconstructed pizza at the end of day 1.
A much needed cool down on what turned out to be a very humid and hot second day.
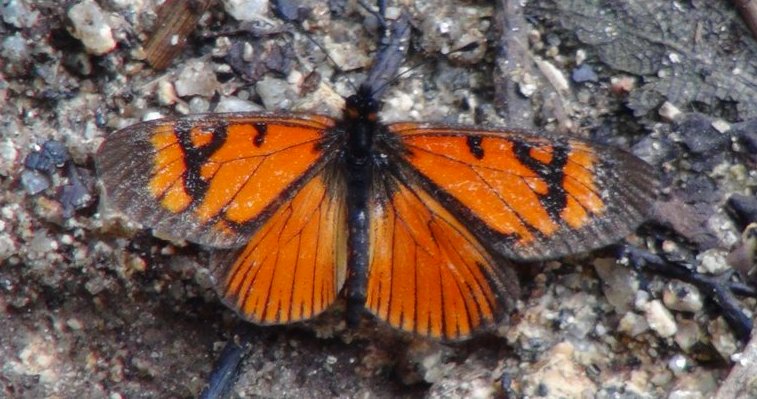
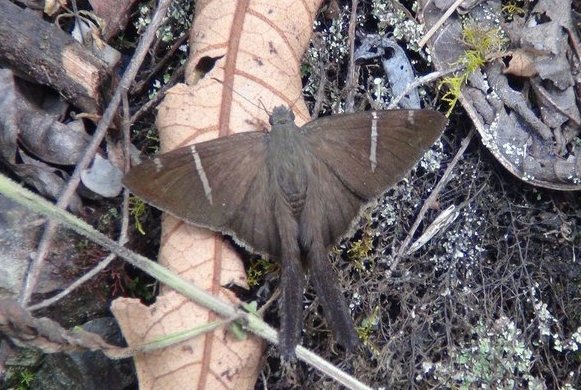
Just one of the many butterflies we encountered on our trip.
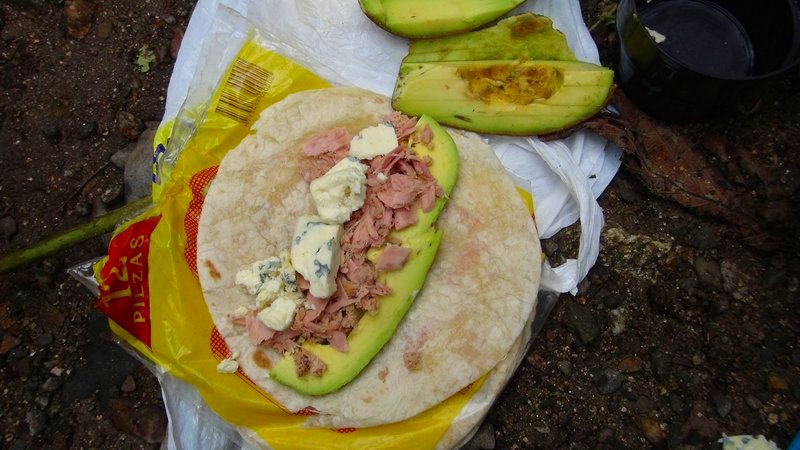
It was worth carrying in the avocado and spinach just for this!
One of the local loco miners.
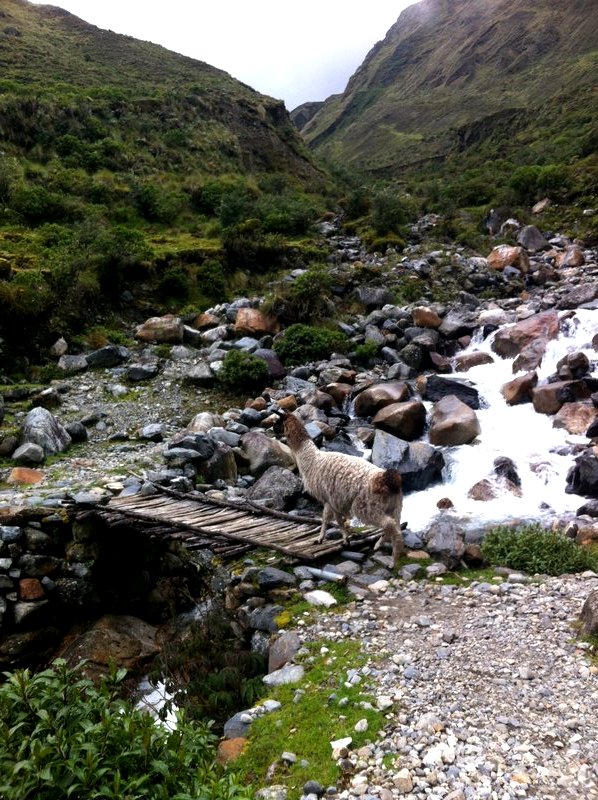
Anyone have the name of this little friend?
Quinua Italiano.
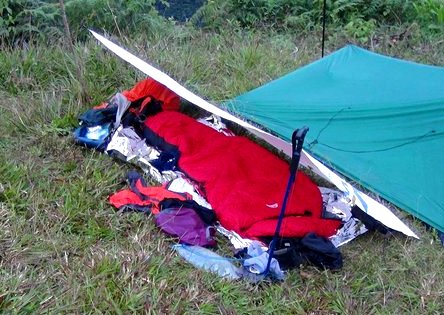
My UL shelter that gave me an amazing view of the starry skies!
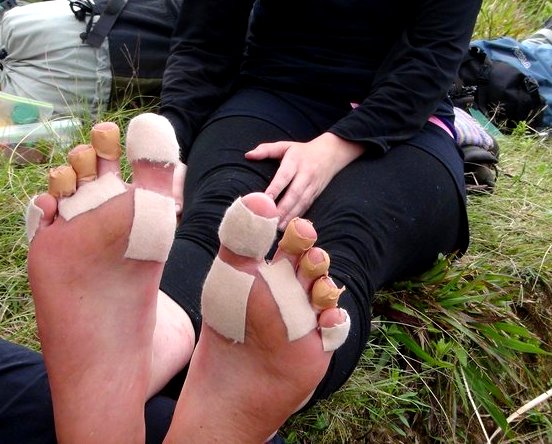
Foot repair on the start of day 3.
Signing the guest book of Tamiji Hanamura. He turned 88 in December.
Tired and triumphant. Even though we had another 2 hours to go until we found cheap transportation to Coroico.
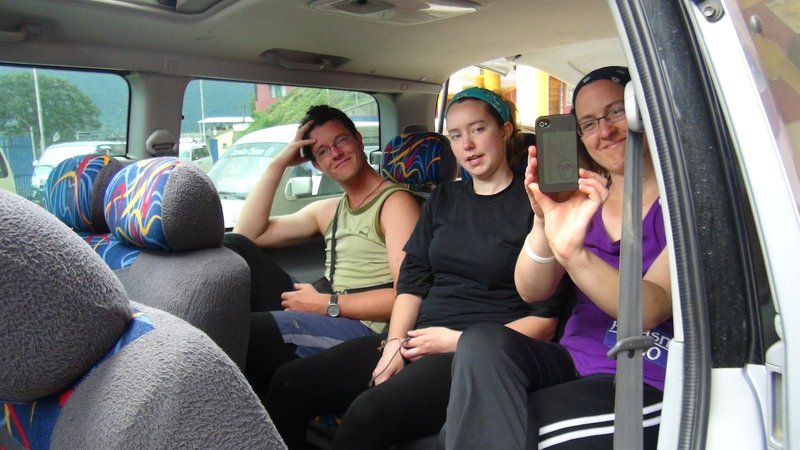
In Coroico after a long 3 days and heading back to La Paz.
Well, you had your kicks on the weekend, but I was working. Now it’s my turn to take a few off. I’m heading out on the Choro Trail in Bolivia again. I’ll be back on Wednesday and hopefully I’ll have some stories to tell and some videos to boot.
Feel free to track my Spot progress on the link on the sidebar.
Here are some of the things I hope to accomplish besides enjoying the amazing views and scenery:
Gear Testing
The final test on my Columbia powerdrains
Golite Beartooth down jacket
Platypus Origin 35 liter pack and reservoir
My Tyvek groundsheet
My new Gopro, wireless mic system, wireless remote.
Recipe Testing (on an alcohol stove)
5 minute pizza
Chocolate Bundt Cake
Pasta with a red sauce (including sausage, etc)
Orange Spice Cake
The usual oatmeal with added spices and dried fruit
It should be a fun trip! I can’t wait. Please feel free to leave your comments on what you were up to this weekend and I’ll get back to you sometime later this week!
Well it finally happened. After training and hiking I managed to get things organized for a 2 day summit attempt of Huayna Potosí.
There’s a bit of debate as to how tall it is, with the official height being around 6088 meters or just shy of 20000 feet. This is in a country where official altitudes can be off as much as 500 meters. Most people at the summit (including one that I summited with) find that their GPS reads about 6100+ meters, or safely above the magic 20000 feet mark.
Usually tourists tackle the mountain in 3 days to allow a bit more acclimatisation time at the high camp of 5180 meters (17 000 feet) before attempting the summit. We did it in 2 as I have been in La Paz for a while and time was a constraint.
Leaving La Paz, we drove up towards Paso Zongo, where on both sides there are mountains over 5000 meters and a glacial blue lake sits just below you. An incredible start to a trip.
Disembarking at the Refugio or base camp (4700 m or 15 400 feet) we stopped for lunch and some coca tea (it helps with the altitude) and discussed plans for the day. A couple hours to the high camp involving regular hiking and a bit of scrambling then it was R&R before the summit attempt the next morning.
We had 2 porteadores (porters) that helped with our stuff. We could have done it without, but it helps support the local economy and makes it more of a relaxing trip.
Huayna is very popular so it has a nicely worn trail, which we followed past a glacier, across a stream and then along a ridge before we scrambled up a rocky trail littered with leftover ice. Apart from a small section of ice steps, the going was non technical and my trekking poles did the trick. Within 2 hours we were at the high camp “Campo Rocas Alto” of 5180 feet where another stone “refugio” sits on the edge of the snow line.
After taking a whole bunch of photos and talking about the route, we relaxed inside with some more food and drink. After chatting with the others that were attempting the summit the next morning we decided to head to bed.
Unfortunately, as is often the case with mountains, the night brings strong wind bellowing up the mountain. I found it hard to sleep as the sounds made me feel that at any moment the roof would be torn off this tiny shelter and leave us exposed to the cold.
This fear was somewhat confirmed at 2 am when I went out to use the facilities and after sitting down on the frozen seat the outhouse door blew open and off its hinges.
We had decided to start an hour later than the others to give us a bit of calm and because my guide Gonzalo felt my pace was quicker than the rest. After getting a few hours of shut-eye and a couple more hours of lying in bed and listening to the rattle of the roof joists we decided to eat a light breakfast and gear up.
We wouldn’t need the ice axe for the first section so we stowed them quick to hand and took out the trekking poles instead. The first hour is straight forward as you cut up to the left and then back to the right. Pretty much every time you start to get tired it levels out a bit to give you a breather, before sending you up another steep section.
My Hydration hose froze solid despite blowing into it to get rid of water in it and I had to store the hose behind me back to thaw it out. The water was essential for the altitude, I’m glad I brought 3 liters, despite the weight.
When I rested, it was not so much to give my legs a break, but more to give my lungs a chance to catch up from the lack of air. Doing the Choro trail a few weeks before had been a good idea.
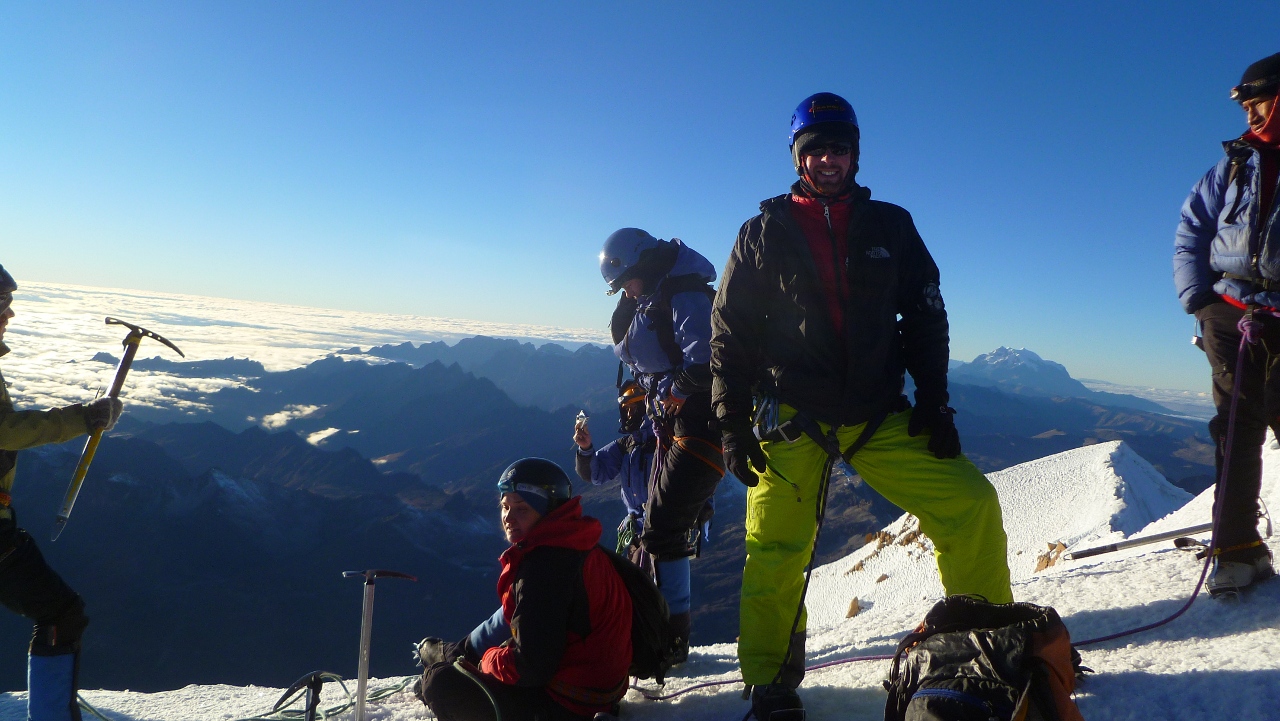
We followed the trail and marked the red flags that indicated crevasses and ascended till we came to a wall. There was one slightly technical section filled with crevasses where we needed to pull out the ice axe and dig in with the crampons to get up, but after that it was smooth sailing to the final ascent. We stopped for photos and a snack when the sun started to crest and the moon was outlined, but then pushed on.
When we got to the final crest, we had caught up with the other teams. We dumped the trekking poles and switched back to the ice tool and climbed up the ridge that snaked its way to the summit. The wind was blowing up one of the faces so we tried to keep low until we got to the top.
At 7:20 AM we reached the summit and the sun had come up not long before. After taking a break, drinking a nice cup of hot chocolate and coffee mixed we congratulated each other, thanked our guides and finished the adage: What goes up, must come down.
Although it took us a bit over 4 hours to get to the top, we only needed an hour and a bit to make it back to the high camp. That included the sight seeing and photo taking of the amazing sights that we couldn’t see on the way up in the dark.
At the high camp again, we took only as much time as we needed to pack up our stuff and have another drink before we hopped back down the trail to the car. Once there we recounted our exploits, settled our debts and got in the car and headed home.
It was then that I realized what we had just finished doing. in just over 24 hours I had zipped up to around 20000 feet (not even possible back in Canada), for the first time in my life had summitted a significant peak and left that all behind. Needless to say, I’m already planning my next peak.
Freeze drying or lyophilization now-a-days goes hand in hand with space flight, military and backpackers. We think of modern technology for lightweight and long term storage, but it’s something that has been around for a lot longer than even the USA was a nation.
This technology in its primitive form is both pre-columbian and pre-incan and was used by the aymaran cultures of South America for over 600 years.
Freeze drying preserves food by removing moisture by using a combination of freezeingcold temperatures and heat. The Andean cultures have taken advantage of the cold nights in the mountains and the intense sun to do the same and preserve potatoes to make them last for years.
The process takes several days and is usually done in their winters at high altitude, even today. They head up to the hills and lay out the potatoes on the hard ground. After poking holes in the potatoes to help the moisture escape they let the cold temperature bring the moisture out to the surface and then let the sun let it evaporate. They then employ the most basic of tools, their feet, to help remove remaining moisture and at the same time get rid of the skins. Depending on the type of potato product they want, they can moisten them to produce a white potato (tunto) as opposed to the normal black variety (chuño). The final process is to let them finish drying without skins in the sun.
They then can be stored for long periods of time (some were even found at the pre-incan ruins in Bolivia known as Tiwanaku).
To me, it shows how people of different countries learned to adapt and make use of their environment, and how some of these “New” ideas are actually only slight variations of well proven concepts.
I’ve had the opportunity to both see the process in action in the Andean mountains and taste the rehydrated end result. It’s amazing to see small communities of tents on high mountain passes set up for the drying season and the hillsides covered with potatoes for those few weeks of the year.
They include these potatoes in many traditional dishes and soups. I’ve also had the opportunity to taste them. The locals love them, but let’s just say there has been a lot of progress made with freeze dried meals in the last 50 years in North America.
You can’t help but admire their ingenuity in developing such a simple and effective way to preserve food with little cost. Especially when the modern day equivalent requires a machine that costs tens of thousands of dollars!
No amazing news today as I’m out on the trail… up to Huayna Potosi in Bolivia. At 20000 feet it will certainly be a dizzying experience!
I’m working on acclimatising myself and seeing what training I need to hit some more technical peaks in the Bolivian Cordillera Real. Huayna Potosi isn’t particularly technical, but the altitude makes it challenging.
The majority of people do the trip in 3 days with a bit of training on the glacier, but for time I’ll be trying it in 2.
I’ll be trying out some gear too, so expect some reports when I get back.
If you want to see the progress, you can check in at my Find Me Spot page where you can see all my check in points. If things go well, I’ll make it to the summit at sunrise on Tuesday morning!
If you’re looking for a hike in Washington that feels more like something in Arizona, head out east past Leavenworth to an area called Dusty Lake. Nestled in between Buttes, this easy 1 to 2 hour hike lands you in rattlesnake country where the fishing is good and the sun is oppresive.
We zipped in on a Friday night and did the hike with Headlamps (not recommended, especially for those who don’t know the route). It made it easy as it was cool enough to keep you from suffering the daytime highs of 90 degrees or so.
The ground is only littered with sage brush (and dust) and apart from the buttes around is very flat. Think Old West. There are very few trees (an experienced guy in our crew brought both a deck chair and umbrella) which most people ended up fighting over. Fires are permitted, but the lack of anything to burn means that you should pack in wood yourself.
We hiked into the slightly farther away Dusty Lake and then took a day hike over the buttes to the ancient lakes where there’s a waterfall and bass fishing. Dusty Lakes is main trout, and big ones at that. The locals know it as they carry in their belly boats and spend the day enticing the lunkers out (you can only keep one per day).
One thing you’ll need a lot of is water. The air is dry and the heat and wind can shrivel you up if you’re not careful. Bring water purification of some form or plan to boil. I shook my head on the day trip out as many families were heading out across the plains without any extra water, a very dangerous thing to do in that area.
All in all, the hike is very impressive because of its landscape. The only downside is that this little valley is surrounded by farm land. A friend kindly named it “Monsanto lake” because of white staining from what is most probably agricultural run-off. The fish seem healthy enough, but I wouldn’t make too many trips out there because of that alone,
For a day or weekend hike, the area is beautiful and the potential for teasing out a 16+ inch trout will be too much for most anglers.
Take a look at the “Guys hike” that a few of my bud and I went on in early May.
Well, it all comes to an end. A special thanks to SOG knives for giving me the Aegis and hand axe that were featured in these videos and that made survival possible.
Also, thanks to everyone who gave feedback on what to do, with what and where. It was an awesome experience and I can’t wait to do something like that next year.
Sit back, relax and enjoy the poorly edited video! Oh, and if you missed the previous ones, here are the links:
If you’re a long time reader, you will have heard about my long term plans to do a survival trip up in Canada for 3 days and two nights. I coordinated it for a trip I had planned to visit family, and my dad ended up coming with me.
The plan was to hit a mountain area of British Columbia where we could test out theoretical skills (this was my first trip) and carry a backup kit if we needed it. I brought simple items (emergency blankets for my dad and myself, flint strikers, survival fishing kit, a cheap rain poncho, aluminum pot and a hand axe and Aegis folding knife (provided by SOG). I also took a small panasonic camera to film all our adventures.
My dad acting as backup also brought a pot, plate and cup, in addition to a regular fishing kit. We headed up to a lake on crown land at about 800 meters where nights were below freezing and where snow in the day was not uncommon.
In this part I improve the comfort of the shelter, make a birch bark cup, dig for and cook cat tail roots, try both cat tail fluff and a Fire puck as fire starter, steam a trout over the fire, collect some wild edible plants for food and determine that I need a camera with an external microphone.
DISCLAIMER: I’m an untrained and unprofessional amature. DO NOT TRY THIS WITH PROPER TRAINING. I am NOT responsible for any harm that comes from anyone trying to imitate me.
One of the most famous things for tourists to do in Bolivia is taking a mountain bike down the old highway from La Paz to Coroico. A couple years ago, it was the only road down to Coroico, but after countless tragedies due to its narrow width and at times 600 meter almost vertical drop to the valley bottom A US group lent the money necessary to construct a large, much safer route. This has eased up a lot of traffic and allowed the tourism to take off for thrill seekers.
Most tours start at La Cumbre (The summit) of the mountain pass (4700 meters or just under 16 000 feet), where you speed down the actively used highway dodging cars and buses (and hoping they dodge you). The views are spectacular in this part with towering mountains all around (over 5000 meters), old stone walled homesteads and the occasional waterfall.
After a quick break and opportunity to pay your entrance fee (b$25 or $3.50 US) for road maintenance you jump back in the bus for a short uphill drive before heading off into the death road itself.
The death road, or “The World’s most dangerous road” isn’t as dangerous for bicycles as it was/is for cars… but it is still not something to take lightly. There have been 18 deaths of cyclists on the road since 1995, and the day before we headed down, a 2012 4×4 had gone over the edge trying to pass in relatively dry conditions. A quick search for “Bolivia death road” on youtube is not recommended for the faint of heart as countless results come back of car accidents along the road.
There are a number of companies going down the road, including B-side Adventures the company I went with a few weeks ago. They charge anywhere from $60 to $100 depending on the company, but you get what you pay for. I saw a cheaper group heading down with only basic helmets and old school bikes. In contrast the more expensive ones include full face helmets, knee and elbow pads, full suspension and disc brakes, and b-side takes both photos and videos (low res) of the event which it offers free of charge to its clients. Oh and pretty much all companies offer a shirt to those who complete the trip. It’s a good idea to check Lonely Planet’s guide as it will give you a good idea of who to check out.
A couple things to ask the companies are if the bikes are full or front suspension, disc or standard brakes, if pads are included, if the helmets are full or partial, do they take photos and provide them after the fact? oh and possibly most importantly do they bring extra bikes or tubes in case there are problems. I really like b-side, except for the fact that they didn’t provide extra bikes. I was fine, but 1 other person got a flat (which they fixed) and another had his pedals freeze up. The guides did switch bikes, but it would have been a downer for me for sure! I did send them an email with my suggestions which they graciously received. We’ll have to see if they implement my suggestions.
If you’re a thrill seeker and know how to pedal a bike you should definitely consider this trip if you’re in the country.
I took over an hour of video going down the road, but condensed it down into this less than 7 minute clip for those who want a taste of the trip!
 The Outdoor Adventure Giving you tips, tricks & recommendations to help make adventuring in the Outdoors fun, safe & exciting for you and your kids.