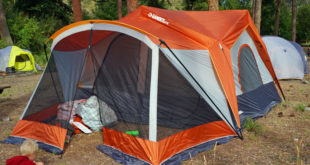
The Outdoor Adventure Giving you tips, tricks & recommendations to help make adventuring in the Outdoors fun, safe & exciting for you and your kids.


A few days ago I tried to make a brief case for backpacking quilts. The idea is this: any insulation that you lie on doesn’t insulate very well. If it doesn’t insulate it’s wasted space and weight in your pack. Of course if you wiggle around in your sleep you’ll need to have that insulation, in case you roll over. If not, I’ve got a cool project.
 |
| bag with all seams removed on the bottom |
I picked up a sleeping bag using points collected from a store that although a “technical” bag, was a bit bulky for my tastes. It’s a 0 C (32 f) bag, but because it uses cheaper hollow fiber insulation it is heavy. Over 3 lbs. I decided to use it as a practice project on saving weight by removing all insulation on the bottom of the bag and replace it with a pocket for a custom cut closed cell foam pad. My future plan is to take a down bag and shift all the bottom insulation to the top to not save weight, but make it warmer.
 |
| I cut right above the shoulders to be able to slip the pad in. |
In the end, I cut off 5 ounces from the bag and 1 ounce from the sleeping pad. This was in a bag that already only had half the insulation on the bottom (as a technical bag, the maker understood the waste of insulation on the bottom.) In a normal bag you could probably save double that.
My suggestion is to start by weighing the bag and pad and measuring how large it is in a compression sack so you can tell how much you saved.
Here’s what I needed to do that:
- sleeping bag (mummy)
- closed cell foam pad.
- scissors – to cut open the bottom of the bag to get access to the insulation and to cut the sleeping pad.
- seam ripper – to remove horizontal seams and separate the insulation from the fabric.
- marker – to trace the shape of the bottom of the bag onto the sleeping pad.
- On the bottom of the bag there should be two layers of fabric (inner and outer). Cut a horizontal line from one side to the other of the inner fabric just above shoulder height.
- Remove the horizontal seams from the bottom of the bag (ONLY the ones that hold the insulation in place).
- Carefully cut the insulation out from between the layers , leaving the bottom 10-12 inches of insulation in place to provide a foot box to keep your feet warmer.
- Place the bag on top of your foam pad.
- Trace the bottom seams of the bag on the foam pad. Make sure it will be snug along the bottom so as not to let air in the pad.
- Cut the foam pad along the lines.
- Slide the pad into the bottom of the bag.
- Weigh the final results and note the size. Oh and post below with how it went!
 |
| 2.9 lbs, Compressed: 8″x10″ |