The Outdoor Adventure Giving you tips, tricks & recommendations to help make adventuring in the Outdoors fun, safe & exciting for you and your kids.

“It looked so much better than this”. “The pictures don’t do it justice”. “You had to be there”. Sadly, our cameras don’t always do our photos justice, but don’t worry, you can turn those drab photos into fantastic shots with only a few clicks.
Who doesn’t have an album of photos that they want to touch up just a little bit, but is intimidated by the idea of it? While most of us don’t know the inner workings of tools like photoshop or lightroom, there are a few simple tools included with most standard photo editors that can easily transform our hum-drum pics into images that capture the moment we meant to capture.
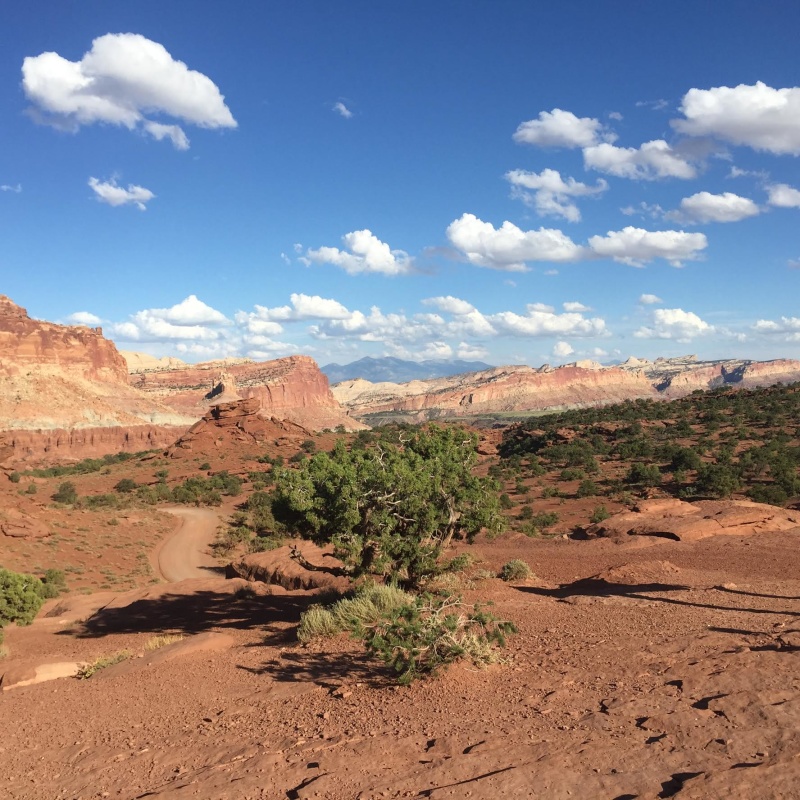
Let’s start with a decent photo of an amazing place and see how we can transform it into something much more attractive in three simple steps. Thanks, Missouri Howell for the photo!
NOTE: Don’t have ANY Photo tool? Look no further than Google Photos or google plus photos. It’s free and can all of what we’re talking about.
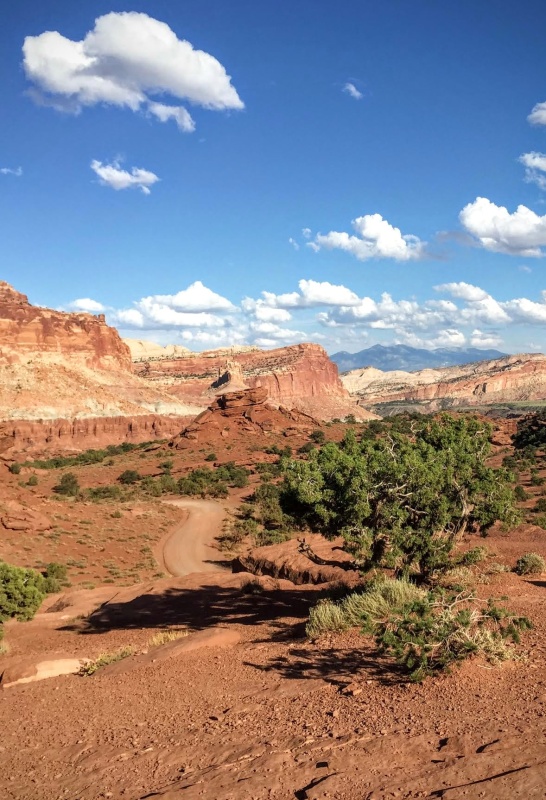
1 – Crop to the Rule of Thirds
When you take or edit photos, you want to follow the rule of thirds.
Wait, rule of what?
The rule of thirds is dividing a picture with three equally spaced horizontal and vertical lines. It creates nine boxes. Many years ago we humans discovered that our eyes are drawn to the points where those lines meet.
Ideally you’ll remember that when you take the photo, but fortunately for the crop tool you can fix that after the fact.
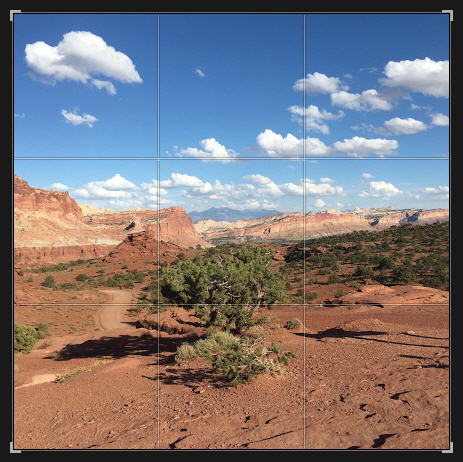
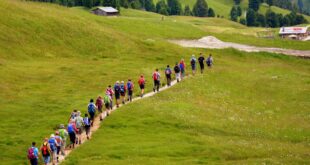
For example, See Mr. Howell’s photo here. The scenery is amazing, but you’re not sure where to look. The tree in the middle looks out of place. What should we look at? Maybe the road? The sky?
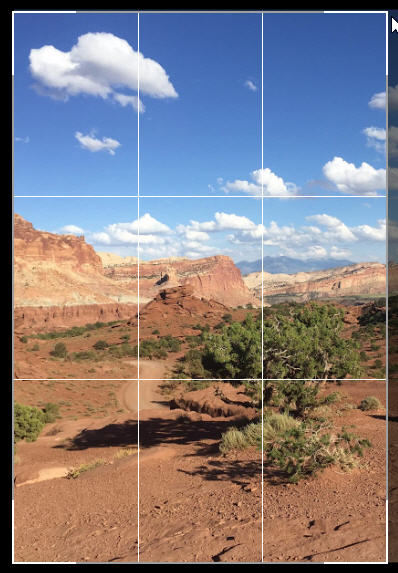
Let’s try cropping it into a vertical image that places the tree and the road in the intersection of the thirds of the photo. Now you have a photo that at least looks visually more engaging. We look at the tree and then we look at the road. The road takes us deeper into the photo.
2 – Auto Adjust
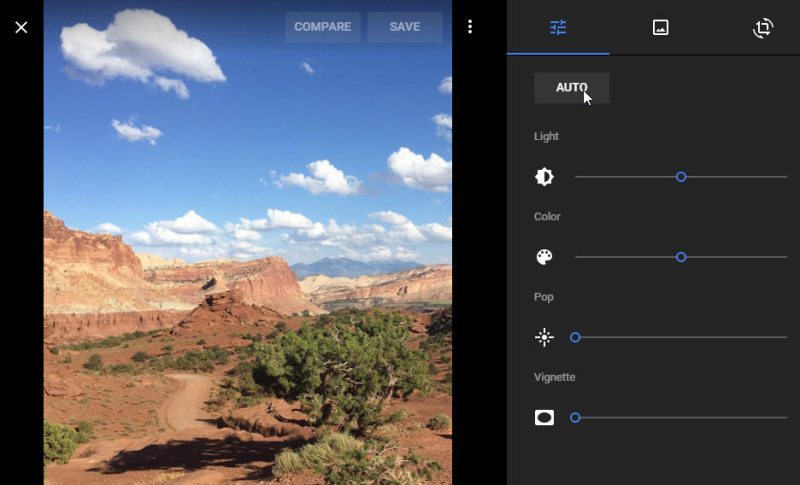
The Pros will tell you to avoid this tool, but until you become a pro, this can really give you a head start. The Auto Adjust tool will try to improve the lighting, contrast, and color to make your photo much more like what you saw. Sometimes it fails, but most of the time you’ll find a huge improvement with just that tool.
How are we looking? The colors are starting to stand out and we see glimpses of what Mr. Howell saw when he took the photo.
3 – Over Saturate
Your photos never look as good as they did when you were there. It’s often true. The colors are more vibrant in real life and the camera doesn’t always capture that. That’s why I like to over saturate my outdoors photos.
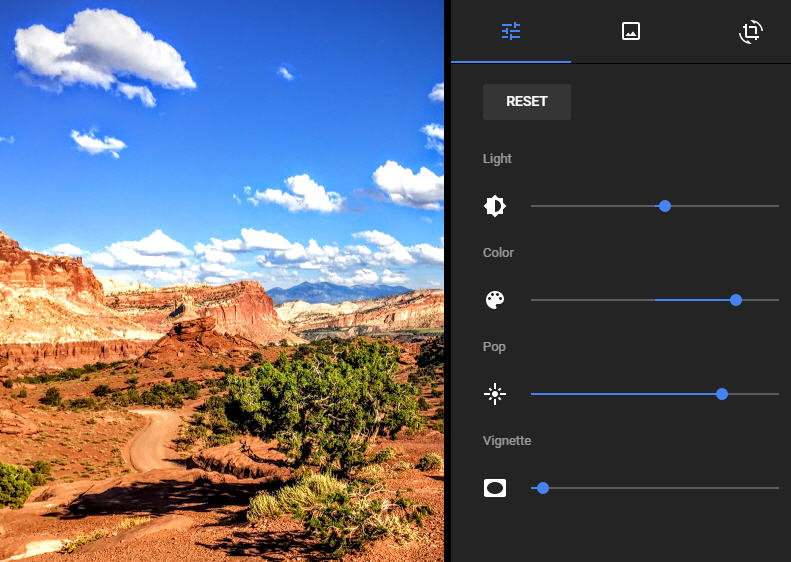
Under Color, there is often a “saturate” slider. Sometimes it’s called “pop” or just “color”. Boost that up and the colors will start to look like what you saw on that epic trip. They really make the features “pop” out at you.
You’re Done

With these 3 easy tricks and even a basic photo editing app you can make your photos look engaging, exciting and better yet, motivate your friends to get outdoors, because the views are Spectacular.
Ready for more?
I used Google Photo on these photos just to show you what’s possible with a free online tool and minute (ok… less than a minute). If you’re looking for a better tool, look at Adobe Photoshop Elements or Adobe LightRoom. They’re more complicated to use at first, but they are more powerful and you can achieve even better results.
What are your tips for capturing or editing better photos?