Home / survival (page 2)

survival

Survival Saturday #4 – How to make a fire log

If you’re only interested in boiling water, then why go through all the steps of creating a big fire with lots of wood? Check out this week’s Saturday Survival and see how to make a 1-log fire that is great for wet and snowy weather!

Have you tried this? We’d love to hear about what you think!


Survival Saturday Episode # 3 – How to Make a Pot Holder

SScover


Ever cook over the fire? Then you’ll know the challenge of finding a place to put your pot to boil water. There are lots of way to hang your pot over the fire, but here are two of my favourite ones! Take a look, check out the video below and let us know what your favourite way of doing this is!


Wilderness First Aid Training

When we started planning adventures in the back country with our kids, we knew it was time for some more thorough first aid training. I decided to sign up for a Wilderness First Aid training through RMI in Seattle. Originally we wanted my wife to go as well, but they don’t let infants attend. So, that left just me.

The course is two days and 16 hours of both classroom and outdoors training. I was really impressed with the amount of material covered, despite the obvious time constraints of a weekend course.

The first day was a lot of basics and a lot of hands on training about rolling, lifting and moving patients. I chose a 6 foot 200 lb guy to move and it really shows use how much of a challenge it can be and how to make it easier.

After every big section, we were brought outside where we had to “diagnose” and stabilize a patient in a scenario. Other class members filled in for injuries and small groups had to work through the triangle to figure out what issues existed and how to best act.

Here’s the Course Outline:

  • Medical-Legal Considerations
  • Patient Assessment
  • Lifting & Moving Patients
  • Shock
  • Head Injuries
  • Spinal Injury Management
  • Wound Management & Infection
  • Musculoskeletal Injuries
  • Documentation
  • Respiratory Emergencies
  • Cardiac Emergencies
  • Abdominal Pain
  • Metabolic & Allergic Reactions
  • Cold Emergencies & Illness
  • Heat Emergencies & Illness
  • Altitude
  • AMS
  • Lightning
  • Immersion & Submersion
  • Remote Medical Kits & Supplies

At the very end before discussing Medical Kits we had one last scenario where we grabbed what supplies we found and came outside to a scenario. It really drove home how nerve racking it could be. In our scenario we found a man who had fallen down a steep 40-foot slope. He was in shock, but had bruised and potentially broken femur, clavicle, elbow and spine pain. Oh, and he kept vomiting. We found him lying on the side of “broken” clavicle and on his “broken” elbow. What’s worse is that we had to move him to a site where the evac could come and take him away.

The teachers did an awesome job responding to questions and what ifs. Although I’m going to have to go through it all again, I feel much better about taking my kids out in the back country with us this summer.

Survival Saturday Episode #1 – Intro and how to make a cooking fire

Starting today the Outdoor Adventure will be posting a series of videos called “Survival Saturday”. We’ll be keeping the tips simple and fun and challenging others to get involved. We want this to be something people can do with family and friends. The purpose is to encourage each other to get outdoors and enjoy the summer while developing the tools to keep us all safe.

This week is a simple video tip on how to make a cooking fire. Watch the video, relax and give it a try for yourself:

Preparing kids to be safe

As I’ve mentioned previously, our family has some ambitious adventure plans this summer. On various outings we’ll be taking some or all of our kids with us into the backcountry. I’m not talking parks, I’m talking areas out of cellphone range with lions (mountain) and bears (not teddys). What makes me feel comfortable is that we do all we can to prepare our kids and ourselves for potential problems.

Every year, I take the kids through a mixture of survival skills and bear safety instructions. They have it droned into them what it means to be safe and what to do if they’re lost. Each of them has a kid specific safety kit to keep them safe for 24 hours, too.

As a parent we feel it our responsibility to be prepared to help too. My wife knows first aid and this year I’ll be taking a wilderness first aid course to make sure I know what to do in serious situations.

In the end, no situation is 100% safe, but my wife and I have decided to do our research and prepared our kids so that we’re at least better prepared for what may come.

As parents or grandparents what do you do to prepare yourselves and your kids for adventure?

Help me plan a survival trip – 2013

This year I’m planning on doing another survival trip. I’d like your help in making some realistic plans. My brother has already told me he wants to go, but aside from being resourceful, he doesn’t have much experience with survival skills.

Essentially I’m looking for your advice on:

  • What type of scenario I should try to simulate?
  • How many days should I go for?
  • What gear should I take with me?
  • Should I self-rescue?

I’m looking to practice and learn new skills and I think this is the best way to do it. I always bring a GPS Spot messenger for these types of trips as well as some emergency gear that I’m not allowed to touch unless it’s a real emergency. I have a wife and 4 kids to look after so I have to mitigate risks.

Last years trip was Spring in the Canadian forests. I went out for 3 days (2 nights) to a mountain lake where temperatures dropped to freezing at night. This year we’ll be going out in Summer, but from there I’m open.

Here are the highlights and below them is the actual series. Please leave your comments and ideas below so we can work this out.


Spring Survival Canadian Forests

Paracord Laces – Another reason to carry cordage

Of the many survival situations that one thinks of, broken shoelaces probably isn’t very high on the list. It should be, though. Good laces go hand in hand with good shoes. Don’t believe me? Try hiking all day in your favourite shoes or boots, but with  broken laces!
The risk of breaking a lace on the trail should be just one more reason to bring along some kind of cordage on your next hike.
About a month and a half ago, while I was tightening up my Treksta Assault hiking boots, the lace broke. No problem. I managed to repair it with two knots and I was up and running.
Fast-forward to last Friday. My wife called me to let me know the 4×4 had lodged itself wheel-deep in a roadside problem, so I quickly sprang into my boots. Unfortunately, I sprung too hard and broke the lace a second time. Sadly, it couldn’t be fixed and I had to retire my boots until a replacement lace could be found–except, I couldn’t find one.
As I puzzled over solutions, I asked myself the question: what would I have done if this had happened on a hiking trip? The answer was clear: paracord (Yet another use! It really is the hiker’s cure-all, like duct tape).
I always bring paracord along with me on a hike. Proper military grade paracord can support 550 lbs of weight and is very versatile. I use it for a lot of projects. In this case, my Olive drab paracord would have to serve as new laces for my hiking boots. It was a straight-forward project and easy do do.
All I needed was: paracord, a knife and lighter.
I started by pulling out my good lace and measuring out a length of paracord against it. Then, with my knife I cut off the length of paracord.
Next, I took the lighter and melted each of the ends of paracord down by running the flame up and down the last half of inch of it. Using the lighter, I shaped it the tip into a point that would fit through the laces.
$8.99 at Amazon.com

Then, I simply laced the Paracord through the eyes of the shoe. The end result was very satisfying. They look decent enough to wear around town, they are much stronger than my previous laces, and in an emergency I can sacrifice them or at least part of them to gain a lot of good cordage.

TELL US. What’s your cord of choice for backpacking or hiking? Do you wear paracord bracelets or belts on the trail for use in emergencies? What stories can you share of how you’ve used cordage in an emergency?

Top Outdoor Adventure Videos of the Year

As many of you know, The Outdoor Adventure has a youtube channel with just over 2300 subscribers and 1500 daily views. Because people seemed to like our most popular posts of 2012 article, I thought I’d do the same for our youtube videos. Take a look below to see what was watched last year on our channel.

We do post some content that doesn’t make it onto our channel, so if you don’t want to miss anything, I recommend stopping by BCOutdoorSurvival on youtube.

In 2012 we had over 600,000 views and to make it interesting we’ve taken the top videos and divided them into categories: Gear Reviews, DIY, and Survival and Primitive skills:


Top Gear Review Videos of 2012:

Swiss Ranger Aluminum Military Stove – This old stove can be picked up for $10 and is just plain amazing. They put a lot of research into the design, and it shows.

JetBoil Zip – The solo, bare-bones model of the popular Jetboil system was obviously on a lot of people’s wish lists. What can we say? Stoves are popular.


Top DIY Videos of 2012:

Penny Alcohol Backpacking Stove – This was one of our first videos so we apologize for the quality. It seems though, with the economy suffering people wanted to save money on their backpacking gear… either that or they’re all just pyros.

DIY: How to Make a Backpacking Wood Stove – This easy instructional involving a couple of cans from canned goods turns out a highly efficient stove with afterburner.

DIY Axe Body Spray Stove – Take a simple axe aeresol can and reuse it. It makes a decent little alcohol stove. Plus, it keeps more junk out of the land fills.

Top Survival and Primitive Skills Videos of 2012:

How to cook a fish on a stone – You can’t get a clearly title than this, can you? Oh, and the fish was delicious!

How to start a fire with water – This instructional using only water and plastic wrap was quickly picked up by both Treehugger and Lifehacker and got over 25000 views overnight.
DIY: How to Make an Emergency Desalination Still – My goal with this was to put together a means for distilling dirty or salty water with what a person normally carries on a backpacking trip. It works, even if desalination is notoriously time consuming.

How to Prevent Snow Blindness

A couple weeks ago I was up on a glacier at over 17000 feet to do a video review when the sun came out full force and I realised that I didn’t have any sunglasses. After struggling for close to an hour on the the slope I was starting to see dancing stars and I realized that I was on the road to causing temporary damage to my vision. I pulled off onto a rocky area to try to deal with it.

Fortunately, although I forgot my sunglasses, I had packed a few other items in my pack and was able to make something to allow me see on my way back down off the glacier. Continue on to read more and see the video.

I’m sure we’ve all seen some kind of documentary or something that talks about this idea and maybe even had to resort to duplicating it. It was a fun experience and I decided to video tape it to see how it would go.

Snow Blindness or Photokeratitis is essentially when you give your cornea or conjunctiva a sunburn from intense UV rays. At 17000 feet I was at a much serious risk of that than I would have been at lower elevations.

Inuit goggles – wikimedia

Traditionally the Inuit of Canada used to carve goggles out of caribou antlers. They were held on the head with sinew. Others used birch bark, or wood, whatever resources were available.

Question: Have you ever suffered as a result of forgetting sun protection or had to improvise? Leave a comment below!


Was that a Sheep or Goat?

If you’re not sure what it was that you just saw, check out this funny and informative video by the Parks Canada.

Can you start a fire with water? – with video

Yes, you can.

A few months back I was browsing twitter when a tweet crossed my eye. It was written by a survival training company and it said that it was impossible to start a fire with water. The writer was referring to a recent survival show episode where the co-host supposedly did just that. I saw the episode and admit that it was a bit suspicious. So I went and did research on the physics.

It turned out the science was there (as I vaguely remembered from my grade 11 and 12 physics class). Light can refract through water and depending on the shape of the vessel can be redirected. Theoretically, it was possible if you could get the light to focus enough to create a hot spot (like using a magnifying glass to start a fire).
Back to twitter. After a somewhat heated debate (he later removed all his tweets from twitter) I took him up on the offer to try it, prove it and video it. I took two continuous shots from two different perspectives. I mixed them together, but each shot shows the clear focusing of light and smoke coming off the paper.
I was able to get a coal and that’s enough to prove that this method can be used to start a fire. Take a look at the video I put together and try it yourself. I’d love to see a video response from somebody trying it.

How to:
What you’ll need is a piece of plastic wrap used for food, and water.
Steps:
  1. Pour the water into the plastic.
  2. Close the plastic together at the top.
  3. Twist the bubble of water until it is sealed.
  4. Continue twisting until the bubble is firm.
  5. Take it outside on a clear day (it’s easiest when the sun is directly overhead).
  6. Manipulate the plastic bubble until the light passing through the bubble focuses into 1 point.
  7. Put tinder where the focal point is and wait till it combusts. *tip: the darker the tinder, the less light is reflected and the easier it is to create a coal.

Survival in the Outdoors: 5 Wild Vegetable Greens to Feed and Heal You

Editor’s Comment: A special thanks to Melody McKinnon for contacting us and putting together this article. As usual, make sure you can correctly identify these items before consuming. Check for allergies before eating large quantities.


Survival in the Outdoors:  5 Wild Vegetable Greens to Feed and Heal You 


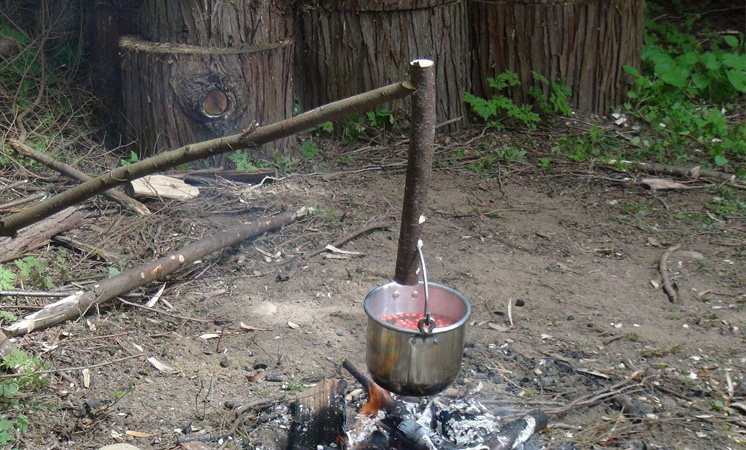
Whether you’re lost in the wild or you enjoy survival camping in remote areas, wild vegetable greens are a tasty source of nutrients and moisture.  They are every bit as nutritious as domestic vegetables, often even more-so.  Wild greens can be eaten raw or are easily cooked in boiling water over a campfire (similar to spinach). Several also offer medicinal properties and all support healthy digestion.

The following five wild vegetable greens are common all over North America.  If you can identify them, you’ll enjoy delicious camp food and survive your wild adventure in fantastic shape.

Dandelion Leaves (Taraxacum officinale)

source wikimedia

Probably the most easily identifiable and widely available edible wild plant, dandelion greens can play a nutritious role in your survival. They are a good source of Beta Carotene, Magnesium, Phosphorus, Potassium, Vitamins A, B6, C, E, K, Thiamin, Riboflavin, Calcium, Iron and Manganese.  They do have a mild diuretic effect so you may wish to limit intake if water is scarce.  Dandelion leaf sap may be used to treat blisters, boils, abscesses, and stings.

Field Identification:  The puffs of bright yellow flowers on hollow stems and sharply serrated leaves are easy to spot.  New leaves found on plants before they flower are the best tasting.

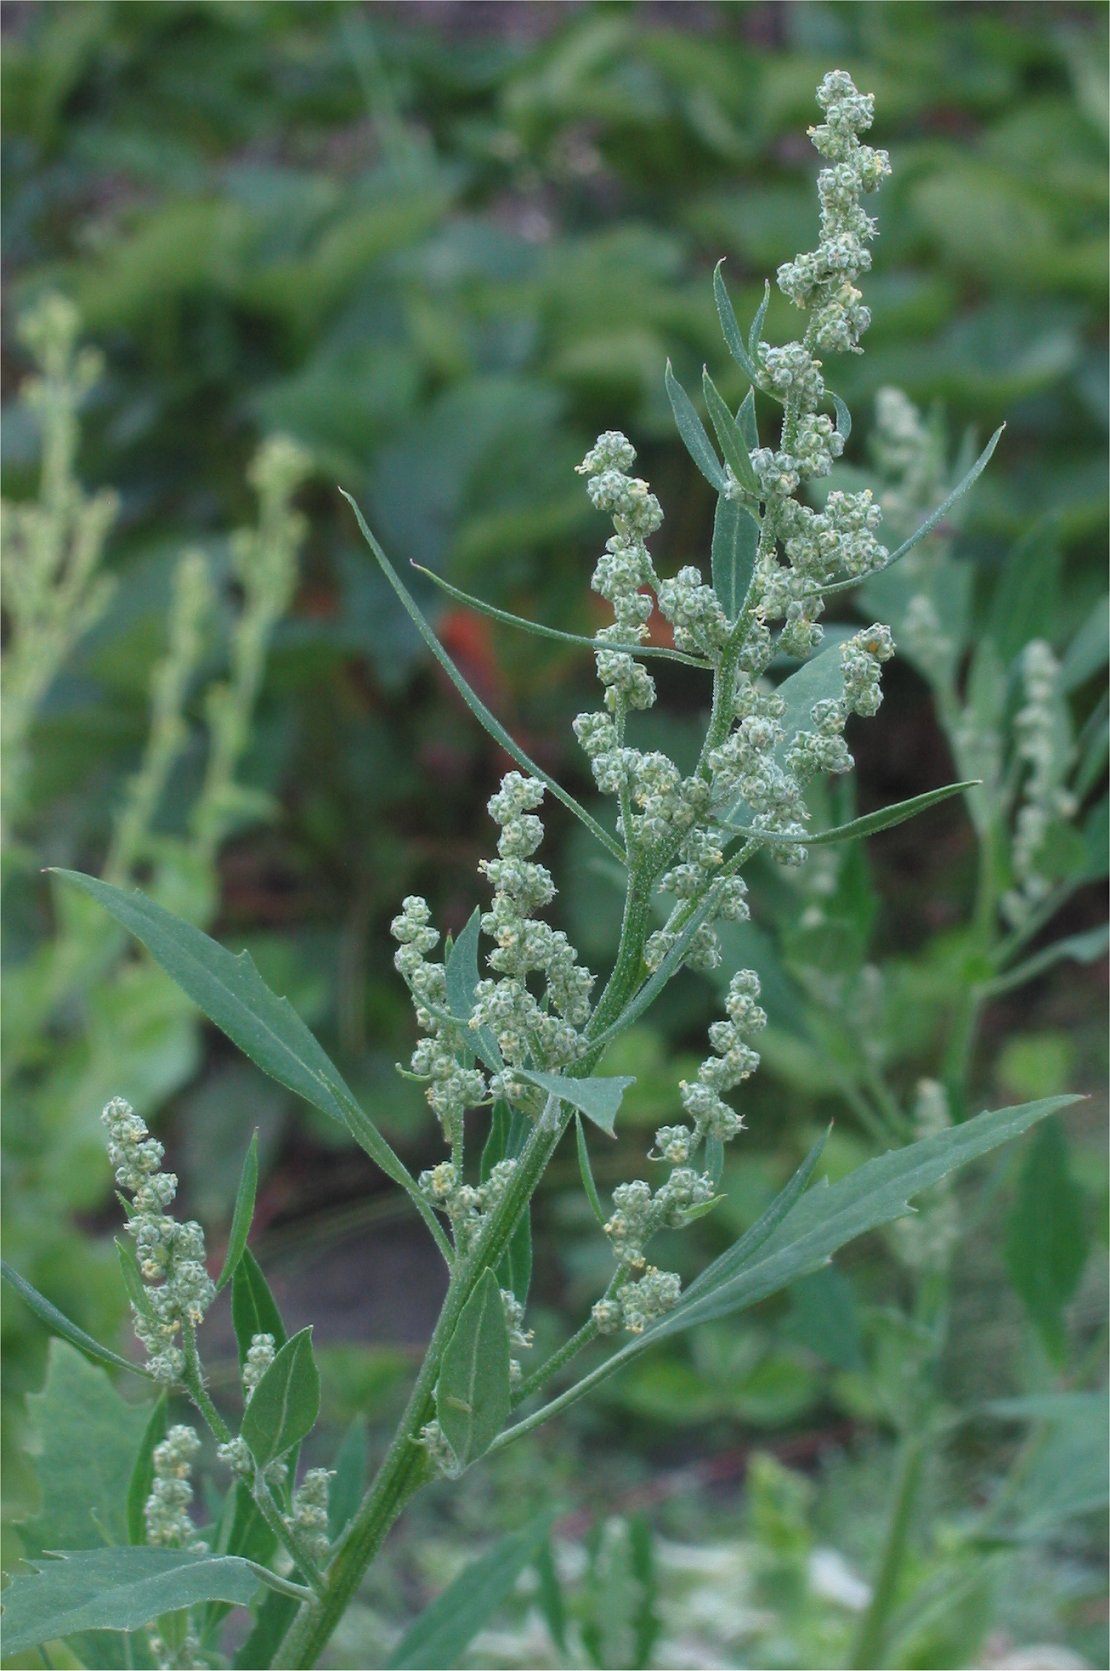
Lambs Quarters Leaves (Chenopodium album)

source wikimedia


Lambs Quarters are a good source of Niacin, Folate, Iron, Magnesium, Phosphorus and vegetable protein, as well as Vitamins A, B6, C, Thiamin, Riboflavin, Calcium, Potassium and Manganese.  The leaves are exceptionally rich in Betta Carotene.  This plant will boost your immunity and stamina during stressful survival situations.

Field Identification:  The leaves of Lambs Quarters have a light powder coating on new leaves and on the underside of mature leaves.  Differentiate between Lamb’s Quarters and toxic Epazote by smell – Lamb’s Quarters have a neutral scent while Epazote has a strong scent.

Chicory Leaves (Cichorium intybus)

source wikimedia


Chicory is a good source of Thiamin, Niacin and Zinc, as well as Vitamins A, B6, C, E, K, Riboflavin, Folate, Pantothenic Acid, Calcium, Iron, Magnesium, Potassium and Manganese. Mashed or boiled leaves make a good anti-inflammatory poultice for minor wounds.

Field Identification:  This plant can be up to four feet tall with blue flowers all Summer long.  Chicory leaves closely resemble Dandelion leaves, but the points of the smaller leaf teeth are directed upwards.  Like dandelions, new leaves in Spring or late Autumn are the best tasting.

Purslane Leaves (Portulaca oleracea)
Said to be a favorite of Gandhi, Purslane, or ‘Pusley’, is a good source of Thiamin, Niacin, Vitamin B6, Folate and Phosphorus, and a very good source of Vitamins A, C, Riboflavin, Calcium, Iron, Magnesium, Potassium, Copper and Manganese.  It’s also a noted source of alpha-linolenic acid, an essential omega-3 fatty acid that may be difficult to find alternate sources of in survival situations.  Purslane offers anti-inflammatory properties that may be used to treat injuries and swelling.

source wikimedia


Field Identification:  This plant has thick, red, creeping stalks with sturdy leaves about an inch long.  It has small yellow flowers that give way to tiny black seeds (which can be ground for flour). It may be confused or cross-collected with the poisonous Spotted Spurge (Euphorbia maculata), but the latter has a significantly thinner stem and white sap.

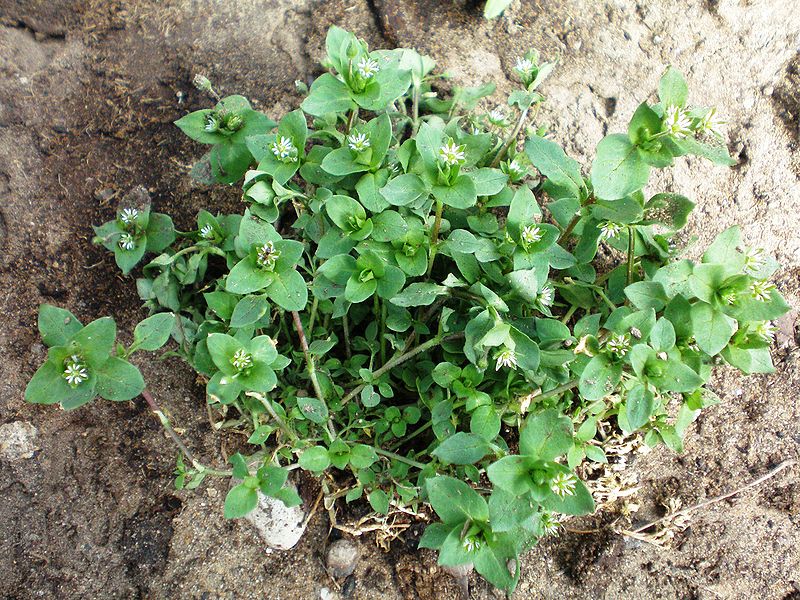
Chickweed (Stellaria media)

Any chicken will tell you that Chickweed is a tasty wild vegetable, although humans may enjoy it more if it’s cooked to bring out its spinach-like flavor.  Chickweed is a good source or Vitamins A, C, Iron, Phosphorus, Calcium, Selenium, Magnesium, Potassium and vegetable protein.  It may also be used to treat cuts or rashes

by Hugo.arg source wikimedia


Field Identification:  The Chickweed plant spreads up to 16 inches and may be up to eight inches tall. The leaves grow in pairs up to one inch in length with an oval shape and smooth edges. Take great care in identifying it as it resembles the poisonous Spotted Spurge (Euphorbia maculata). White sap indicates Spotted Spurge.

If you’d like to be more prepared to survive the great outdoors by eating wild plants, pick up a copy of The Encyclopedia of Edible Plants of North America: Nature’s Green Feast by Francois Couplan.
When it comes to survival, eating the above wild plants will ensure you’re one of the fittest!


Author Bio

Melody McKinnon holds 52 certifications revolving around nutrition, biochemistry, general sciences, business, marketing, and writing. You can find Melody writing at AllNaturalPetCare.com, (http://www.AllNaturalPetCare.com) on the All Natural Pet Care Blog (http://www.allnaturalpetcare.com/blog) and for Petfood Industry Magazine.