Home / video (page 9)

video

Golite Beartooth 650 down jacket review (video)

Two years ago I was looking for a lightweight, compact, warm jacket at a reasonable price. After a lot of research and the promise that I could choose my birthday present, I picked up the Golite Beartooth down jacket. At the time it was less than $70 so it was an easy choice for a reasonably high lofting down jacket. I’ve had 2 years to test it so I figured it was worth a review.

Golite has update the jacket adding an extra 2 ounces (now 18 ounces), so here are the current specs:

  • 650 fill power goose down
  • 130 g of fill
  • 100% polyester DWR outer
  • 100% polyester inner
  • Included stuff sack
  • Micro chamois chin liner
  • 2 exterior zip hand warmer pockets
  • 1 zip exterior chest pocket
  • 1 interior zip chest pocket
  • Suggested price: $200
  • Actual current price on Golite: $59.99

And now for my thoughts.

GoliteBeartooth1

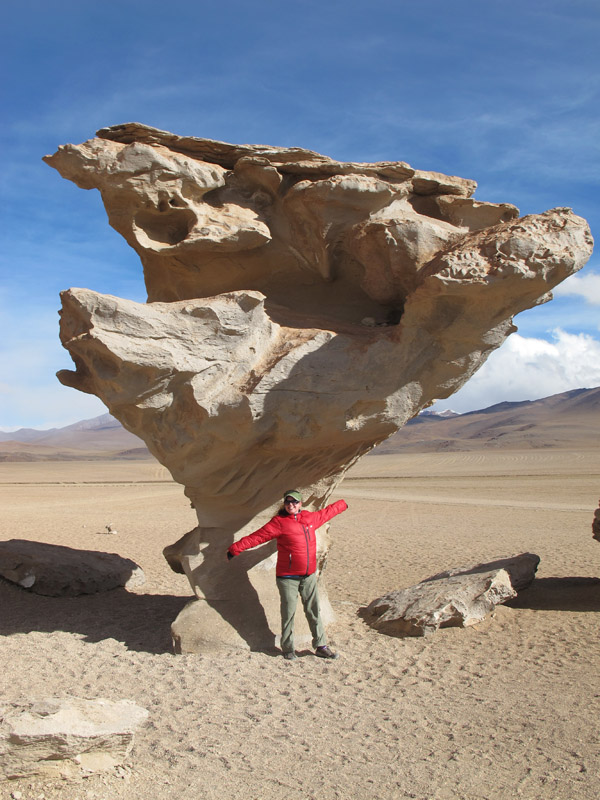
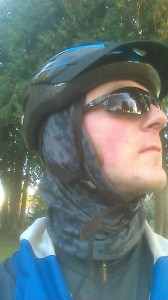
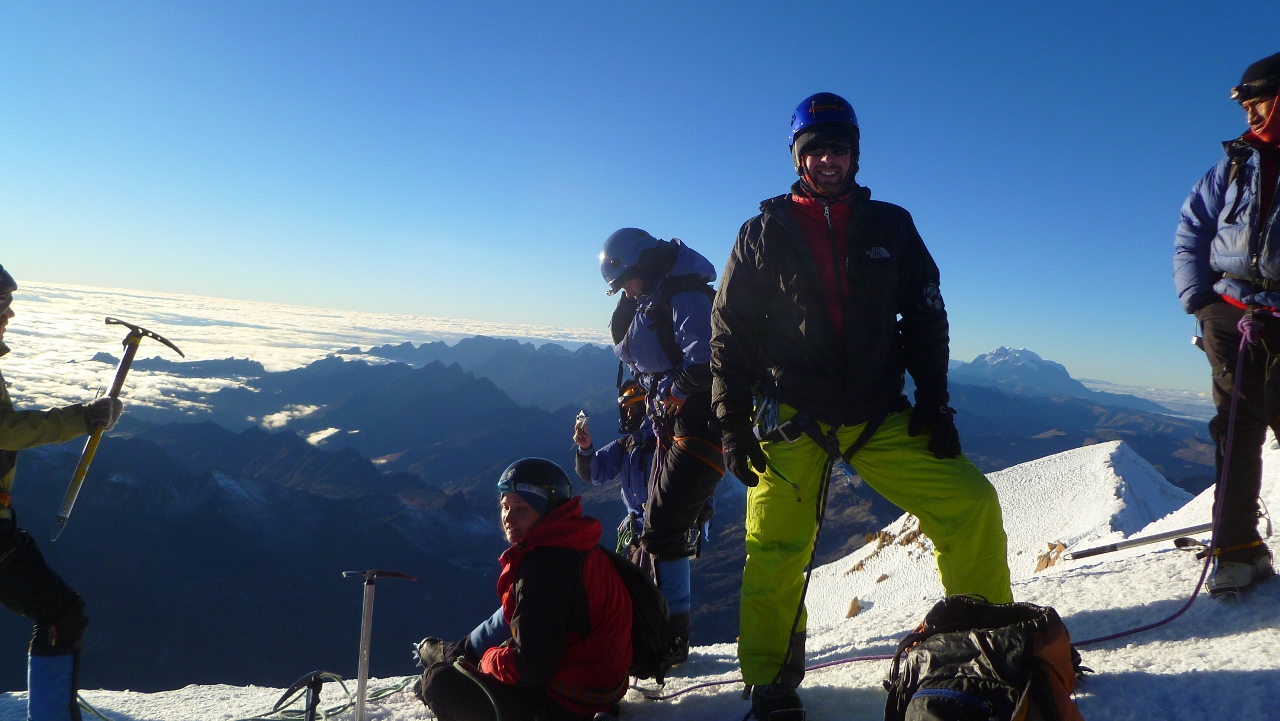
As I’ve said, I’ve had the jacket for about 2 years. In that time my wife and I have taken it up to nearly 20000 feet, to salt flats and well below freezing, in rainy, tropical climates and more. We’ve really put it through its paces.

My version of the jacket comes in at 16 ounces (1 pound) and for such a light weight it does a great job of keeping me warm. The hand warmer pockets are a savior. they honestly feel like heated pockets. I make great use of them.

The lightweight polyester liner does a great job breathing, but has its downside. When I active in it I never work up a sweat, unless I have a waterproof shell on. In that case the moisture obviously can’t escape and the jacket gets damp. The one downside of the lightweight polyester is that it occasionally sheds feathers. That’s a combination of the lightweight fabric and 650 down. It doesn’t she a lot, but you will see the odd white piece of fluff creeping through the jacket.

To save weight, they’ve use lighter weight zippers. It was a good move for the pockets, but for the main zipper I think a slightly heavier zipper would have helped prevent snags and catching. One thing I really like is that the zipper is 2 way. You can unzip from the top or bottom. It’s great for getting access to pockets, or as my 8 month pregnant wife found, great for making child number 4 a bit more comfortable.

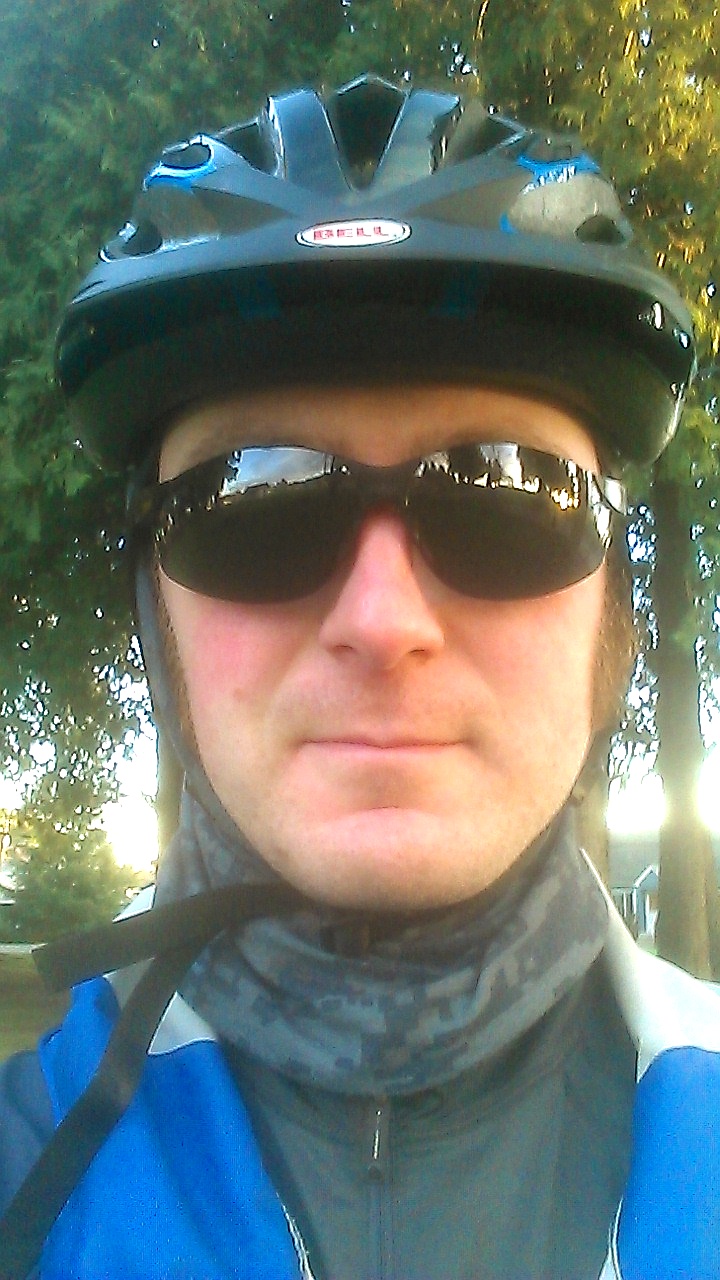
Having the micro chamois around the collar was a simple, but great decision, especially for bearded men (or women for that matter). I’ve had a few jackets where beard hair scratches the jacket or gets caught in the fabric. It’s not a problem with the beartooth down jacket.

One thing I found on my 2010 edition jacket is that it is a bit short on the length and arms. I’m an average medium and when I lift my arms my wrists are a bit exposed and breezes can come in around my waist (despite the shock cord waist band).

People talk about down being a pain for wet weather. I have gotten mine wet a few times, but the lightweight shell allows it to dry very quickly. Hanging it up in a breeze or in front of a heater dries it out in no time.

POsummitHP

A huge benefit is how small it packs down. You can squish it down incredibly small for packing (about the size of a softball in a compression sack) and know you’ve got a ton of warmth for when you need it.

Conclusions:

The Beartooth down jacket is an excellent entry level down jacket. It’s packable and warm and a great choice for someone on a budget.

What I like:

  • Weight
  • Warmth
  • pack-ability
  • Price ($60 for a 650 down jacket!)

Improvements (that may have been made already)

  • Runs a bit small
  • Sheds small amounts of down
  • Main zipper catches from time to time

Check out the video below to see the jacket in action. What Golite gear do you own? Are you happy with Golite as a brand?


Pelican 0915 Memory Card Holder review (video)

When it comes to memory cards, organization has not been one of my strong suits w. Typically I shove the 3 or 4 memory cards that I have into my pockets for backpacking. Sometimes I’d use a ziploc bag, but mostly I just fumbled around hoping that I had the right card and that it was empty. This summer I have some longer trips planned, 2 weeks on the John Muir Trail, 1 week on Bowron Lakes, a couple survival trips and a lot more memory. I picked up the Pelican 0915 Memory Card Holder to take up the challenge.

The Pelican 0915 is a shock proof, water resistant (waterproof in my opinion) made of polycarbonate. It’s simple, functional and practically bombproof. It holds 12 SD cards, and underneath those it hides space for another 6 mini SD cards and 6 micro SD cards. It has a place where you can hang it or put a lanyard through so you don’t lose it and well… that’s pretty much it.

P1040562

It’s a simple tool that I know I can trust to keep me organized while keeping my memory cards safe and dry. The only potential downside is that it weighs a bit over 3 ounces. That’s not much, and a sacrifice that I’m prepared to make, but gram weenies would probably leave this behind.

Specs

  •  Stores 12 SD cards, 6 mini SD cards and 6 micro SD cards
  • 4.79″ x 2.25″ x 0.55″ (12.2 x 5.7 x 1.4 cm) (interior dimensions)
  • 3.3 ounces
  • Insert liner for absorbing shock and protecting memory cards
  • Polycarbonate resin
  • Water resistant seal
  • $15


Vaude Astra II 55 + 10 backpack (with video)

Backpacking with a family presents a conundrum. Even if one has an ultralight philosophy it still results in heavy loads. One has to cut down on weight as much as possible, but still ends up carrying all of the gear for (in our case) 4 kids. This means that an UL backpack just won’t cut it. Because of that, when I was shopping for a backpack a couple years ago I opted for the Vaude Astra II: a 65 liter backpack that is built for hauling weight comfortably.

An example of how the weight adds up was on a father-daughter backpacking trip with my almost 5-year-old daughter. It was her first 3-day backcountry backpacking trip so I had to make sure I had everything and more to make her comfortable… and want to go backpacking again. Sure, she had a daypack with snacks in, but I had all the meals, more snacks, fuel, sleeping pads, survival gear, first aid kit, tent, sleeping bags, more food, lots of extra clothes, bear spray, cordage, fishing rod, most of the water, etc., etc., etc… oh, and 2 small, collapsible chairs. My pack weighed much more than the others we went with, despite the fact that I packed my golite tent, UL closed cell foam pads and mini alcohol stove. Weight was a guarantee, but the Vaude Astra II made it as comfortable as one could be lugging around everything minus the kitchen sink.

DSC01132

The Astra II is a highly padded and adjustable pack. It uses a heavy duty velcro system for adjusting the torso size from small up to an XL. It uses a sturdy internal frame and ample padding to make one happier about the fact they are carrying a lot of weight.

The back padding is not only comfortable but breathes very well. There’s a ton of space for ventilation so you stay cool when you’re lugging all that extra gear.

The 55 + 10 is a reference to its ability to hold 55 liters in the main pack and an extra 10 in the lid. The lid itself can be removed, but it leaves a 5 inch tall flap of fabric to flap in the wind.

Almost everything is easy access in this pack. First off, there’s a separate sleeping bag compartment that opens from both the outside and inside. On the back of the pack there’s also a double zipper that starts at the top and unzips all the way down to the sleeping bag compartment allowing access to everything inside the pack. Underneath the removable lid there’s a cinch to close the main pack for extra security and for when you don’t take the lid with you.

There are two very large side pockets with zips. I can fit my Vaude Ice Peak 150 sleeping bag in one side with room to spare. Below the side zip pockets there are elastic pockets that can fit smaller items. The downside is that once you fill up the zip pockets it’s almost impossible to get items in and out of the elastic pockets below.

P1020423

There are plenty of straps to cinch down the pack for carrying smaller loads and attach stuff to the outside of the pack, but honestly the I feel the straps are too long and a bit too heavy duty. You could cut a couple ounces off the weight if you shortened them and used lighter duty webbing and buckles. On the back there are loops for trekking poles and/or ice axes as well.

One more thing. On the bottom of the pack there’s a pocket for the built-in rain cover. The more dexterous among us can even take it out and put it on the pack without even taking the pack off. It connects inside the pocket with a snap, but can be completely removed if one so desires. My pack came with a high visibility orange cover which would be useful for signalling in an emergency.

For versatility and heavier loads, the Astra II by Vaude is a good pack that provides capacity and comfort. I continue to use it for family trips and it’s sturdy enough that I don’t have to worry about lending it to friends.


Pros

  • Comfortable
  • Highly adjustable
  • Included rain cover
  • high capacity
  • carries heavy loads
  • Easy Access
  • Hydration compatible

Cons

  • Heavy (4 lbs 15 ounces avg)
  • Webbing (straps) are too long
  • Elastic Side Pockets are hard to access when side zip pockets are used
  • No hip belt pockets

The Vaude Astra II hasa MSRP of $199.95, but can be purchased at the Sierra Trading Post for $129.95.


Jetboil Helios Cook System – Great for group cooking

One of the challenges of backpacking with a family is finding a cook system that gets the job done quickly. Enter the Jetboil Helios.

The Jetboil Helios is a canister stove system with 2.1 liter pot that shares the Flux ring technology that made Jetboil system famous. It’s been on the market for at least 5 years now, but is still popular because of its functionality, capacity and ability to handle cold weather extremely well.

Check out the video down below to get a better look at the system. Oh and if you’re looking for a Jetboil system, use this link to get 25% off at the Sierra Trading Post. http://bit.ly/16M7N85 I do not get a  commission for purchases made through this link.

choro 10 pizza

Jetboil Helios Specs:

  • 2L FluxRing® Pot with neoprene cozy
  • Pot-supporting burner base
  • Push-button igniter assembly
  • Fuel can stabilizer
  • Snap-on windscreen
  • Lid and bottom covers that double as plates (lid makes a good ‘flying disc’ for added fun around camp)
  • 28 ounce weight
  • Optional 3 liter pot
  • MSRP: $149.95

All-in-one

If you’re a fan of all-in-one systems this is a great choice. It comes with a wind screen that snaps onto the stove base and the pot slips onto the stove that creates a very stable connection. In addition to all that you can take it all apart and fit the stove, stand, windscreen, canister and canister stand into the pot together for storage. You may want to carry an elastic band to stop the handles from flapping around.

A Cold Weather Stove Where it steps apart from regular canister stoves is how it uses an inverted canister and pre-heater to keep it working efficiently in cold weather. Inverting the canister means you don’t have to worry a bit low pressure from either cold temperatures or low fuel. As long as there is liquid fuel in the canister it will get carried along to the stove and the heat coil will vaporize it and turn it into gas to be burned.

This stove has been around for years and yet I saw someone describe a newer copy-cat stove at the OR show as “new and innovative”. There are a couple stoves on the market that now make use of this concept, which just shows that the concept is tested and proved.

Good for the Backcountry Gourmet 3addvegetables

The Helios has a fine adjust for better control of fuel flow and temperature for simmering and greater flexibility with cooking options. I found it a bit of a challenge when I started using it as there’s a time delay in how the stove responds to adjustments. There is a decent amount of fuel in the fuel line so it can take 10 seconds or more before you notice a change in the stove. For example, once you turn it off completely it will continue burning off fuel for a good 10 to 15 seconds. That said, I’ve managed to

  • bake pizza,
  • simmer pasta,
  • cook quinua,
  • fry fresh meat and vegetables,
  • and more on this system.

It works very well on a large number of meals for those of us who like to be adventurous with our cuisine. Oh, and I frequently use the lid and bottom cover as both cutting boards and bowls.

choro 17 quinuaital

Flux Ring Efficiency

Anyone familiar with Jetboil stoves will know about the Flux Ring Technology. There’s a heat exchanger on the bottom of the pot that captures the heat from the stove and transfers it into the pot. This is what makes the Jetboil series efficient and gives a more even temperature across the bottom of the pot.

You need to have the stove at a medium to high temperature to take advantage of this. I tried a very low flow for the stove and it was boiling in the center and cool on the outside. I did have the typical burn spot in the middle of the pot that comes from not having enough water or not stirring the food well enough. It can be avoided by continuing to add cold water. That also helps maintain a simmer while you cook.

Who is this for?

I feel I need to emphasize that this is not an ultra-light, solo system. It’s built for group cooking. I’ve cooked for four adults with this setup and two adults and four kids. Everyone was full afterwards.

It’s also a good choice for those of us that want to try fancier foods on the trail. With a bit of practice one can depart from the typical freeze-dried meals and indulge in some more complicated and more tasty meals that the solo Jetboil systems can’t handle.

Take a look at the video below and leave a comment telling us what your favourite stove system is and what your thoughts are on the Jetboil line.

Disclaimer: I was given this system by Sierra Trading Post and asked to provide an honest review of it. All opinions are my own and what I would tell a friend.

Deconstructed Trail Pizza for a Crowd

A couple weeks ago I took some friends down the Choro Trail in the rainy season. To combat the discouragement of wet weather we decided to pull out some awesome meals using the Jetboil Helios that I picked up from the Sierra Trading Post.

Yes, I had made a simple trail pizza for one person, but cooking for a crowd is more demanding, and requires a bit more creativity, and a bigger pot.

Want 25% off Jetboil gear at the Sierra Trading Post? Use this link: http://stp.me/JetboilHeliosStove

Paul’s Deconstructed Trail Pizza for 4 hungry backpackers – Makes 6 to 7 – 7.5” pizzas with a 2.1 Liter Jetboil Helios pot

Here’s the Ingredients you’ll need:

  • Pre-mixed quick dough
    • Dry Ingredients
      • 2 cup flour
      • 3 tsp baking powder
      • 1 tsp salt
    • Wet Ingredients
      • 2 cups water
      • 3 tbsps oil – for bread
  • Toppings
    • 4 x spanish sausage (or equivalent in pre-packaged pepperoni)
    • 1 lb mozzarella or other prefered cheese
  • Tomato Sauce
    • 2 x 6 oz package of tomato paste/sauce
    • 1 tsp Garlic
    • 1 tsp Oregano
    • 1 tsp Basil
    • 1 tsp Thyme
  • For the Pan
    • 3/4 cup corn meal
    • 7 tbsps oil

Prep:

  1. Mix tomato sauce ingredients together in a bowl and let sit
  2. Mix pizza dough dry and wet ingredients together and let sit.
  3. Slice Spanish Sausage into 3/16” to 1/4” thick rounds.
  4. Slice cheese into 1/16” slices.

Cooking:

The biggest challenge of cooking this recipe is keeping the bottom from burning. To overcome this I changed other recipes and processes, including corn meal and putting the sausage on the bottom.

  1. Add 1 tbsp of oil to the pan, rotating the pan until the bottom (and sides up to 1 inch high) are coated.
  2. Sprinkle with corn meal until there is a thin layer of corn meal on it.
  3. Line the bottom of the pan with sausage slices until you have 1 complete layer.
  4. Pour over enough dough to juts cover the sausages.
  5. Put the pot on the stove with lid on top.
  6. Let cook for 3-5 minutes or until the dough has cooked.
  7. Remove from heat and apply tomato sauce mix to the top of the pizza.
  8. Cover with sliced cheese.
  9. Return to the heat with lid on top and let cook for another 1-2 minutes or until the cheese has melted.

Serving:

The real challenge with this pizza is removing it from the pot. The corn meal helps. My best success is the sumo drop. With the lid on the pot and your hand on the top lift the whole pot, flip it and stop on the way down. Just like getting the ketchup out of the ketchup bottle, this same action will pop the pizza out of the pot and into the lid. Then, you can just remove the lid and eat off it like a plate.


Check out the video below for an example of how to do it and to see how much everyone enjoyed it!

The Hoo-Rag

Who needs a Hoo-Rag? You do!


About 4 months ago the mail was opened to reveal a bandana/buff to review call the “Hoo-rag“. Now, I have found bandanas to be useful in the past, particularly as they help to protect my neck from the sun while out on the trail, but this was an opportunity to put a bandana through a rigorous daily test… cycle commuting in the middle of winter.1

Now, for those who aren’t completely familiar with what we are talking about with a bandana/buff, it is essentially a 18-inch long tube of thin fabric that has horizontal stretch but is fairly rigid vertically. It can fit over your head and can be twisted/tied/adjusted to several looks. On the Hoo-Rag packaging the graphic shows what would be the 6 most likely used ways of wearing the Hoo-Rag.

What I also found is that when you take the Hoo-Rag out of its packaging, you may notice a graphic hidden by the sticker showing some of the other, less common (Or less useful) ways of wearing the Hoo-Rag. I did not notice the graphic on the package for my own but did notice it on one I bought for my dad.

So, having received the Hoo-Rag, I began to wear it on my regular 5 mile cycle to work. In the Pacific Northwest, weather can change quite frequently and I found the Hoo-Rag to be useful in all of them. On the warmer days it kept the sun off my neck or the sweat out of my face. And as the winter set in I began to cover more and more of my head, and in particular covering up my ears. This is wear the Hoo-Rag impressed me the most. Not only was I able to easily put a helmet on over top of the Hoo-Rag, but my ears hardly cooled at all in spite of the weather near freezing. In contrast, last year at this same time I was wearing a fleece balaclava under my helmet. The weather recently dipped a few degrees below freezing, which finally made it too cold to wear the Hoo-Rag on its own and forced me to find another layer. Overall, I found the performance of this bandana to be very impressive.

2 Now, the points raised so far are probably true of many bandanas, so what makes the Hoo-Rag different?

A couple items in particular about the Hoo-Rag:

1) After a couple runs in the wash, the Hoo-Rag is fairing better than another bandana I have of similar design.

2) There are several well thought out patterns to choose from, making it very likely that you will find a design you like.

As good as the Hoo-Rag is, I did find a few things that would have been a bit better.

1) The Hoo-Rag is simply a couple inches too short. I cannot keep my head and neck both covered with the Hoo-Rag, which I found disappointing. An extra couple inches would go a long way to distinguish the Hoo-Rag from similar bandanas in the marketplace.

2) After a while the top and bottom curl from the fabric stretching. This commonly happens to bandanas of this style, and is a bit of an annoyance as the curl gets more pronounced.

Overall, I have found the Hoo-Rag a pleasure to use even though it is just a little shorter than what I would like. The design and uses are perfect for my normal outdoor activities (cycle commuting, backpacking) and the pricing is reasonable among similar buffs/bandanas. However, while the Hoo-Rag works well for me, I didn’t consider it to be extraordinarily different from other bandanas or buffs that are available. Ultimately you will want to choose what works for you, and for me the Hoo-Rag works very well.


The Hoo-Rag sells for $14.95 online.

Good eats and cold feet – rainy season on the Choro Trail

When some friends came over to visit from various parts of the world, I knew I had to take them on the Choro Trail… even if it was the rainy season.

We ended up being caught in a snowstorm at around 16000 feet and slipping down the Incan paving stones in the rain. To help make up for the weather we brought along a Jetboil Helios and made some gourmet meals. It was an awesome trip.

Here’s a video of day 1, which brought us from the cold mountain tops to a semi-tropical campsite. Food was Peanut Pad Thai and deconstructed pizza. I also got some time to try out my Sony Action Cam in the river too.

A special thanks to Sierra Trading Post for the Jetboil Helios and Mountain Hardwear Versteeg. They were awesome. Expect a full review in the near future.

Take a look and let us know what you think.

All video is with my new Sony PJ580v Handycam or Sony Action Cam.


Hiker Diaries #1 – Singing in the Rain

For 2013, Adam from www.hikingthetrail.com and myself, Paul from www.theoutdooradventure.net have decided to start a back-and-forth video diary about all things hiking.

Today we’re talking about rain and shelter. We’d love your participation so check out the video below and / or head over to youtube to watch Hiker Diaries #1 – Singing in the Rain to post your own video response.

We’ll be posting all videos on youtube so that anyone who would like to can participate with comments and/or video responses.

1 Can Side Burner Alcohol Stove

I felt it was time to post an instructional on how to make an alcohol stove and keeping it even greener: Just use 1 can. I’ve used this design many times and I find it to make a more efficient stove than using 2 cans because of how the inner wall works.

This design can be used for any tall can whether it be the energy drinks like monster, the red bull style cans or full sized pop cans. The only thing is that you need to be extra careful while cutting not to make mistakes.

See the video below and continue for the instructional:

What you need:

  • A tall beverage can, whether that’s a beer can, energy drink can or other, it just needs to be the tall version
  • A ruler
  • an exacto knife or other blade
  • a pair of scissors
  • a marker
  • pliers
  • a lighter
  • and a push pin
Mark and Measure:

Now the first thing you’ll want to do is to measure your can. You’ll want to divide the length by 3 as you’ll be making 3 pieces for the stove. The can I used was just over 6 inches so I measured and marked at regular intervals around the can 2 inches from each edge.


Pop the Top:
Before you cut the can you’ll want to remove the top. To do that you’ll need the exacto knife or craft knife. You’ll be scoring the channel around the inside edge of the top of the can. Keep working your way around until you’ve almost cut through. Next, push through with the knife at one point and work your way about 1/4 of the way around the channel. The next part is cool. Just push near where you’ve cut and the whole top will start to tare long the scored line. It’ll pop off and you can move on to the next step.


Cut it out!
Next you’ll want to cut the can into its 3 pieces. I use the exacto knife to cut along the dots that I made while measuring until I have about an 8th of the can to go. Then I take the scissors and finish off.
Now, you’ll notice a seam on the can from where they printed the colors on. Cut up the seam until you reach the other line you drew with the marker. Next use the scissors to cut along the other line all the way around. That’s all the cutting you’ll need to do. You now have 3 pieces and just have to connect them all together.
Both pieces of the can are the same diameter so what I like to do is take the bottom piece and crimp the edges with the pliers. I twist and bend the edge in so that the upper can will slide onto the top.
Pull Push it all together:
Once that’s done, you can see how the stove will be put together. You coil the middle section of the can inside the bottom piece to make an inner double wall and then slide the top portion over them both.
If you find it hard to fit the cans together without damaging them, try heating the upper piece of the can with a lighter. This will make it expand and will give you 10 seconds or so to slip the pieces together.
The inner wall needs to slide into the channel on the inside of the top and bottom pieces of the can. I tap the two cans together and then check the inner wall guiding it into the upper channel so that it makes a good seal.
Let’s Jet:
Now that it’s together we just need to mark the jets. The key to the stove are jets that are high enough in the can to prevent the fuel from leaking and low enough to allow the jets to continuously heat the stove. It’s usually between half an inch and 3/4 of an inch from the top of the can. I spacing these jet about half an inch apart. On the narrow diameter cans try 1/2 a centimeter or 3/8 inch apart.
That’s it. This stove is pretty quick and efficient. On my first run it boiled 2 cups in a little under 5 minutes. It did a liter in 7 and a half. Using the wider cans like this you can easily boil 2 litres of water without refilling it.
Thanks for checking this out. Please let me know what you think. Please comment like, dislike and or subscribe! We’d love to see a video response showing your stove in use.

How to Prevent Snow Blindness

A couple weeks ago I was up on a glacier at over 17000 feet to do a video review when the sun came out full force and I realised that I didn’t have any sunglasses. After struggling for close to an hour on the the slope I was starting to see dancing stars and I realized that I was on the road to causing temporary damage to my vision. I pulled off onto a rocky area to try to deal with it.

Fortunately, although I forgot my sunglasses, I had packed a few other items in my pack and was able to make something to allow me see on my way back down off the glacier. Continue on to read more and see the video.

I’m sure we’ve all seen some kind of documentary or something that talks about this idea and maybe even had to resort to duplicating it. It was a fun experience and I decided to video tape it to see how it would go.

Snow Blindness or Photokeratitis is essentially when you give your cornea or conjunctiva a sunburn from intense UV rays. At 17000 feet I was at a much serious risk of that than I would have been at lower elevations.

Inuit goggles – wikimedia

Traditionally the Inuit of Canada used to carve goggles out of caribou antlers. They were held on the head with sinew. Others used birch bark, or wood, whatever resources were available.

Question: Have you ever suffered as a result of forgetting sun protection or had to improvise? Leave a comment below!


Kahtoola K10 Crampon Review (with video)

A few months ago Kahtoola contacted me and asked me to test out their newest hiking and trail crampons, the Kahtoola K10. Having know of the brand for a long time, I wanted to try out their response to the snow and ice covered trails that so frequently hamper my outdoor adventures in the off season.
Let’s be honest. Where I like to hike, I’m usually limited to 2 to 3 months of snow free trails. Anything that can get me out more is a boon. A 9 to 10 month off season unless I want to hike in the coastal areas is not an option in my books. I also don’t want to switch over to full winter gear or technical equipment if I’m only chancing snow or ice or will only be hitting on the shady side of the peak I’m bagging.
Trail or hiking crampons are designed to fit that need. They are supposed to fit on almost all types of shoes or boot, be light weight, flexible and compact and give you good traction.
Read on to see how they held up, check out the video and see some amazing views of Bolivia where I tested these crampons.

So, How does the K10 do?

Fits almost all types of shoes or boots?
For off season hiking I find myself turning to my Treskta Asault Hiking boots. They’re a great boot as you’ll see from the review, but they do have an oddly shaped toe box. I have another pair of trail crampons and they struggle with the shape. Not so with the K10s. The design allowed them to adjust to my boots and trail runners with equal ease.

Quick-Fit?


The K10 employs what they call a Quick-Fit system. They’re medium duty straps with buckles. The buckles are very sturdy and hold together well. I cinch the down very hard and they have never slipped or come off or undone.
They use heavier duty buckles which make it a bit more difficult to undo, but I think it was a good choice to avoid them breaking or becoming undone when you’re hiking.


The one thing I noted was that the straps were a bit long for my boots. Once I cinched them down there was a lot of leftover. I understand this is to allow for much bulkier footwear (like snowboarding or ski boots) and they’ve dealt with the extra by providing an elastic loop that any extra strapping can be doubled back into. If you’re only going to use them on hiking boots or shoes then you can deal with this by simply cutting the straps to size.
Adjustable?
The K10 Crampons are adjustable and fit men’s US size 6 to 13. They fit Women’s US size 7 to 14 for regular footwear. For something heavier duty like a Pac Boot they fit as low as size 5 and up to a size 10 1/2.  Adjusting them is best done at home. Although it’s straightforward and tool-less, you do have to take off the neoprene Snow Release Skins to do it and that’s difficult.
They fit down to a size 7 Ladies, which is good for my wife, but only barely. If you’ve got smaller feet you might want to try the KTS crampons.

Anti-Balling?


The Snow Release Skins are claimed to be the lightest weight anti-balling system on the market. They serve to prevent snow build up under the ball of the foot which could effectively defeat the purpose of the 3/4″ spikes. They don’t look like much, but they really do a good job. Once the snow comes out and the snow gets stickier you’ll be glad you put the on. They do weigh almost nothing so no need to leave them at home for weight concerns.
The skins are a 2-piece set-up for each foot. You slip them over and around each spike on the crampon. Once you get them on they’re very snug and aren’t going to come off easily, but putting them on was a bit of a pain. I had to pull out a pair of pliers and work away at it. For me it was a one time thing as I set them up at home. If you plan to do it on the trail or lend them to someone with a different shoe size, just bring a multi-tool and a bit of patience.
Leafspring? This isn’t a car!

I must say I find the leafspring concept is pretty intelligent. It’s like you’d see on a car. If you don’t know what I’m talking about, just ignore me or check out this wikipedia page. Basically it uses 2 lighter weight metal strips to connect the two parts of the crampon together and allow for support and smoother movement of the foot. When you bend your foot it makes flexing your shoe easier while still providing a strong and supported connection between the front and back of the crampon. Kahtoola is so confident with the quality of the design they offer a Lifetime warranty on the leafspring.

The spikes themselves are 3/4 inch tall and there are 10 of them They’ve gone for a nice wide design and placed them at different angles around the crampon. I have 2 other pairs of trail crampons, including a pair with longer spikes. I felt the combination of width and the varying angles made these just that much more secure on snow. wide spikes great for digging in to slippery and even very steep terrain. I felt very stable due to how kahtoola placed the spikes in different direction to reduce slipping.
Weight?
At 21 ounces for a pair the k10s are one of if not the lightest trail crampons of this style (not including things like microspikes). I don’t feel they’ve made any compromises in quality in keeping the weight down that much. If that isn’t light enough, try their KTS Aluminum crampons which shave off 2 ounces to weigh in at 19 oz a pair.


I struggle with all crampons as far as packing. I usually am reduced to strapping them on the back of the pack with spikes out to prevent damaging things in my pack. It also serves to intimidate anyone that is hiking too close. That said, they claim a packed size of 8 5/8″ x 3 1/2″ x 4 3/4″. That’s because you can slide them together when not in used to save a few inches on length.

1 percent for the people

Oh, kahtoola is also a member of 1 percent for the people. The contribute 1% of sales to help preserve indigenous mountain cultures worldwide.
Conclusion
I was sceptical of the K10 when I first tried pulled them out of the box, but when I stepped foot on snow for the first time my opinions had changed. They’re a great, lightweight hiking crampon that’s easy to put on and take off on the trail. They flex really well making walking easy with no need to adopt a funny gait like you would with technical crampons. The Quick-Fit binding makes them easy to tighten onto your foot and easy to take off.
It’s easy to see that kahtoola has taken their experience with hiking crampons and put what they’ve learned into the K10 to make a great all-round hiking crampon that I know I will be recommending to you and others.
K10 Crampon by Kahtoola
Features: Quick-Fit Binding
Material: 4130 Chromoly Steel
Spikes: 10 x 3/4″ multi-directional
Weight: 21.1 oz (598 g)
Pack Size Inches: 8 5/8″ x 3 1/2″ x 4 3/4″
Fits: Men’s US 6-13, Women’s US 7-14
Fits Pac boot: Men’s US 5-10.5, Women’s US 5-10.5
Warranty: 3 year on the crampon, Lifetime on the Leafspring
Ideal use: Winter Hiking, Trail running, Glacier travel, Non-technical mountaineering
Disclaimer: I was given a pair of K10 crampons unsolicited, but this did not affect my opinions in my review. All are my own and recommendations are the same as I would give to any of my friends.

How to fix a Klymit Sleeping Pad

So nobody likes to wake up on the cold ground to find out that their expensive sleeping pad has sprung a leak. Nope, nope. Well, I had used my Klymit Xlite for a lot of nights, around 65+. At about night 55 it started to leak and by night 65 I was having to overfill it and still it was soft 8 hours later. I can’t really blame the pad, after all 3 kids playing with it means that you toy with disaster.

Well, I decided to document my experience finding and fixing the leak on video. If you want to jump straight to the video I’ll have it embedded below.
After watching or reading, please let us know if you have any tips, products or experiences about patching a pad on the trail!
For those of you who just want the facts I’ll divide it into two parts: finding the leak and fixing it.
Finding the leak

Now-a-days, most sleeping pads are using lighter and lighter weight fabrics… yes fabrics. The Klymit uses what looks like a ripstop nylon. That’s why it weighs only 6.1 oz. The bottom is heavier, but you still need to be careful and change some of the traditional ways of finding and marking leaks.

Your best bet is to inflate the pad and submerge it in water until the tell-tale line of bubbles ascends from somewhere in the pad.
If the leak is in the valve, try cleaning it with a damp cloth and later with a tooth or bottle brush. If that doesn’t work you’ll have to hope your sleeping pad is still under warranty!
Don’t use soap or chemicals!
I used a set of small weights to keep the pad submerged!

I know, when finding a leak in a car or bike tire the old soap and water trick are used. You’re taking a risk that you’re going to remove some finish on the fabric with the possible result of causing more leaks in the short or long term. Be particularly careful with detergents.

The same thing goes for marking the leak. Don’t use a marker to mark the hole. At least not on the inflated part of the pad. Sharpies and other markers have various chemicals that may damage the sleeping pad. It’s better to mark a glued section or just tie a string around the part where the leak is. Usually you can see the leak once you find it.
Let it dry
Obviously you’ll need to wait a few hours to let the pad dry. If you’re on the trail, make sure you do this in the AM so by lunch you’ll be able to patch it in time for a good night’s sleep.
Deflate it!
this should be obvious, but if it’s inflated air will bubble through the adhesive and create a leak!
Cut a patch

Klymit comes with 2 patch types, one for the top and one for the bottom. Choose the right one and cut the patch to cover the whole with enough space to make sure you can seal it well. I like at least half and inch all around.

Apply adhesive
Before you head out on the trail, make sure your adhesive tube hasn’t dried out. If you’ve used it once already just open it and make sure it hasn’t dried or jellied.
Do you apply it to the patch or pad? Either or. It may be easier to apply it to the pad, but it can be tidier to apply it to the patch. Just make sure you apply a liberal amount so that it can be absorbed and still have enough adhesive to bind the patch to the pad.

A little pressure

Just make sure you continue to press, tap or hold the patch on until it binds. Sometimes it feels like it won’t stick, but it will if you just hold it down for long enough (10 seconds is recommended, but you may need more).
Let it be
Make sure it has time to cure. If you’re backpacking, strap it to your pack if it’s sunny and just let it cure so that by nightfall you’ll have a fully functioning pad.
Thanks for reading, please share your stories, tips or complaints below!