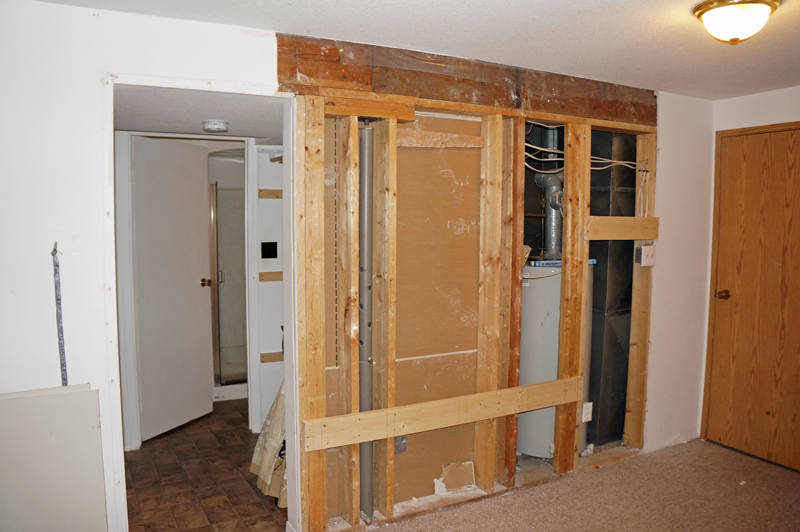
What do you do when someone breaks in and damages the drywall in the playroom? You do the obvious thing: Make a bouldering wall.
Last fall I started working on converting a downstairs wall into a multi-angled bouldering wall for the kids. It frequently got sidelined by more important projects, but slowly it has made progress… and I brought the video camera along with me.
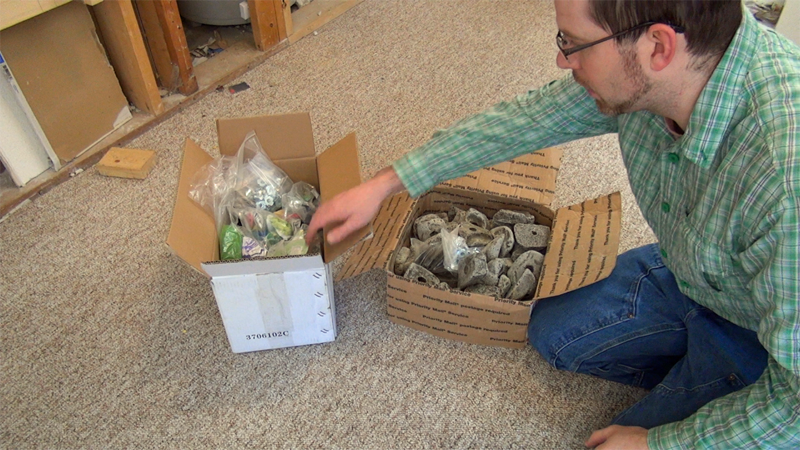
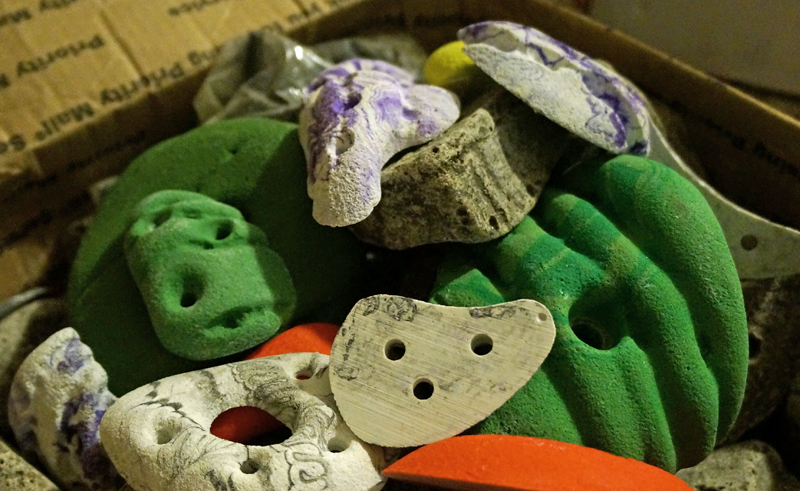
I have more than enough holds, but apparently not enough T-nuts, so I’ve put in an order for them at MEC.
The wall in question is the main load bearing wall, meaning it is strong enough for the job. It’s a section about 8 feet long and 7.5 feet high.
Our research suggested that vertical walls would get boring, so I decided on a more complex, multi-angled wall that eventually will extend onto the roof. We used 4.5″ timberframing screws to attach the header to the joists and 2×6 framing for the joists. It has to hold up 1″ ACX (or Canadian equivalent) so I didn’t cut corners.
Take a look at the progress we’ve made in the video above. Currently we’re at the point where I’m placing the T-nuts, but you’ll have to wait for part 2 for specifics and finishing.
Question: Have you ever thought about installing a climbing wall in your house? What’s holding you back?
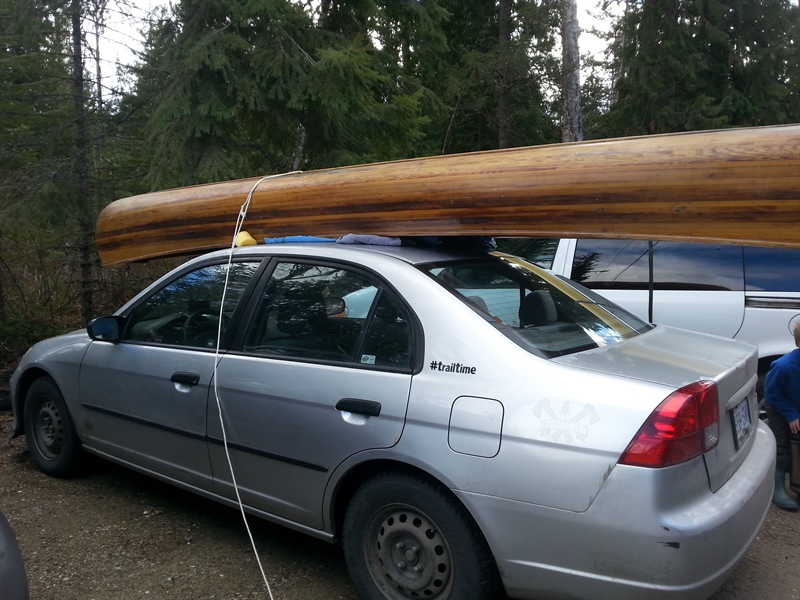
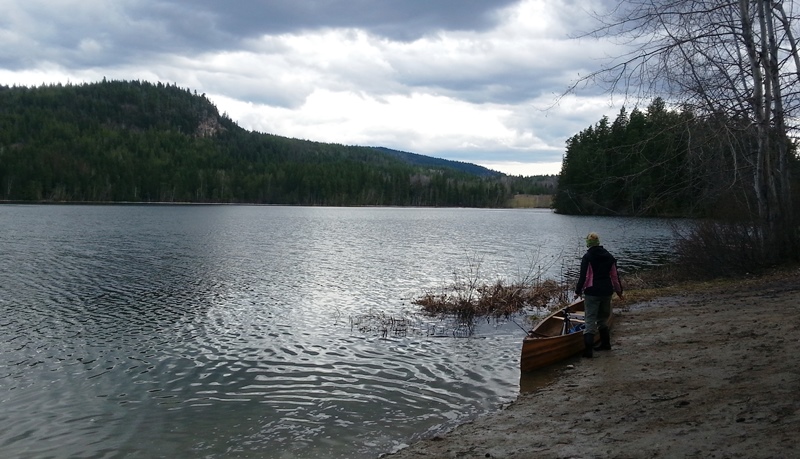
When we can, we get out for a paddle, hike or other microadventure with kids. This recent trip was to a local lake right after ice-off.
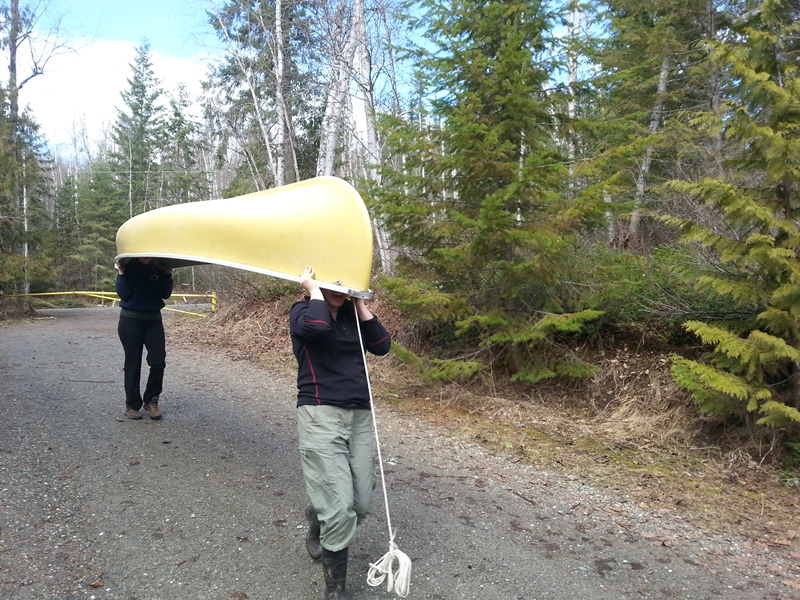
Four kids and 3 adults required us to do a bit of MacGyvering, relying on the Outdoor Adventure Mobile’s sibling to cart one of the canoes with us.
Last year the ice didn’t come off the lake until Mid-May, so the gate was still shut in March when we went. We did a bit of trekking to get the canoes to the water but it was well worth it… And before you think I got the ladies to do all the work, I carried the other canoe down to the water.
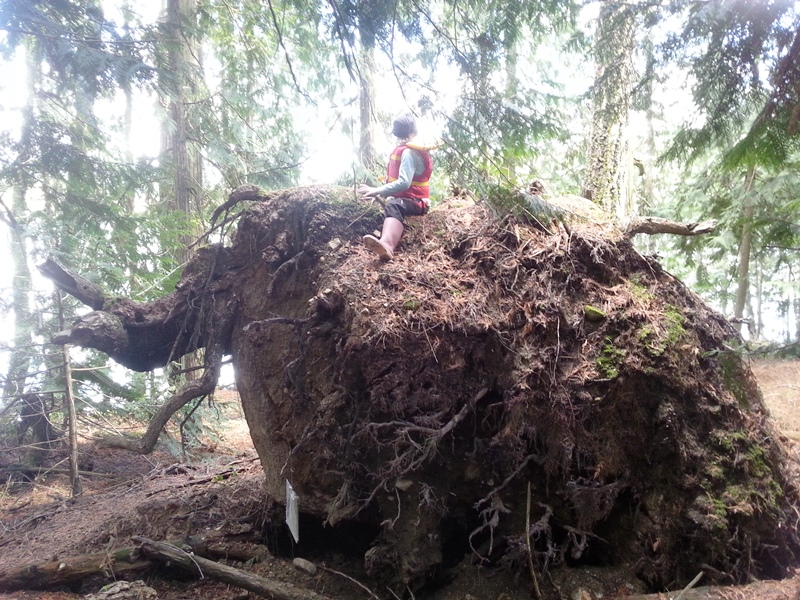
There was a lot of wind on the water that day so we took a detour and got off the water for lunch. This meant some mandatory exploration and a bit of discovery.
We were lucky to find one of the few remaining Pacific Northwest wild Mammoths. These lesser known relatives to the Siberian Mammoths are much friendlier and are known to offer rides.
All in all it was an awesome opportunity to get out and relax after a week at work.
Take a look a the video above and let us know: What’s your favourite Saturday Afternoon activity?
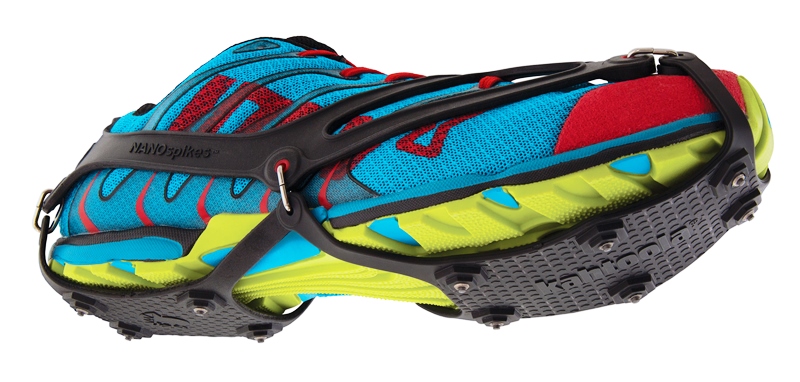
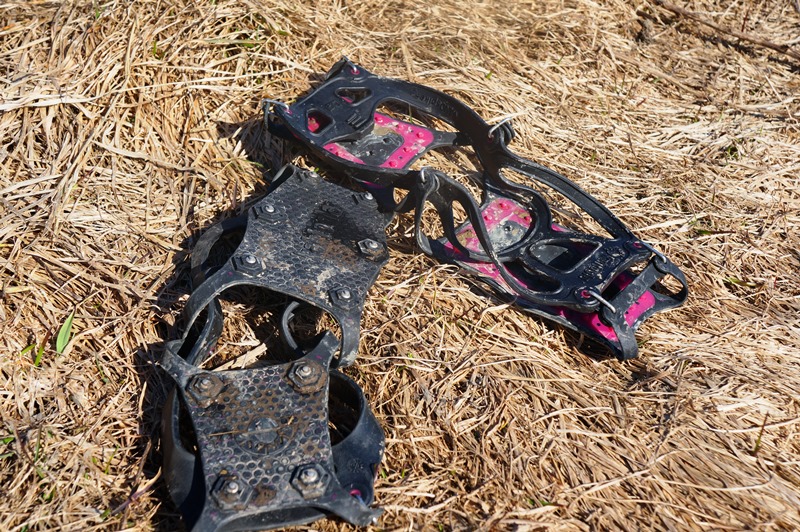
Up here in Canada we run studded winter tires on our cars… and now, on our feet. Well, almost. With Kahtoola’s new NANOspikes we have a lightweight traction device designed to give you traction in icy conditions that would normally stop your daily activities.
The NANOSpikes slip on over your normal footwear to allow you to navigate treacherous terrain more safely. We’ve all seen the video of “Man slides down driveway” and as entertaining as that may be to watch, let’s face it: we don’t want to be him!
We’ve been extremely impressed with the quality construction and effectiveness of the NANOspikes. Don’t stop walking your dog, training for that marathon or delivering newspapers! NANOspikes have you covered. Heading out on that frozen lake to do a bit of icefishing? No problem!
Let’s talk features:
10 Tungsten Carbide spikes (6 on the front and 4 on the heel)
Elastomer Construction
Stainless Steel fastners
Packs down to 5 3/4″ x 4″ x 2 1/4″
Weight:
Small 7.5 oz
Medium 8.0 oz
Large 8.3 oz
1 year Warranty
MSRP: $49.99
Performance:
We were immediately impressed with the build of these Traction Devices. Last year we tried a competitors product that failed miserably after two runs. These have held up to abuse and show no signs of wear.
The Traction that they offer is excellent. Carefully spread studs re unobtrusive, and well placed so that you have excellent traction over a full range of motion.
The fit is excellent. Whether worn over hiking boots or running shoes, they provide a secure fit. They’re easy to put on and remove, but they don’t come off when you don’t want them to.
Our only complaint about these is the colour. They’re fuscia. Everyone that knows me knows I’m not a fan of fuscia. They certainly keep you visible, so it’s a small price to pay 😉
Conclusion
The NANOspikes by Kahtoola are a great addition to the Kahtoola line of Crampons and traction devices. The price point is perfect. It’s nice to see a brand that constantly impresses with overbuilt gear that performs as advertised.
Take a look at the video above for a full review and to see them in action.
Disclaimer: The Outdoor Adventure received this product free for review. All opinions reflect our thorough testing and are what we recommend to friends and family.
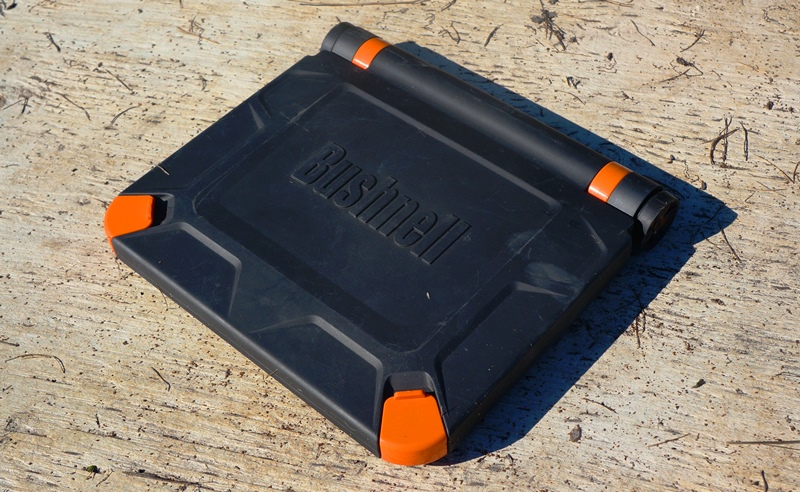
Today we take a look at Bushnell’s Powersync Solarbook 850, a Solar charger and battery pack locked away in a durable, adventure-proof case.
The Solarbook 850 is the Solarbook 600’s big brother, cutting charging time by 2.5 hours. Check out the features and then take a look at the video to learn about how it performs.
Features:
Dimensions: 9.25″ x 8.3″ x 1.3″
Unpacked length: 53.25″
Amorphous thin film solar panels (better for charging in less than ideal sun conditions)
2x 5v, 1a regulated USB Output, 1 Micro USB input
XXXX maH Dual Li Ion battery (no maH rating listed)
I’ve had this panel for over a year and it’s been tested on week long canoe trips, Day trips, camping trips, you name it. I’ve used it to charge cameras, video cameras, cell phones and more.
My Thoughts
Check out the video above for my thoughts and see how it performs on higher end devices.
Pros:
The internal battery means that a regulated power output that higher end electronics will accept as charging sources (a problem for stand-alone solar panels).
Amorphous Panels mean improved charging in indirect sunlight
Dual charging ports are always a plus
Heavy duty case can take abuse
Attachment points are a plus
Cons:
The plastic fastening clips can come off
Did not charge my iPad mini (a problem for most solar charging systems that don’t have 2.1a USB power)
More expensive than comparable solar panels.
Conclusion:
A good all-in-one portable solar charging system that will handle the majority of your electronic devices. Bushnell has made a sound entry into the market and their products are definitely worth checking out.
This weekend we went out for a paddle on a local lake and the kids wanted to see “daddy” throw a knife. It was a comical experience with moderate success. Happy Wednesday!
Always be careful with knives kids! Never throw when someone is in front of you. Never walk in front of someone that is throwing a knife!
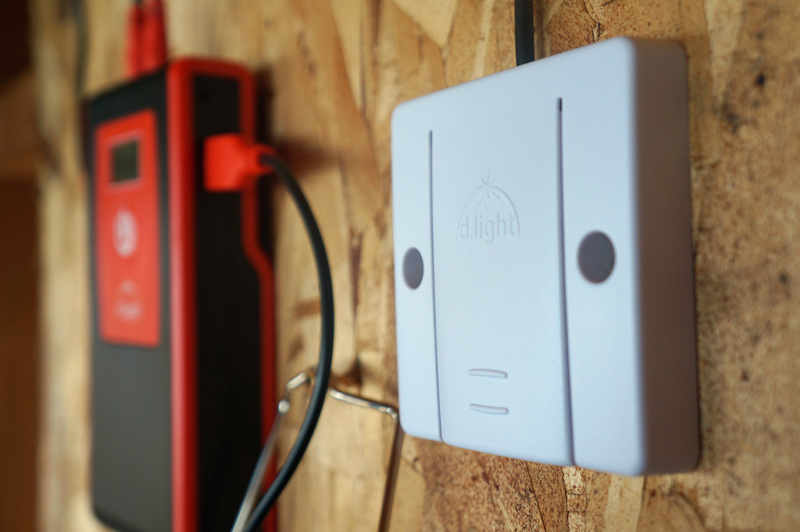
It’s nice to finally see an overbuilt solar home lighting system that performs the way its meant to. d.light Design’s D20 solar home lighting system has impressed me because it is built for the developing world where off the grid is the only option and where durability and functionality are what drives design.
While most solar lighting that we see on the market has the quality of those solar patio lights that end up in the trash every fall, this setup is built for real-world use, making it ideal for your backwoods cabin, hot tent, lakeside boat house, or wherever you’ll need a real solar system that will work for years to come.
Let’s look at the features and then discuss in more detail why I like this system.
Features:
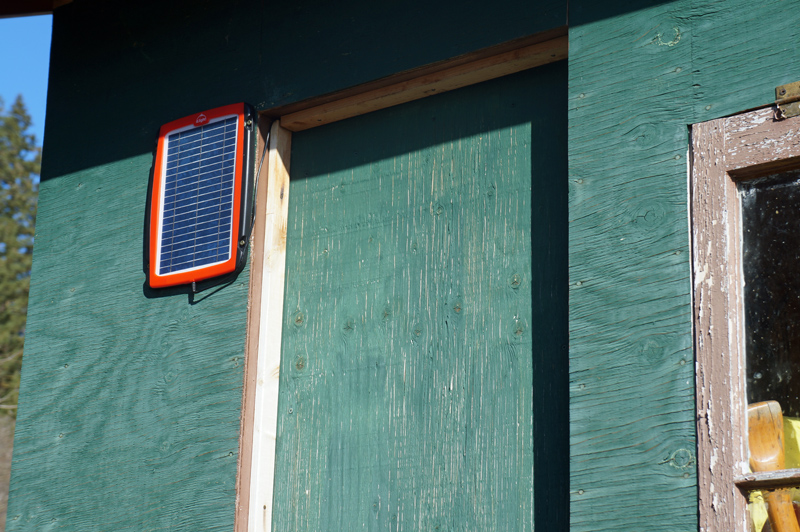
5w solar panel with 20 foot power cable
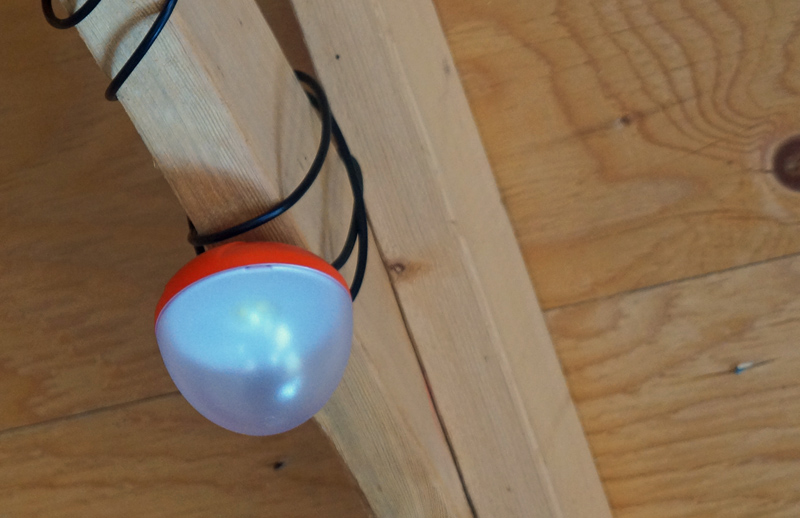
2 solar lamps with attached cables and switches (one has 13’ cable the other a 20’ cable)
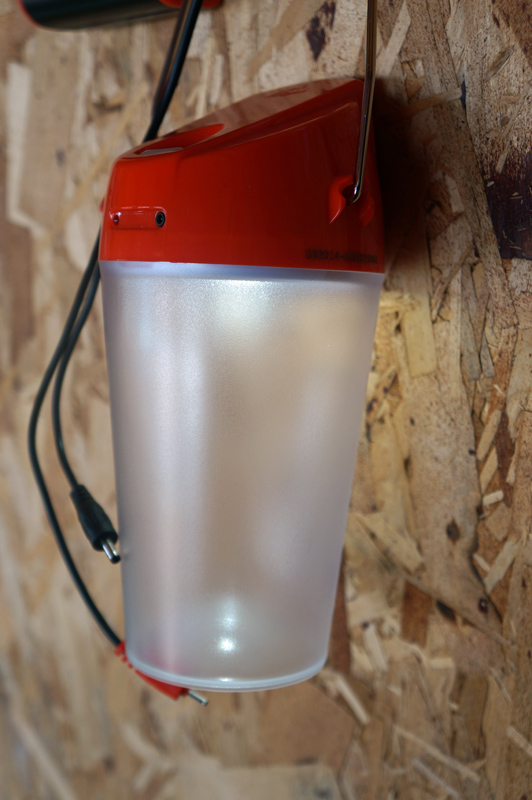
cordless solar lantern
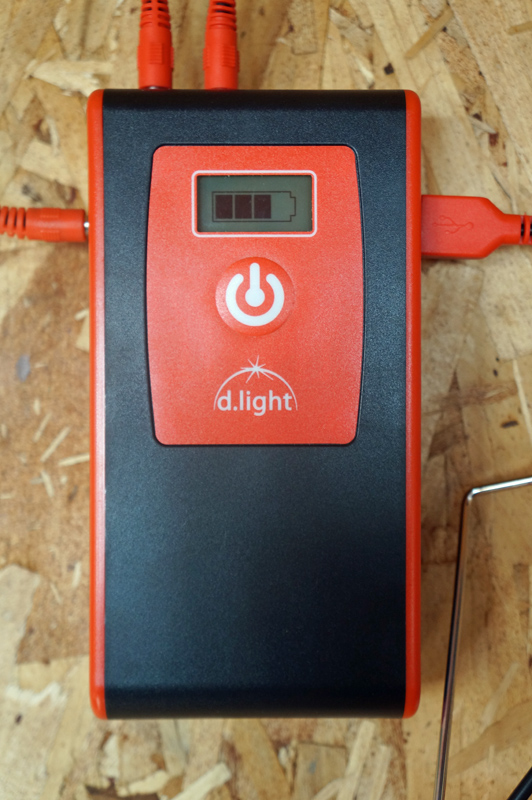
3000mAh battery pack cable of running up to 4 lights
USB output and six adapters for charging most USB devices
Take a look at our video review below to get an idea of how easy it is to setup:
Testing
Currently this system is setup and my parent’s cabin/shed by the lake. It’s been up for 6 months with the solar panel set up on a Southwest facing wall (not ideal).
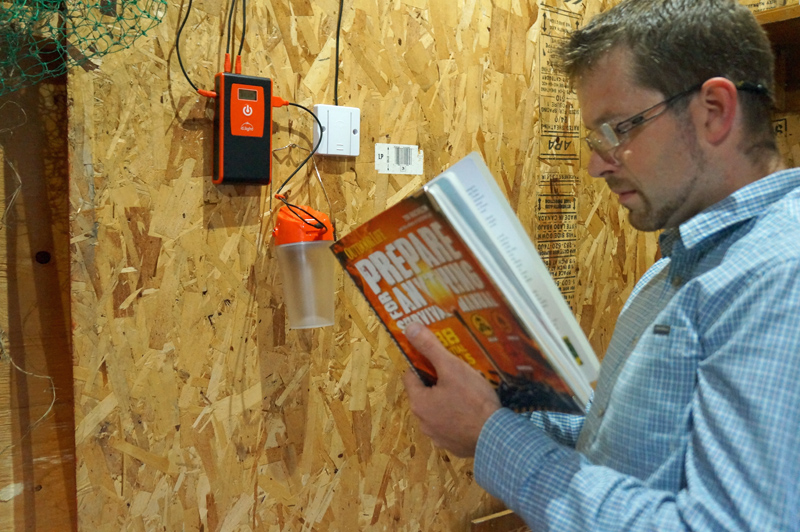
Setup was a breeze with a pocketful of screws to fasten the various components. The Switches are heavy duty utilizing a tap system to switch between low, high and off. There are two switches, one for each light, meaning you can turn on the lights separately (great if you have multiple rooms in your cabin or tent).
The setup includes a solar lantern that charges via the battery pack. There are an assortment of connectors, meaning you can charge your usb powered devices with it as well.
The battery pack has a 3000 maH battery. It’ll run the two lights on full power for 7-8 hours or 15 hours on low level. You can also buy additional lights to run a total of four off this battery pack. It can be precharged (and therefore used separately) or charged via the solar panel.
The solar panel is 5 Watts, and is of course weather proof. It is permanently attached to its power cable, so you don’t have to worry about losing it.
There is plenty of attached cable to power these devices. The switches are also installed inline giving plenty of distance to set them up in separate rooms in a small home or cabin.
The two lights were able to provide adequate lighting to read a book in the evening in a 16×12 shed and the hand lantern does a fine job of lighting your way should you need to go out for a midnight excursion.
Conclusion
The d.light systems are specifically created for the developing world, meaning they’re meant to handle long term use in real-world, daily life. As such, they don’t disappoint in simplicity or functionality. The price point ($200 MSRP) is excellent for this setup, making it a great choice for your cabin, tent, or even the kids’ playhouse.
disclaimer: dLight gave me this system to review free of charge. As always, my opinions are my own and what I would recommend to family and friends.
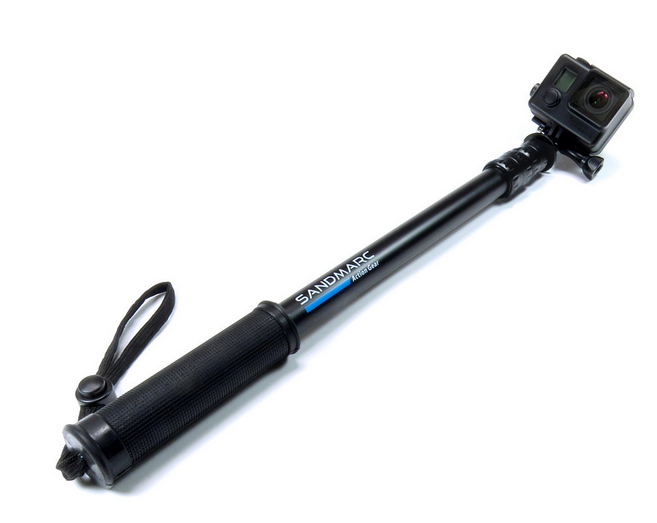
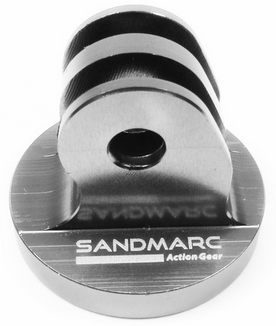
The Sandmarc telescoping pole is a simple piece of equipment. It has one purpose in life. It functions as an extension of your arm to get your GoPro camera farther away from you.
Lately, these extension poles are also being referred to as selfie sticks. While that term may sound negative, there are times when nothing will help you to take as good a picture or video – unless you happen to have your own photographer/videographer to follow you around.
Think about the times you’ve used your phone to take a selfie with your friends. Unless you happen to be an Orangutan, your arm simply isn’t long enough to get the camera far enough away from you to take a good picture. Instead, you and your friends have to gather cheek-to-cheek to get everyone in the shot. Personally, I like the closeness of a cheek-to-cheek picture, but all of your selfies come out looking the same. And forget about getting much of the background in your shot.
Want that great picture of you and your family with the Taj Mahal in the background? Before these selfie sticks, you were forced to stop a stranger, ask them to take your picture for you, and hope they didn’t muck it up. You also had to hope the stranger didn’t desire your camera more than you.
It’s advertised to fit all GoPro cameras, including the latest GoPro 4. The only non-metal parts are the rubber handle and the lanyard. The rest is all aluminum. Even the camera mount itself is aluminum and a beautiful aluminum knob is also included. The benefit of aluminum is that you’ve got a strong, lightweight, virtually unbreakable pole that will never rust. Feel free to use it underwater!
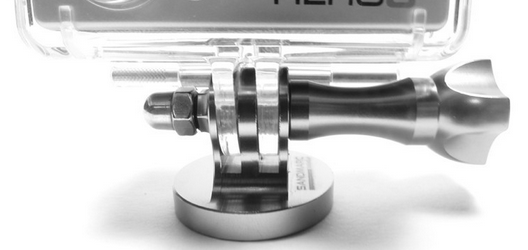
The mount is detachable, so you can also use it to mount your GoPro to standard tripods. Conversely, you could detach the mount and if you have a standard screw-on camera attachment, you could use the pole for your other non GoPro cameras.
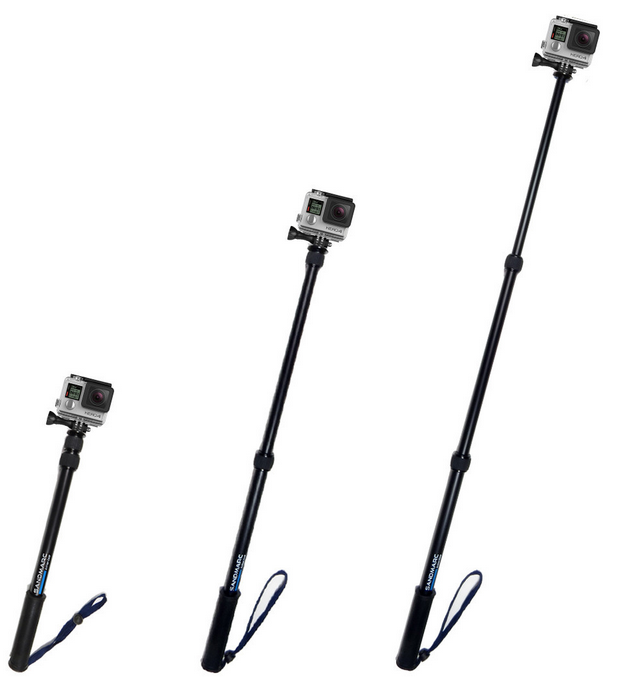
The pole is comprised of three sections that enable you to extend the pole to any length you need, from the fully collapsed length of 17” all the way out to 40” at full extension. The extensions are loosened or tightened by a knurled knob. It takes nothing more than a quarter twist to either loosen or tighten the fittings.
That’s the nuts and bolts of the Sandmarc pole, but how does it really measure up?
I like it. A lot!
There’s nothing cheap or flimsy about this extension pole. Everything about it feels like quality. It’s sturdy, stylish, and I wouldn’t worry about breaking anything on it. I can’t say the same about some plastic accessories I’ve come across.
Despite the robustness, Sandmarc has managed to keep it very light. It weighs-in at a mere 8.5 ounces (0.25 kg). Before I had the chance to try the stick, I was a little concerned that, while snowboarding down a long slope, it might be too heavy to hold at arms-length, fully extended with my GoPro attached to the end. I needed not worry. Even fully extended, I never really felt the weight.
The rubber grip is very firm rubber. At first, it almost feels like plastic. But even in the snow, I never felt like it was hard to hold. I suspect that in the long run, the harder rubber might even be a little more durable than soft rubber.
As I’d stated earlier, the knurled grips can be loosened with a quarter turn, extend the sections to your desired length, and then locked-down with a quarter turn back the other way. I never needed to apply anything more than a gentle turn and the extension would lock in place with no fear of subsequent collapse.
The camera mount is a thing of beauty. All GoPro mounting accessories I own are plastic. Mind you, the GoPro mounts are quality pieces in their own right and I’ve never had issues with any of them, but this Sandmarc mount really appeals to my aesthetic sensibility. The mount appears to be machined from a solid billet of aluminum – even the threaded nut was machined from the block.
As impressive as this mount is, there is a minor issue worth noting. Since the mount is machined from a solid billet, it’s very solid – it doesn’t flex at all. When I mounted my camera, it took a great effort to screw the mounting knob in tight enough to prevent the camera from rotating inside the mount. I happened to have a pair of pliers handy and I had to give the knob an extra little turn with the pliers before it was finally tight enough so the camera wouldn’t move. I can easily envision many people not having the finger strength to get it tight enough and also relying on a pair of pliers. There are aftermarket GoPro knobs that give your fingers a little more torque. There are also aftermarket GoPro wrenches available for tightening and loosening the knob. Or you could just use a screwdriver or a pair of pliers.
To test the pole, I mounted my camera and headed to the ski hill for a day of snowboarding.
I can find no fault with the Sandmarc extension pole. As I stated earlier, it is lightweight – even with the camera mounted to the end, it is high quality construction, and it’s stylish. If I had to nit-pic, I simply didn’t know what to do with it when I was done using it. Even fully collapsed, it’s 17”, so it’s not likely to fit in any of your pockets. My choices were to take it back to my car or go to the ski hill’s village and hope to get a locker for the afternoon. If you’re out on a hike, it’s light and small enough to carry (or put in a backpack or large purse), but while on the ski hill, I didn’t want to finish my snowboarding trip carrying the pole throughout my remainder of the day.
It also seemed to gather attention from other skiers and boarders. You’re not exactly inconspicuous speeding down the slopes, holding a camera three feet out in front of you. But that’s just my own issue. Maybe if I was a more impressive boarder, I’d feel less dorky filming myself.
Despite my feeling that I was attracting attention to myself, I really feel that you can get some of the best pictures and video of yourself while using an extension pole. The pole can provide an interesting perspective that you simply can’t get any other way. Additionally, mounting your camera on the end of a pole has an interesting effect – it smooth’s the video significantly. When my GoPro is mounted on my helmet, the video can be very jerky and rough. All my motions (bumping, jostling, shaking) is transferred from my body, through the helmet, and into the camera. I’m not sure how the pole seems to automatically smooth everything out, but it does. I’d guess one’s arm is a natural shock absorber.
Features
Compatibility : Fits all GoPro® Hero Cameras (including Hero 4)
Durability : Water Proof, Aluminum Locks, Tripod Mount & Thumbscrew
Unique Feature : All aluminum build quality
Compact : Retracts 17″, Extends 40″
Lightweight : 9.5 ounces / 0.25 kgs
MSRP: $49.99
All-in-all, I really like the Sandmarc extension pole. I’m happy to add it to my arsenal of accessories and I know I’ll be using it a lot. I recommend it highly to anyone that wants to start adding new perspectives to their videos and pictures.
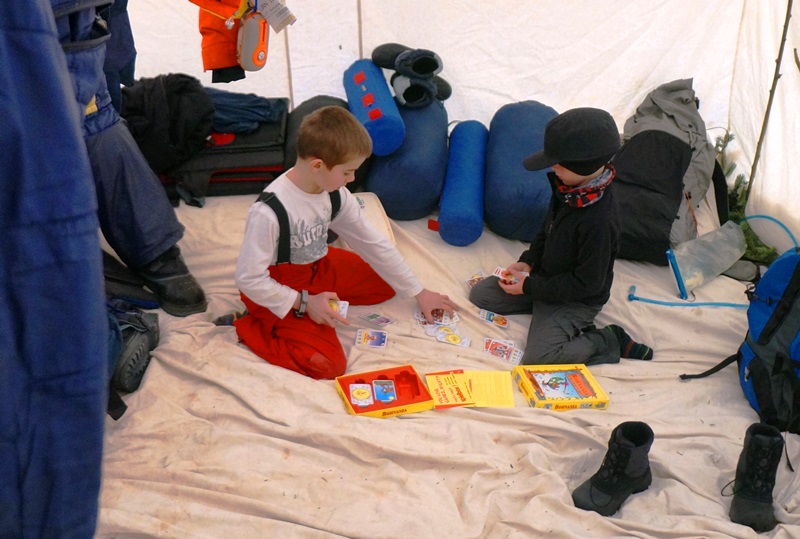
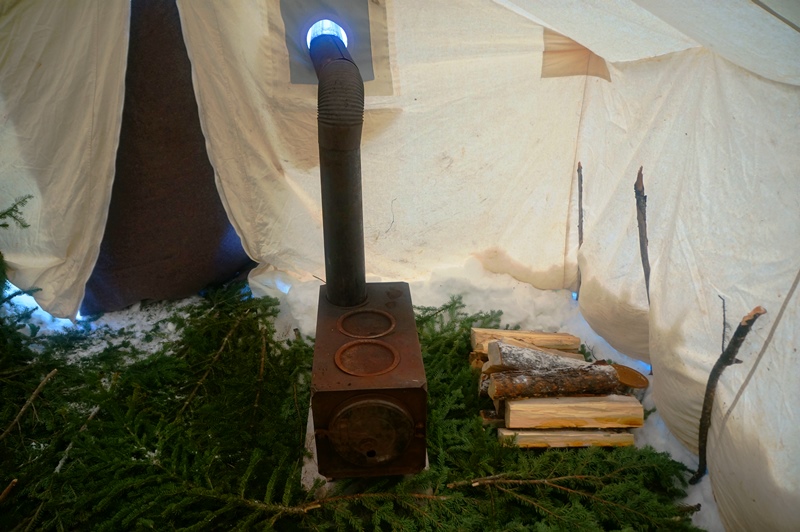
As a kid, I remember reading stories of prospectors and adventurers living in Canvas tents with tiny wood stoves to warm them. Over time that spirit of adventure was renewed, but due to their price tag (over $800 for the tent alone, not including the stove) those dreams had to remain dreams. That was until a friend of ours invited my son and I the opportunity to join on winter camping trip in Prince George, BC. The obvious and immediate response was “yes please!”, followed by, “when” and then, “What do we need to bring?”
Everything except the basics (clothes, lamps, snacks and sleeping gear) was provided, so we only needed to worry about packing our gear and making the long drive North.
Fortunately, there was a travel warning in effect, which meant that the roads would be clear. After a careful examination of weather radar, we made plans to miss the storm and have clear highways to ourselves. Blessed with great weather and a safe journey, we were set for the fresh foot and a half of snow and an excellent adventure.
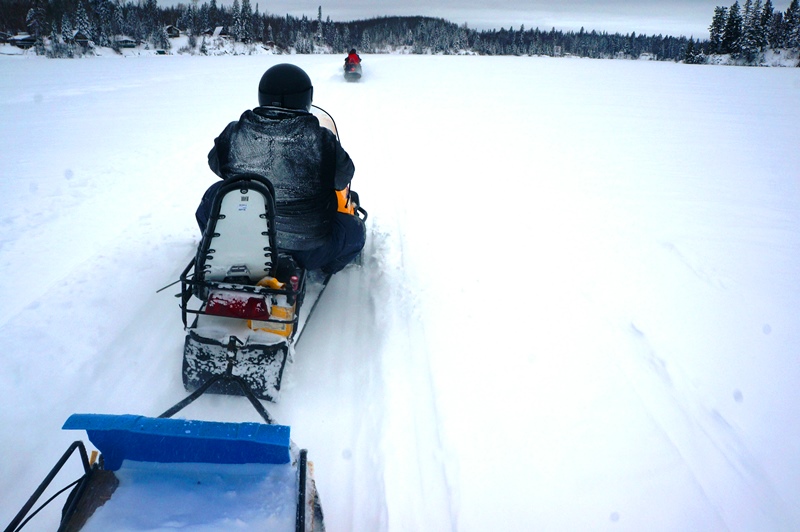
The plan was to travel by snow machine (call them sleds or “snowmobiles” if you want) up to an area that our guide, an experienced outdoorsman and author (Check out his books here) had scouted and prepped for us. We would set up a tent, put on a hot meal and go for a snowshoe. We were told to prepare for a cold night that would be followed by a hot breakfast and then a bit of ice fishing.
The kids were sat safely on the sled with an adult, but that left me to take up the fun position of riding the dog sled standing up as we crossed the lake and then navigated the spindly northern pines and spruces with their heavy laden boughs.
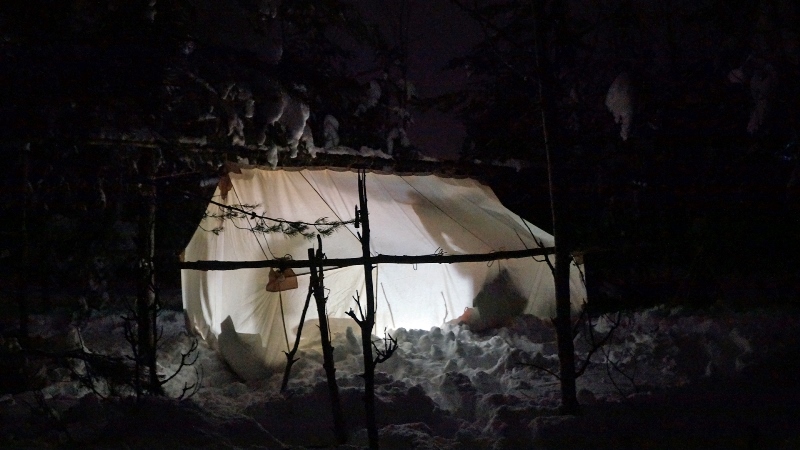
About twenty minutes later we arrived at our chosen site with cold faces and grins frozen on our cheeks. From there we set about preparing the poles for the canvas tent and collecting spruce boughs for the tent floor.
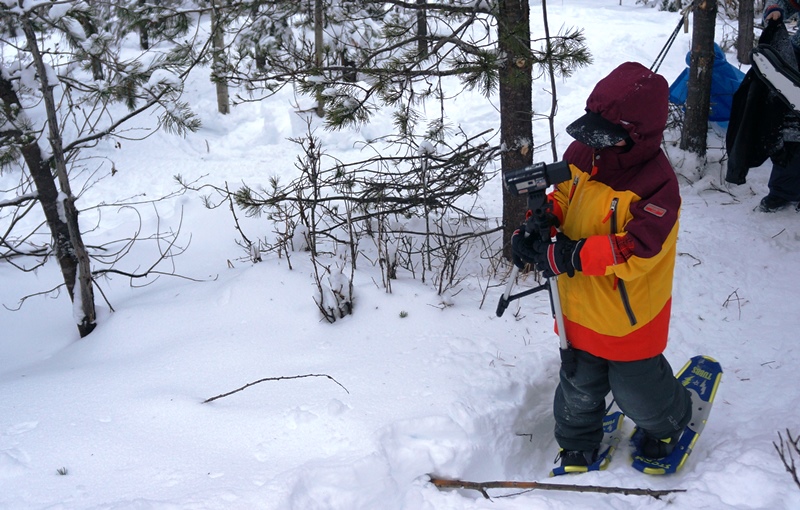
We warmed up in no time in the calm afternoon as we heaved the heavy canvas, constructed alder tripods and cleared the freshly fallen snow. The kids busied themselves making snow forts and exploring the deep snow for wildlife before they were wrangled into collecting firewood.
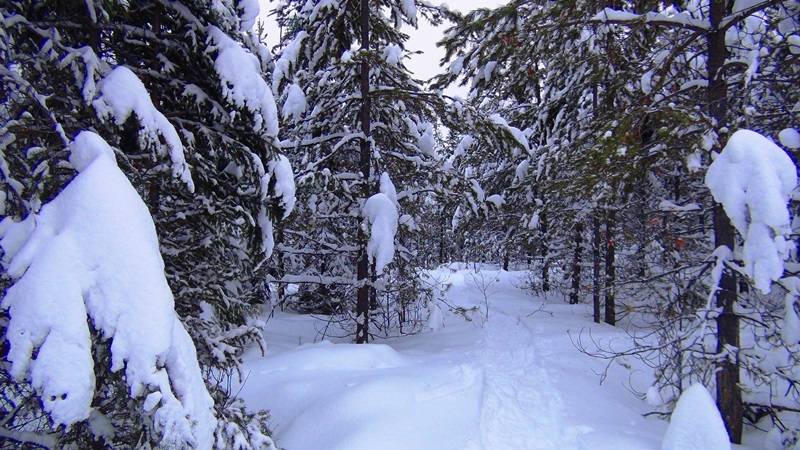
With the tent setup and the fire roaring we headed out for a snowshoe with the kids. Buoyed by the excitement of the experience, they ran about laughing and playing in the deep Northern snow.
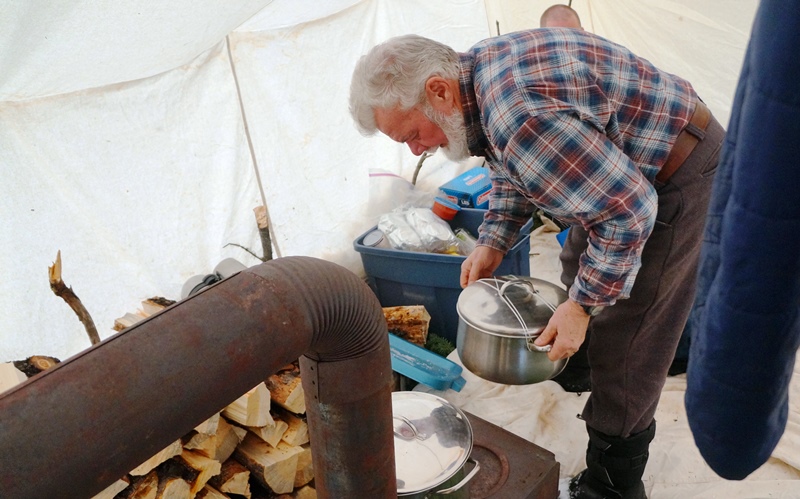
Our Guide – Keith Billington
As we set up our sleeping arrangements for the night, the rich smell of stew mixed with the aroma of spruce bows worked with our hungry and tired bodies to whet our appetites. So, with full bellies we drifted off into sleep.
In a canvas “hot tent” the comfort and temperature of the shelter depends on the diligence of its occupants in feeding wood into the stove. We were told to prepare for cold in the early hours when the fire would typically die out, so we brought two sleeping bags each. We hadn’t anticipated the diligence of the other dad in our group who stoked the fire every time he sensed the cold. The result was a constant alternating between pulling the sleeping bags close to shut out the cold and tossing them away as we gasped for air in the oppressing heat. Our guide joked that if he heard another log being tossed on the fire he had considered tossing one right back at him.
Breakfast was a delicious and filling bowl of oatmeal. Normally I don’t eat the stuff, but we all know that food tastes better on the trail… so I went back for seconds.
The kids rushed out again to explore, while the adults chatted and packed up camp. We headed back through the woods and out to the lake as I clung on to the sled as we sped back through the now falling snow. I was already reminiscing about the constant smiling of my son during the adventure and I wondered if I should revisit the idea of having our own a canvas tent. Maybe there would be money in the budget if we just looked a bit harder for it.
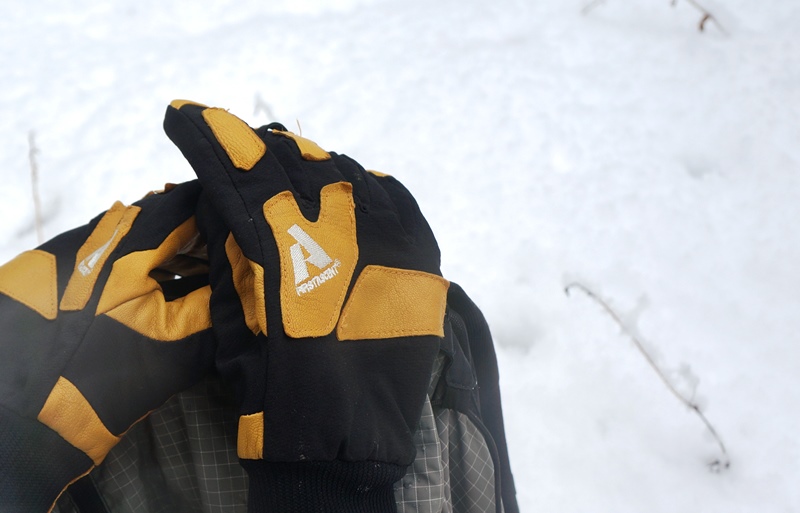
When out adventuring in the alpine, sliding down the slopes, trekking in the snow or simply packing the perfect snowball a good pair of gloves is at the heart… err at the finger tips of success… and a good pair of gloves is what you find in Eddie Bauer’s Guide Light Gloves.
They’re definitely worth a look, and here’s why:
Features:
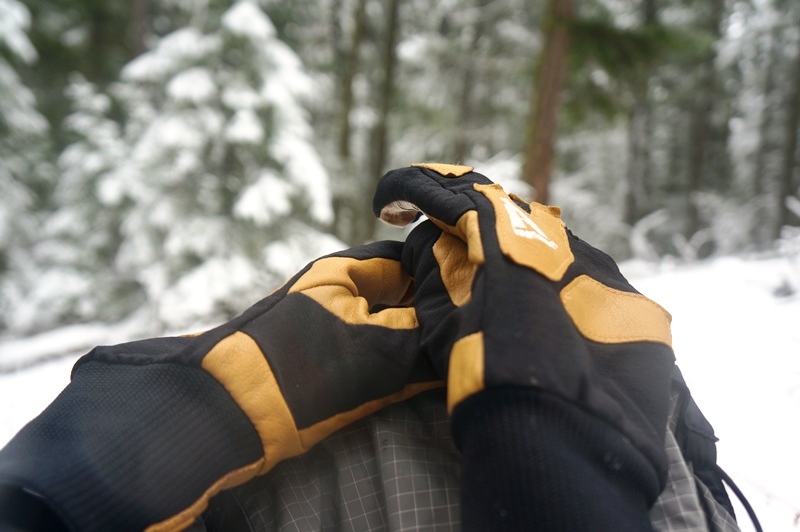
Nikwax Treated Goatskin Leather Palm and Fingers
DWR treated Stretch Nylon (90% Nylon/10% Spandex)
Acrylic/Merino Wool Jersey Lining (70%/30%)
Stretch-Rib Cuff
Nose/Goggle Wipe on Thumb
Webbing Clip Loop (on middle finger)
MSRP: $80
What are my thoughts?
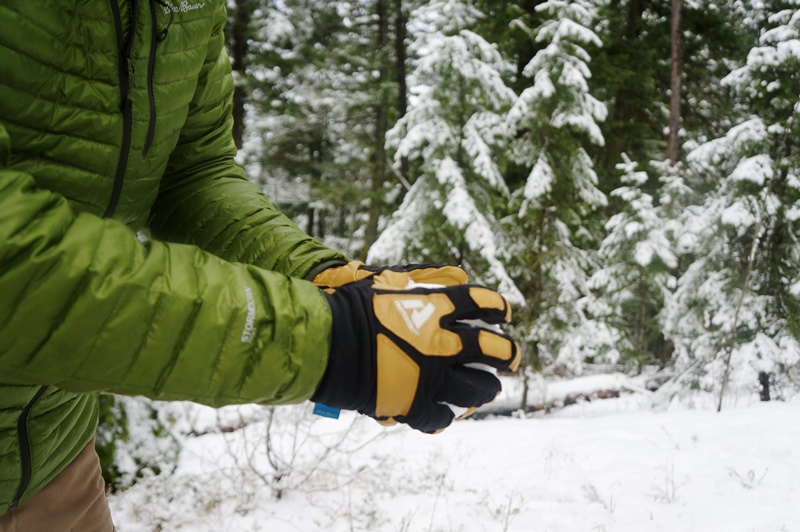
Eddie Bauer sent me these gloves for testing in early December, and they have been my go-to glove choice this winter. They’ve performed excellently and aside from a slight complaint would receive 5 stars.
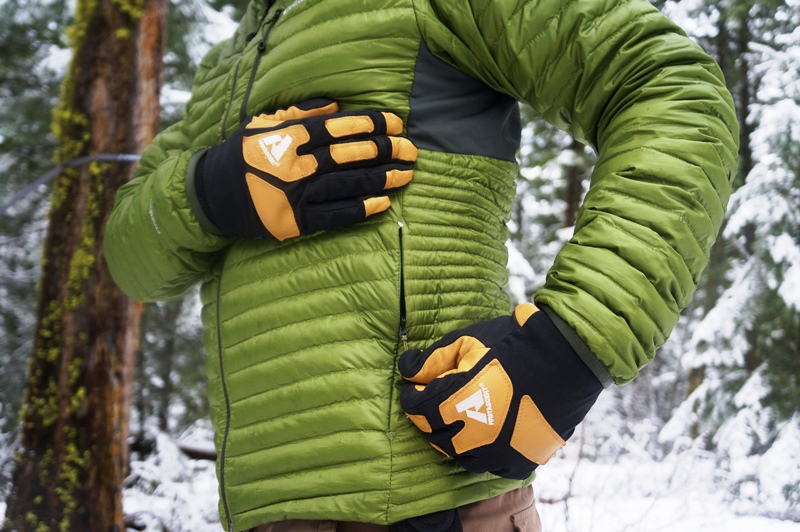
These gloves are designed to provide warmth and grip without causing dexterity or range of motion to suffer.
They allow great motion due to the glove’s low profile design and careful placement of leather where you’ll need it for protection and grip, filling in the gaps with a warm and form fitting Nylon/Spandex blend. The result is the ability to use fine motor skills to perform even delicate tasks like grasping fine zipper pulls or adjusting the fuel flow nob on your winter stove.
The warmth comes from an acrylic-merino blend that does a great job of keeping you warm while active in below freezing temperatures. Take note: they’re not designed for extreme weather. If you want something for that then check out the Eddie Bauer Guide Gloves.
The Stretch Rib cuff is pleasantly long for the gloves, meaning you can stretch your arms and move around and it’s unlikely you’ll expose your wrists to the cold.
As you can see in the video, the one complaint I have is to do with manufacturing consistency. The width of the leather that covers the finger tips differs from glove to glove, not just finger to finger. It doesn’t noticeably effect performance, but it was a surprise to see the variance that exists. I haven’t had any problems with seams or cold fingers, so this may be simply an aesthetic complaint.
Conclusion
Is you’re looking for a low-profile, high quality, lightweight glove I’d take a look at the Guide Light Glove by Eddie Bauer. The $80 MSRP is a bit high in my books, but is probably in part due to the buttery soft goatskin and resizing demand for Merino wool.
Now, let us know your feedback down below! What are your go to gloves?
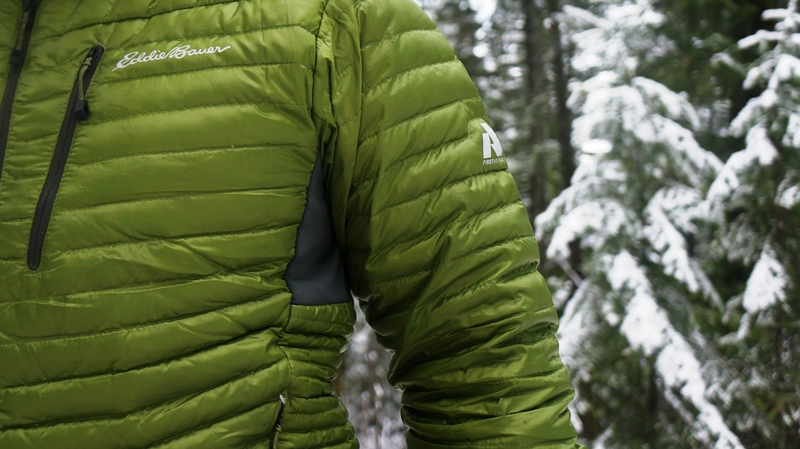
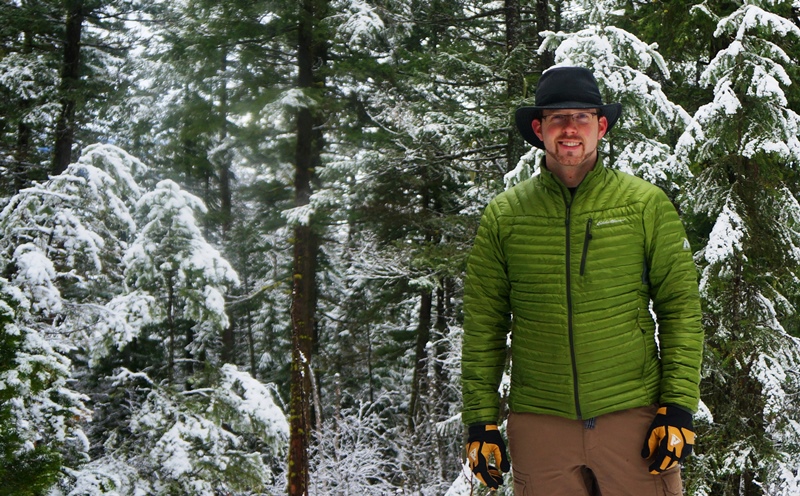
When I’m outdoors at any time of the year, I need a jacket that is lightweight, packable and warm. I’ve found that Eddie Bauer’s (www.EddieBauer.com) MicroTherm Stormdown Jacket (part of their First Ascent line) is hard to beat.
If you follow our blog, you’ll know that we’ve been falling in love with Eddie Bauer’s quality Adult’s and children’s wear. Although it’s all been impressive, this down jacket with water repellant StormDown™ takes the cake.
For disclosure, we were sent this jacket by Eddie Bauer, and all opinions are our own, the type you’d expect from family and friends.
Let’s talk features before getting into the specifics. (Video Review Below)
Features
20D Windproof Recycled Ripstop Polyester Shell, with StormRepel® DWR finish
800 Fill DOWNTEK™ StormDown™
Microtherm® Construction
Streamlined, micro-channel design for maximum thermal efficiency and compressibility
This jacket has been through regular winter testing, including a winter snowstorm, snowshoeing, hiking, tubing and other snow related activities with a proper baselayer system.
What are my thoughts?
Eddie Bauer has put together a winner here. From the 11.5 ounce light weight to the athletic fit, to the fantastic Water repelling StormDown and StormRepel finish, this jacket is incredible and performs incredibly.
The typical down-side of down is that it performs very poorly when wet. Down relies on loft to trap air and insulate you from the cold. If moisture from perspiration or from damp weather gets into the down it causes it to collapse and you can say goodbye to your warmth. Fortunately, down technology has come a long way and water repelling finishes have been applied to down that prevent the moisture from permeating the down, allowing it to maintain high loft (like the Microtherm’s 800 down fill). Add to that a DWR finish to the recycled 20D polyester ripstop and you can trust the jacket when you’re active or when the weather is wet.
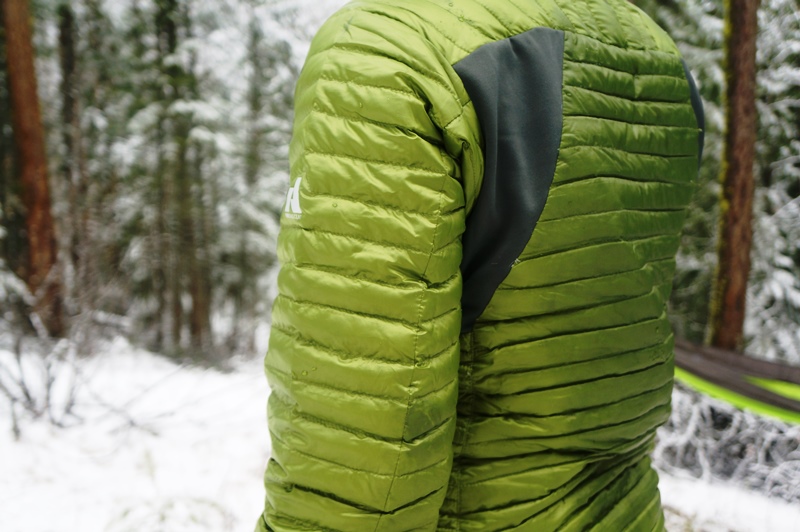
Another huge benefit to this Microtherm jacket is the micro loft channels. It opts for a lower profile, higher loft down that allows better range of motion without being restricted by larger loft pockets. It means the jacket does not provide as much warmth as a bulkier equivalent, but the benefits of greater range of motion, pack-ability and lighter weight are worth the slightly warmer temperature rating. With a proper layering system I’ve never felt cold in this jacket (despite the cold Canadian Winter). The range of motion is improved by the fleece panels under the arms.
Pocket sizes are ideal for my use. The front zip pockets fit my Guide Light gloves, cell-phone and other essentials and the zips mean that it all stays safe. Despite their tiny pulls, the zips are easy to use, even with gloves on. The front chest pocket is ideal for your wallet, cellphone or MP3 player and the interior “media port” which is standard on most jackets now-a-days performs its purpose… if you’re into adventuring with your tunes blasting away.
They’ve nailed the sizing on this jacket as well. The collar is high enough to keep the cold out without making one feel restricted or uncomfortable on your chin or jawline. The length of the jacket is great for a standard medium like myself. One thing I noticed is that there’s no waist synch. I barely notice the fact and am happy to take this trade-off for the amazing weight savings.
As a light to ultralight backpacker I appreciate weight and packability. The men’s medium weighs 11.5 ounces. The women’s weighs 8.5 ounces. That’s the whole jacket. By giving it sparse features and utilizing micro channels of down, Eddie Bauer has made an impressively warm, comfortable and light winter… or pretty much any season down jacket. I’ve retired my other down jacket (to my son), because the warmth, weight, compressibility and style of this jacket is superior.
As for packability, just watch the review video to see what it looks like packed up. It packs into the chest pocket easily. Ounce packed, it reveals a loop that allows the jacket to be attached to a carabiner if you just want to attach it to the outside of your pack… you can, because it has a DWR finish.
If you prefer, the jacket comes as a vest and with a hood if you prefer.
Conclusion
I hate to read reviews that have only positives to say about the jacket, but it’s hard to find a negative about this jacket. The stormdown and Stormrepel finishes to the down and fabric makes it hard to beat for versatility and performance. The Microtherm is excellent for cold weather, especially as a part of a layering system. I can’t get enough of how small this jacket packs down to and yet how warm it is. The price point is perfect and when you combine that with the fact that it goes on sale for much less, it’s hard to beat what this jacket offers.
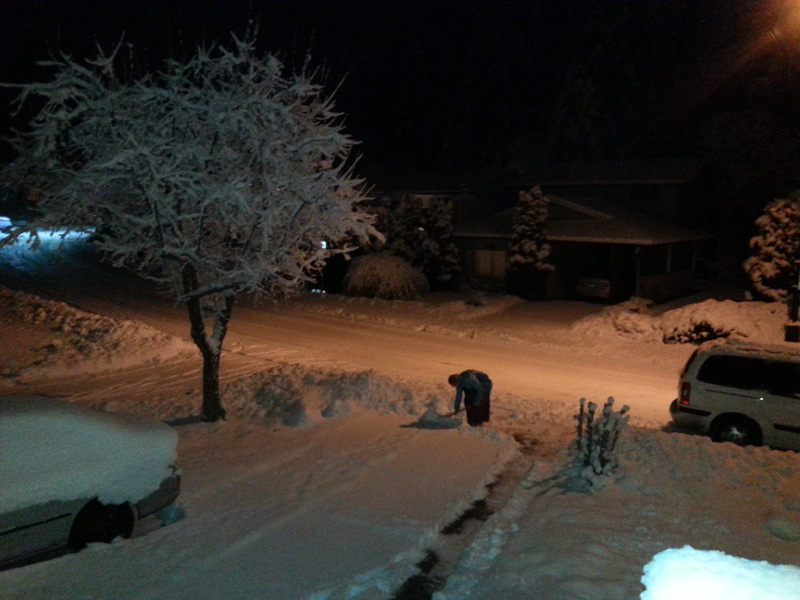
We spent the year end in Seattle with family, and came up into the interior of BC on the snowy passes of what drivebc.ca is calling #BCStorm. We had some record snowfall, treacherous roads and a lot of shoveling to do.
A friend of mine got 2-3 feet of snow and was unable to get home from work on Monday night. He lives out of town and the plows had packed snow across his road. Crashing through the barrier in his Ford Expedition sent snow over his hood.His chains later broke and he had to turn around and head to somewhere else for the night.
Here’s a look at some of the weather we had and a video of the trip up on the fourth.
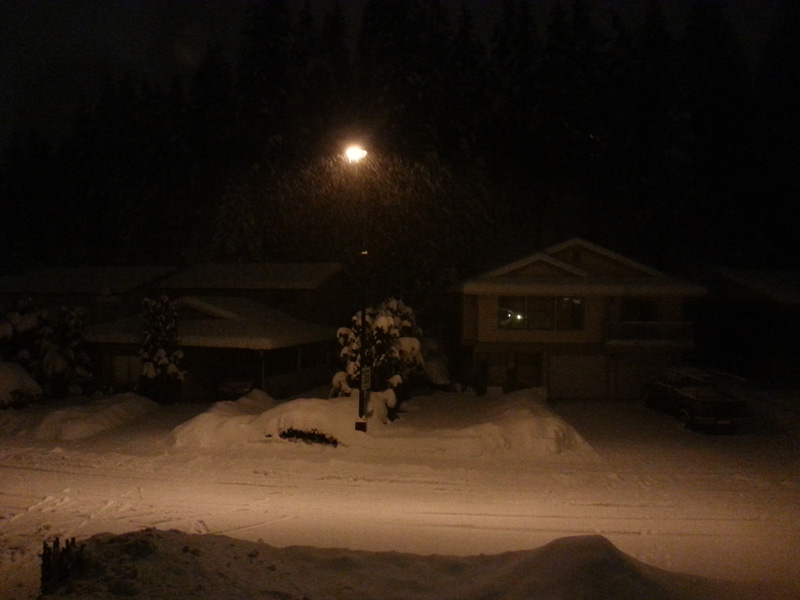
December 26th, before we headed down to Seattle.
We had a few inches come down before we left. Note the car on the left and shrub on the right. Both didn’t move until after the 5th of January.
January 4th – Driving from Seattle, WA to Armstrong, BC
As you can see in the video above, the foot or so that fell kept the plows busy on the main roads. We had to abandon one attempt at driving home on a side road that hadn’t even been touched since the snow started to fall on the Sunday.
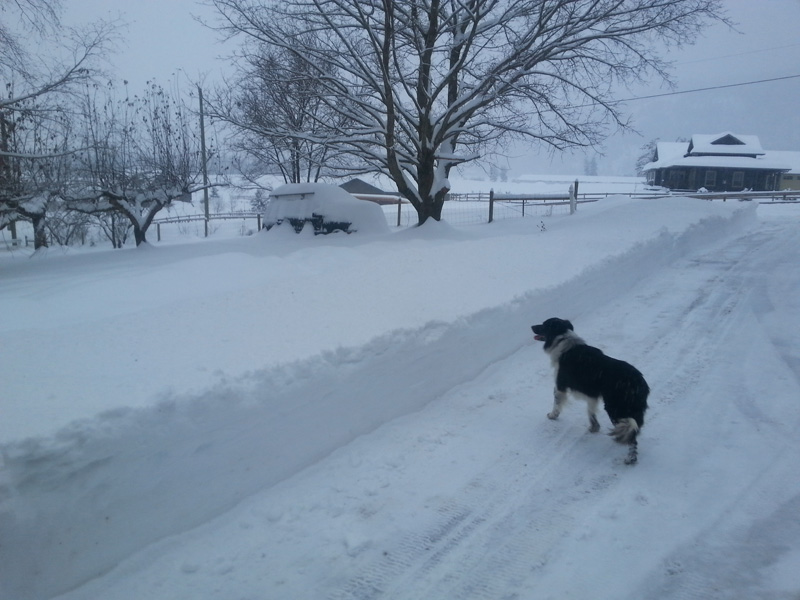
We managed to come home on another more recently paved side road that had only 4-5 inches of snow on it. We were welcomed by a full driveway and lots of snow piled in our front yard.
Note how much more snow there is compared to that same shrub (bottom left) of the photo.
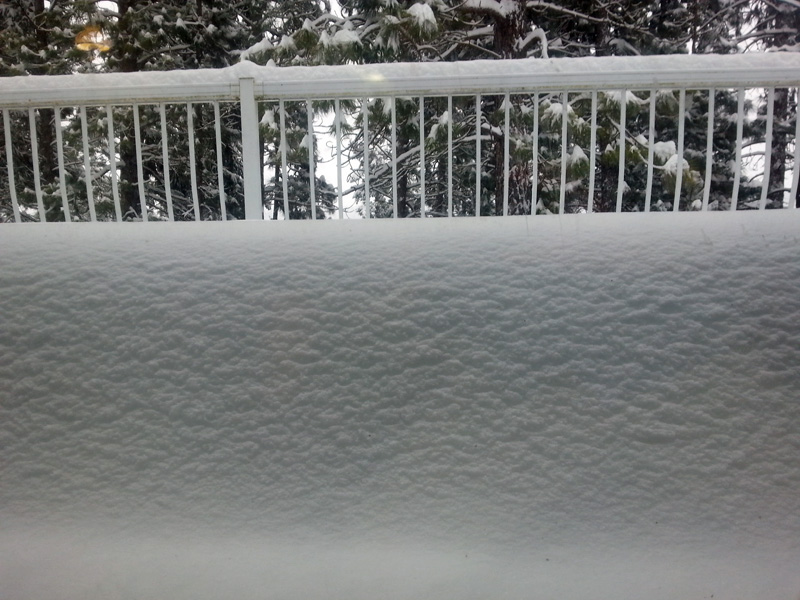
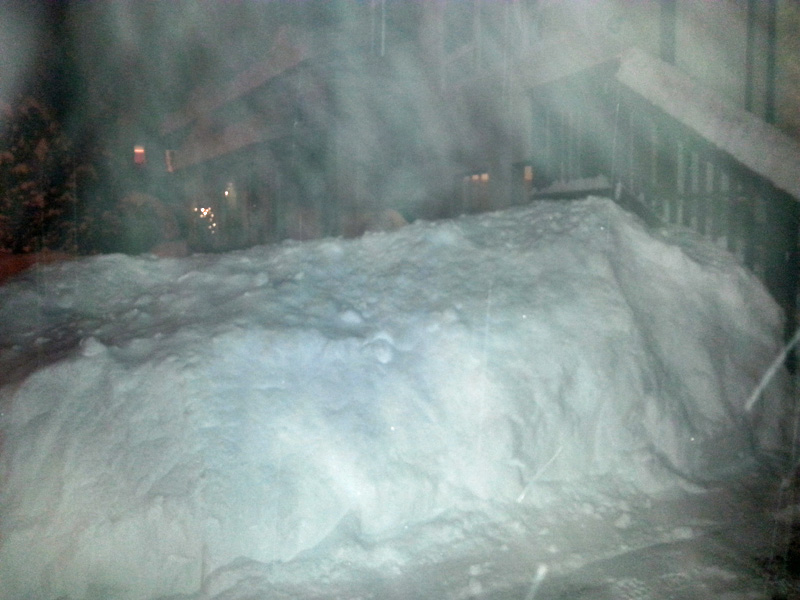
Over night and during the next day another foot or more fell, making for some impressive amounts of snow, even where it wasn’t piled up.
This is a very impressive amount of snow on my parents’ deck. Close to two feet.
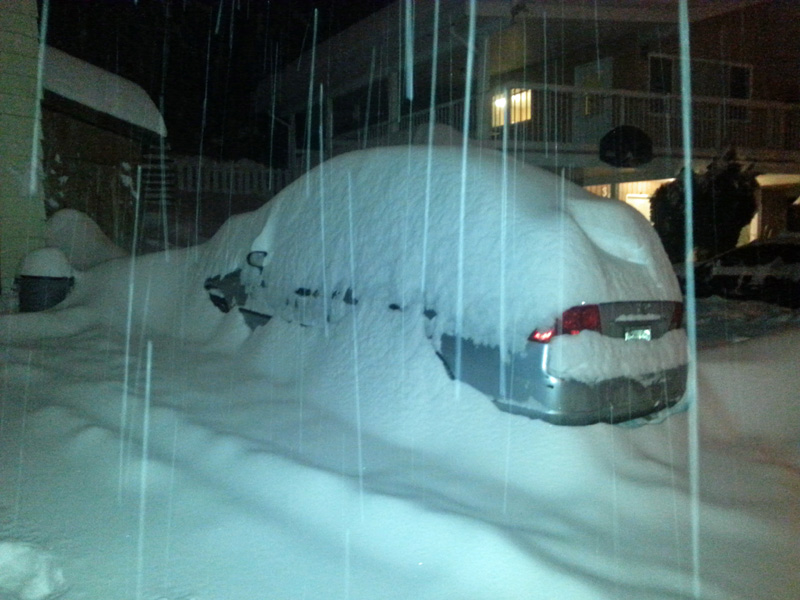
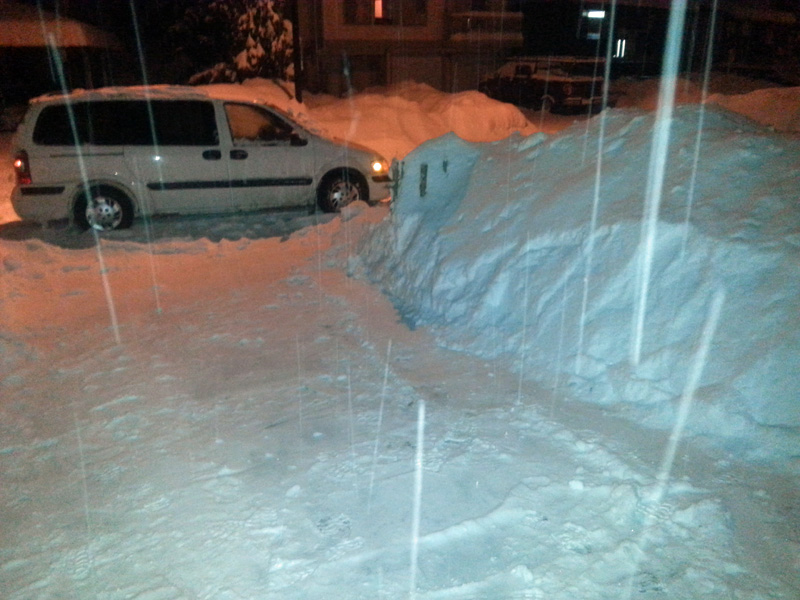
When I got home on Monday, January 5th, we had to shovel again. The snow piles are now higher than the roof of our minivan.
Yes, that’s my car under there. There were 12-18 inches of snow on top of it. Fortunately it was powder, so it moved pretty quickly.
Sorry for the steam. After that much work, I’m sure you’ll understand just how warm I was.
Here’s a short camera phone video of what things looked like. After shoveling our own driveway twice and my parents’ driveway once I think I crashed at about 8:30 pm.
Be safe out there. I’d love you hear about your own winter storm experiences! Feel free to comment below or reach out to us on facebook or twitter (links in the sidebar).
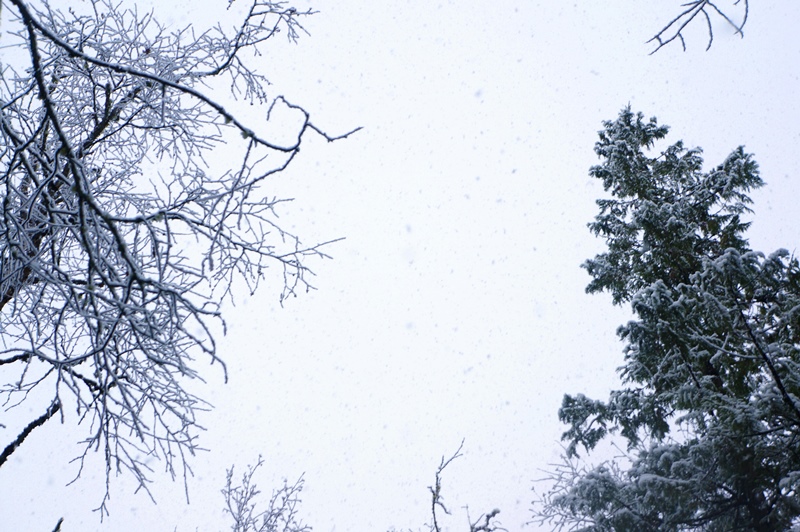
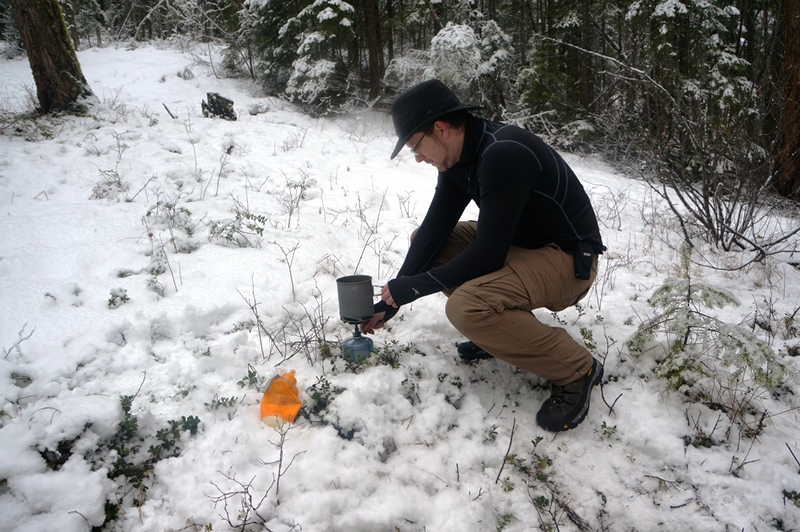
Last weekend my son and I went out for an easy and fun hike on a local trail in the Okanagan. It had just started snowing and we figured it was time for a bit of relaxation and a cup of hot tea.
The snow was beautiful and at times very thick.
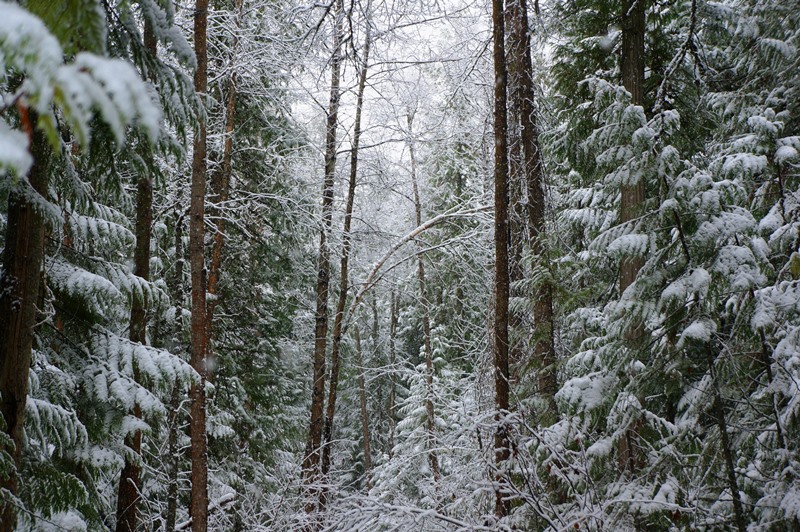
There weren’t many people out so we were able to chat about whatever was on our minds. It was a great chance to reconnect after a busy week of work and school.
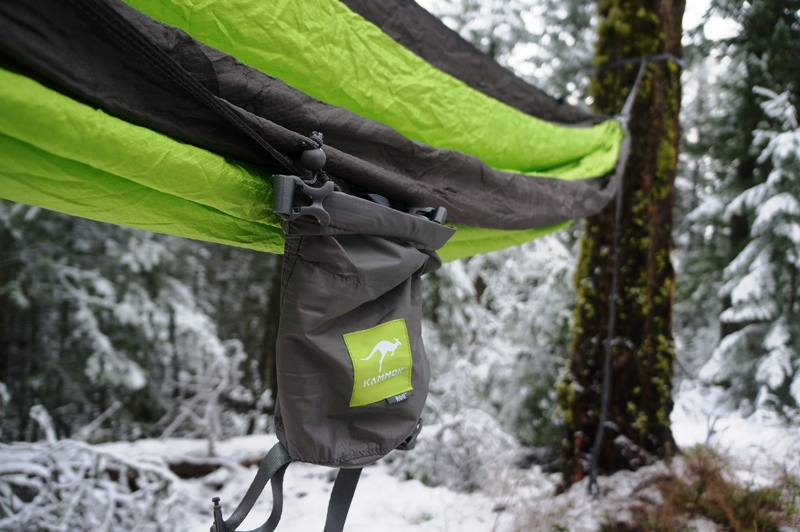
My son tried his hand a photography on the trip while I made tea and set up the hammock.
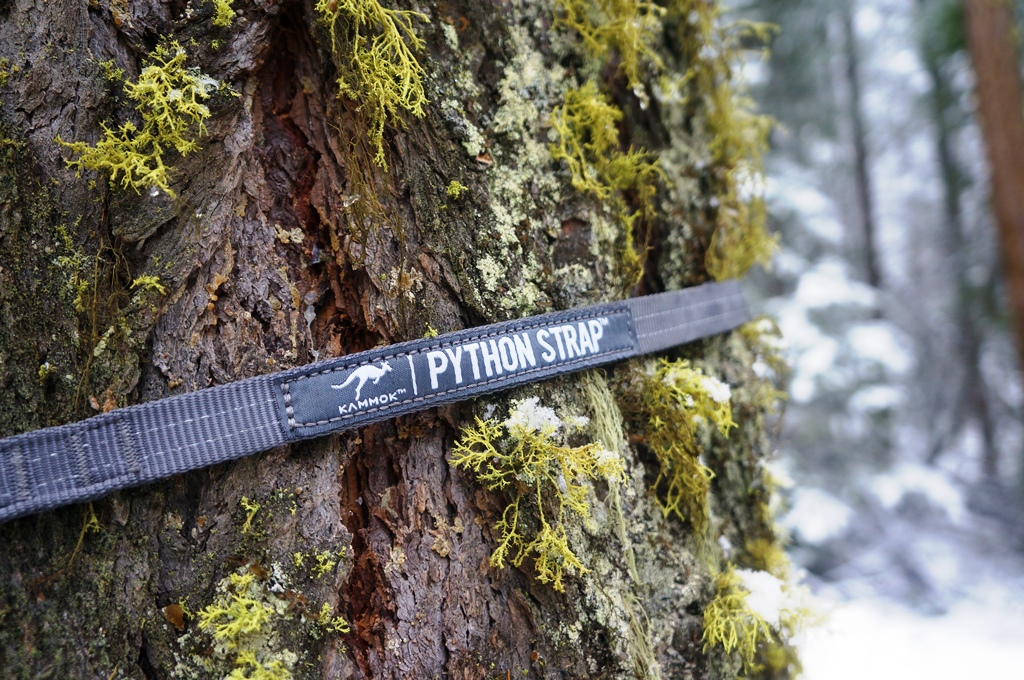
This beast (and its matching python straps can hold 500 lbs, so lay back and stared up at the trees, snow and all the wild features around us.
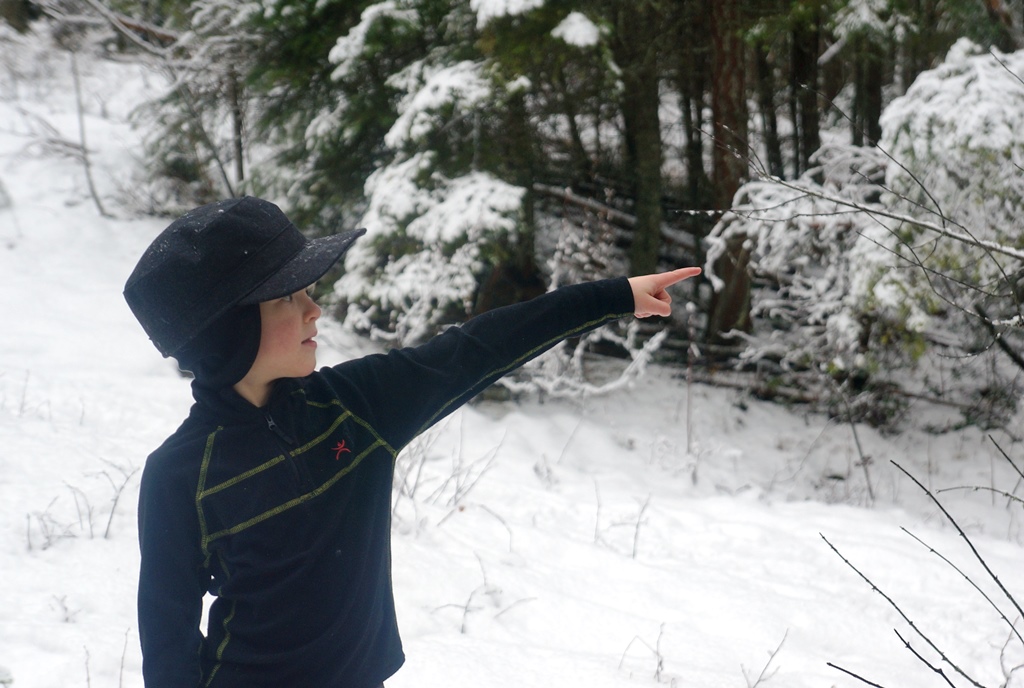
Mr. Adventure jr. even tested out one of my new hats.
Overall we had an awesome time and started making plans for our summer father-son hike and a potential week long trip when he turns 13.
Take a look at the video below and let us know what you micro adventures you’ve been on recently.
 The Outdoor Adventure Giving you tips, tricks & recommendations to help make adventuring in the Outdoors fun, safe & exciting for you and your kids.