Home / video (page 4)

video

Magellan eXplorist 350H GPS review

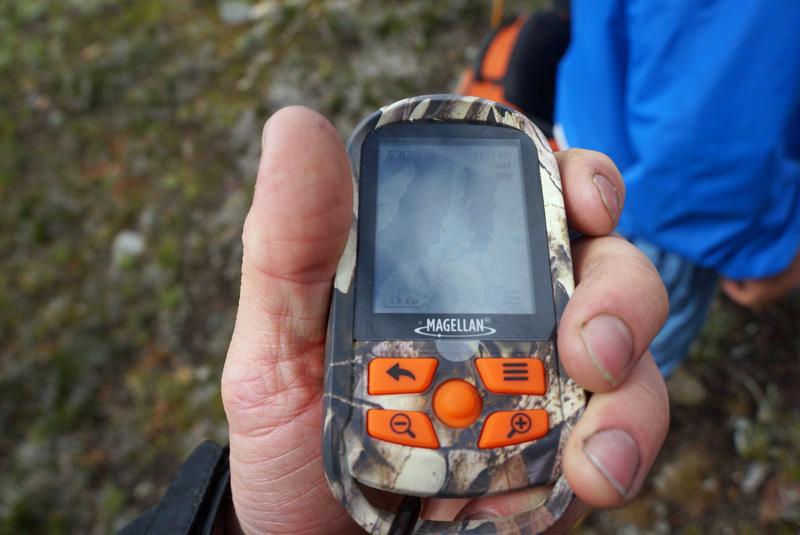
A full colour GPS with topo, shaded relief or satellite image overlay and it fits in the palm of your hand. I’d say that’s pretty cool… but wait, it does more? Queue the music…

The Magellan eXplorist 350H was built for hunters and hikers. Aside from those cool features I just mentioned, it has a number of others that cater to more than just the geocachers amongst us. If you want to see a summary of what it does, check out the video below and keep reading for more functionality and my thoughts on whether it hits the target or not.

Disclosure: Magellan sent me this device for review, so as usual I do my best to test things thoroughly and as always, the opinions are my own, honest and what I’d recommend to family and friends.


Features:

Physical Features:

  • Display: 2.2” diagonal
  • Resolution: 240×320
  • Weight: 5.2 oz
  • Dimensions: 5.8 x 2.4 x 5.7 inches
  • Batteries: 2 AA (configurable for type)
  • Waterproof
  • Mini USB port
  • 5-way joystick
  • On/off button
  • Zoom in/out buttons
  • Menu and back buttons
  • Webbing loop
  • Camo/hunting orange colours

Key Software Features:

  • Topographic, Shaded overlay and downloadable Satellite image overlay (down to 2 feet per pixel)
  • 1 year free subscription to digital globe (satellite overlay maps uploadable to your GPS)
  • Hunt and Hike modes
  • Customizable waypoint markers
  • Preloaded with Game Management Unit borders (for hunters)
  • Programmable alarms notify when you enter or leave a hunting zone
  • Navigate back to start
  • Waypoint field notes
  • Accompanying desktop software for planning and managing trips
  • Dashboard view for showing:
    • Distance travelled
    • Elevation change
    • Elapsed Time
    • Average Speed
  • Digital Compass
  • Hybrid map/compass view
  • MSRP: $250 – on sale for $180 at amazon here (affiliate link)

Testing:

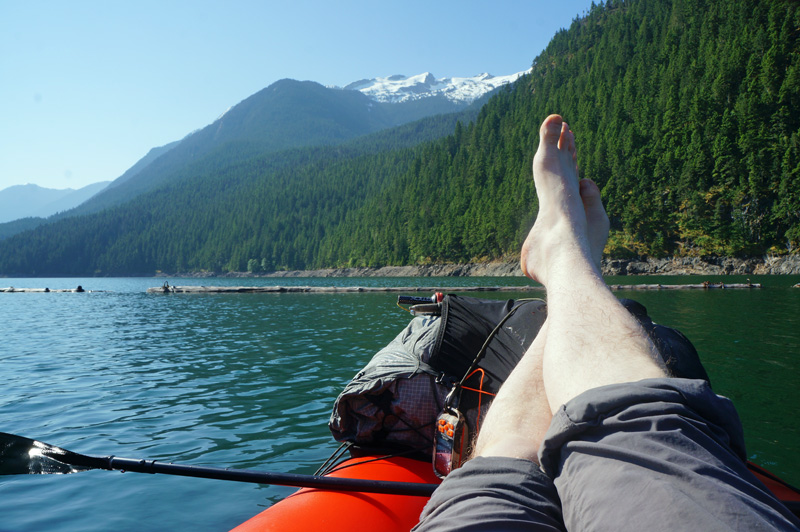
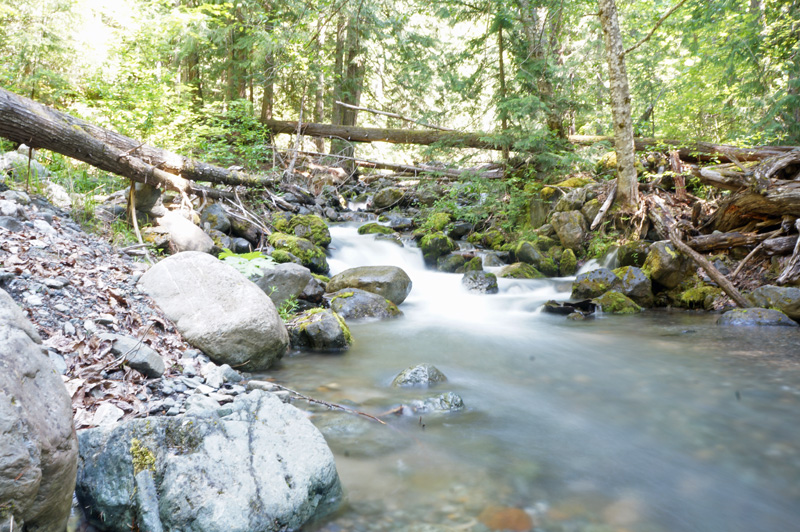
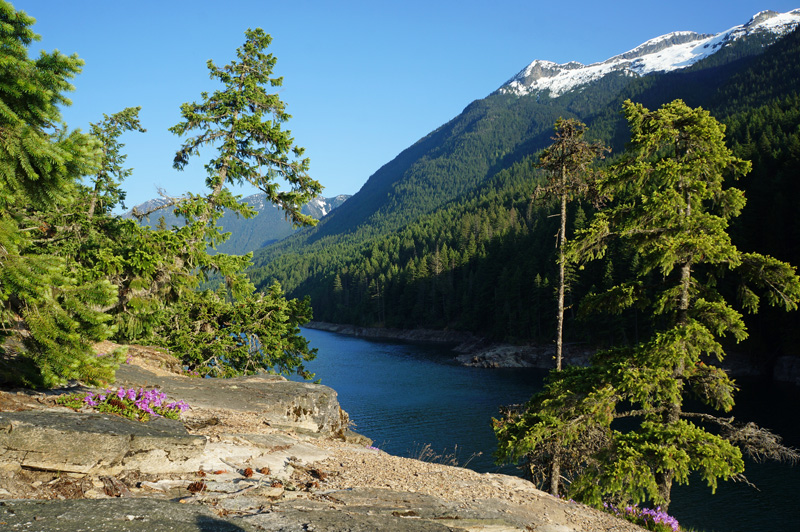
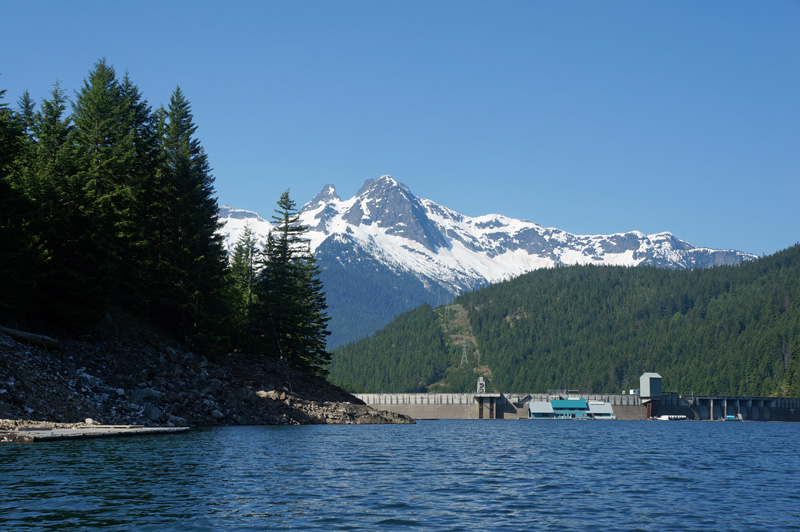
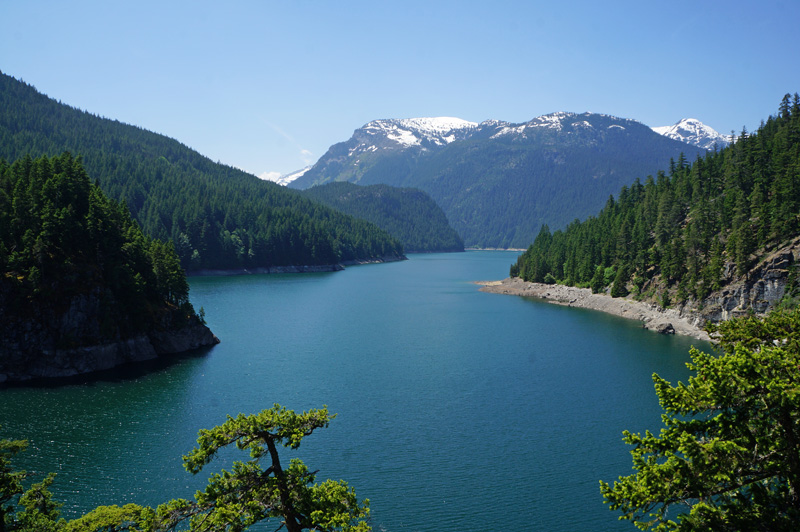
I tested this device over the course of a year in cold, warm and wet weather in the Pacific Northwest. It has been tested in torrential rain, full sun and of course sub-zero weather (isn’t it always cold in Canada?).

What do we think?


map2hand


Physical Features:

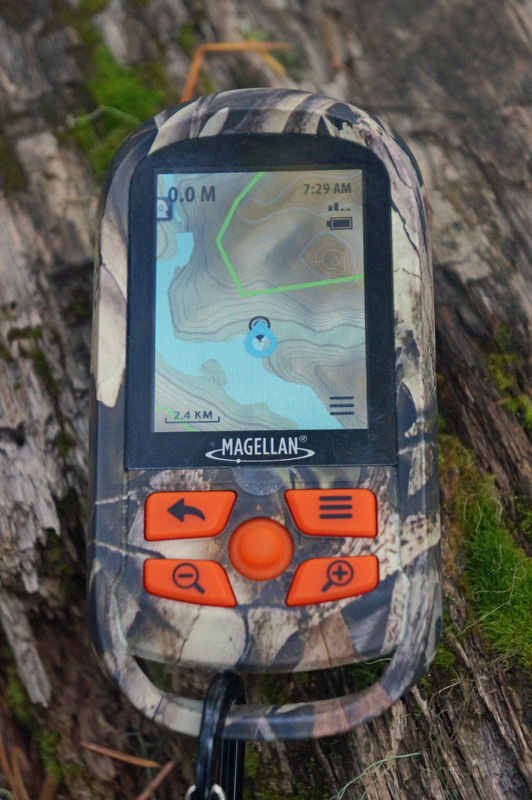
Magellan has done a great job at packing all these features into a small device. It’s at the point where half the device is the battery compartment. It really does fit in your hand. The display is small at 2.2: on the diagonal, but because of its resolution, clarity of fonts and brightness, that average sized screen looks ample.

With two AA batteries, the device supposedly lasts for 18 hours. I’ve found that with a set of Lithiums I’ve gone through 2 3-day backpacking trips without having to change them out. After that I changed them only to make sure I didn’t run out on my third trip.

water


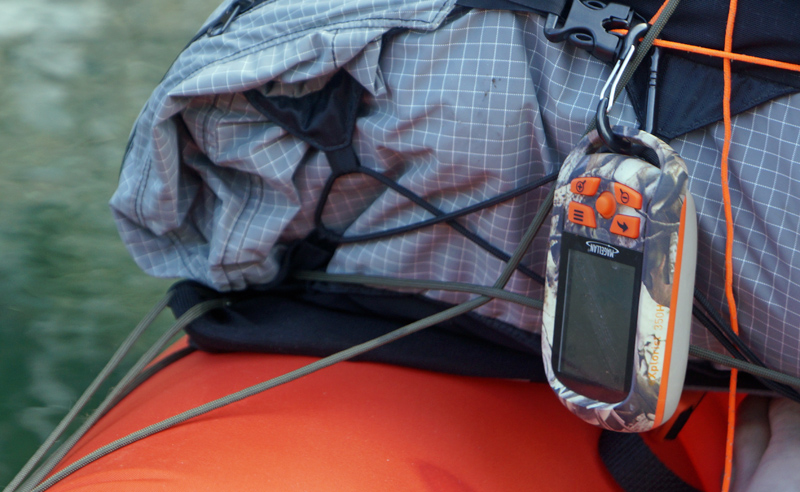
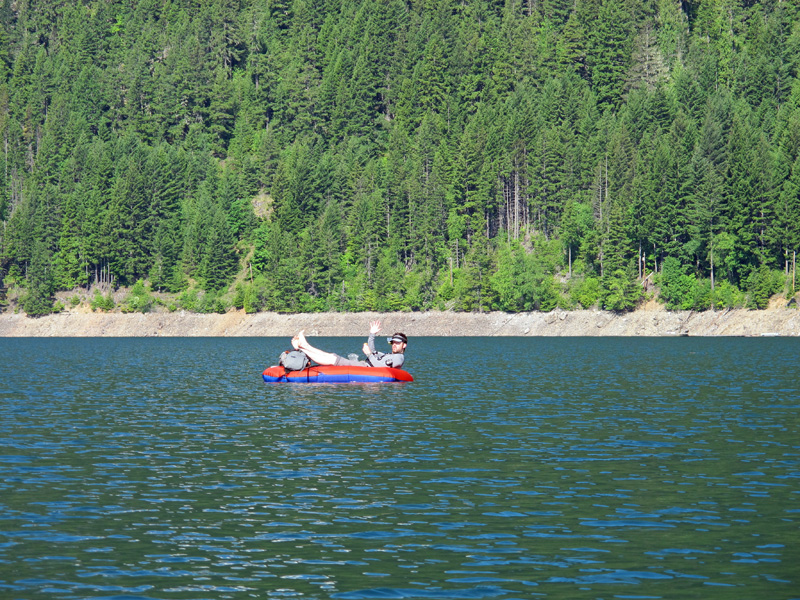
Knowing its waterproof is comforting for someone who likes to get out and packraft when he can. The only challenge is that it makes the battery compartment a bit difficult to open and close. A small price to pay for a robust device.

I was happily surprised to find that the mini 5-way joystick was quite easy to use, even with gloves on. I suspected challenges on the down press, but have never found myself fumbling with the device. That said, typing a field log could get tedious. That’s where the wide array of waypoint icons comes in handy. A picture saves you from typing a thousand words.

One more thing about the buttons. It took me a bit of time to find the off/on button. It was too well camouflaged. Also, it’s flush mounted making it extremely unlikely that you’ll accidentally turn it on or off.

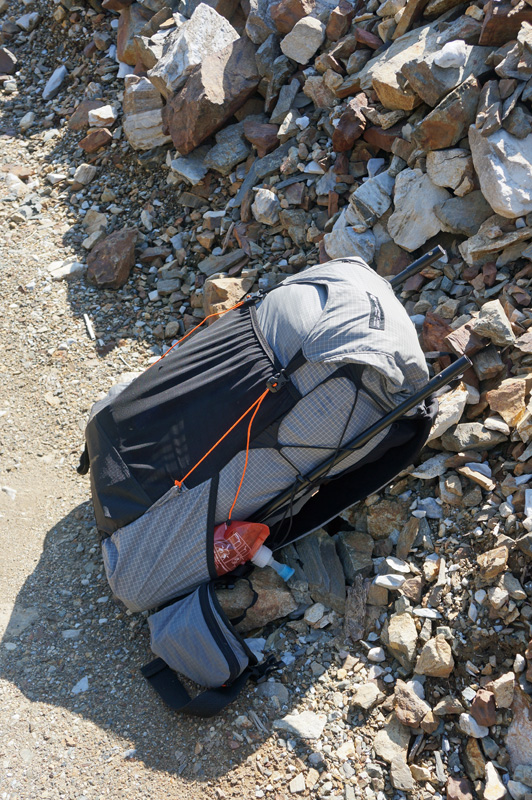
The webbing loop is exactly that. For webbing only. It’s too small for most carabiners, so a short length of paracord makes a handy attachment point.

maps


Software and Interface:

This device is designed for hikers and hunters. It’s for people that go on trips. As such, waypoints are tied to the trip you’re on or that you’ve planned. Some find that frustrating if they just want to randomly tag a waypoint without tracking their trip, but for me it makes a lot of sense for what I do.

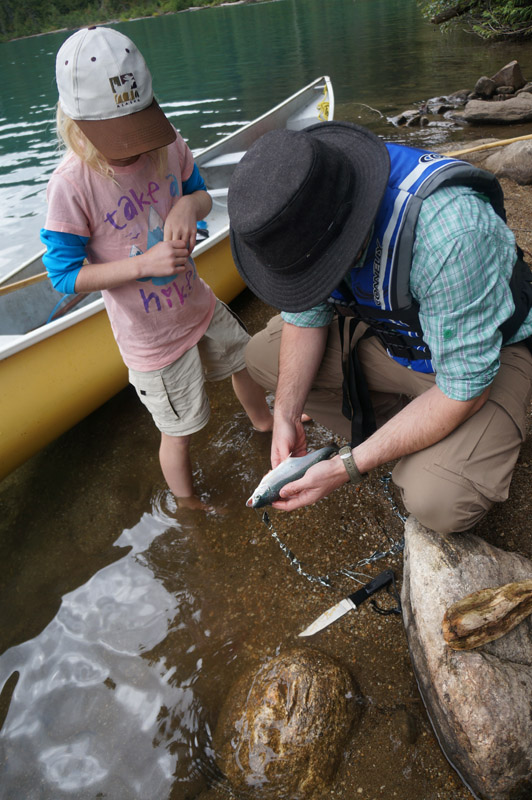
The wide array of waypoint icons would come in really handy for detailed trip planning and documentation, especially for hunters. No need to flag with tape and forget what was so important about that spot. For backpackers on long trips documenting those ever necessary water sources, stealth campsites, reliable fishing holes, or berry bushes will mean you won’t waste time looking on your next time through.

I’m a huge fan of the shaded relief maps and satellite overlay. I didn’t grow up reading topo maps, and while I can, the shaded maps make it immediately obvious what terrain to expect and what to watch out for. The fact that it’s full colour is another boon. Even better are the satellite overlays. I like to venture into areas where there is no trail, so often topography isn’t enough. Being able to turn on a satellite overlay and know how dense the trees are, where the meadows will be and even if there are streams, creeks or structures is an extra plus.

In Canada, I choose trails that can bring me back and forth between park boundaries and crown land (read Game Management Units). In parks there are often laws about collecting firewood, collecting mushrooms or having fires. On a trip last year I was able to track my location and make sure I kept within the law. It was nice to see that a feature I didn’t think I’d use (I haven’t ever had a hunting license) could come in so handy. Oh and you can set alarms to notify you when you enter or leave those areas.

There are more hunting features such as the ability to program sunset and sunrise to make sure you’re not hunting outside the legal times, as well as tracking the phases of the moon for ideal hunt times, features that could come in handy to the experienced (or inexperienced) hunter.

I could go on and on about the dozens of other features of the eXplorist 350H, but as they are common to most modern GPS units (navigate to start, navigate to waypoint, elevation, elevation change, speed, distance, compass, alternative mapsets, but I think we’ve hit the important features.

In Conclusion:

If I were to make improvements, I’d like to see a bigger loop to hook a carabiner on as well as the ability to enter waypoints outside of a trip.

The absence of those features are not deal breakers. In fact, it’s hard to beat the number of features that this device does have for the price.

At a time when the market is flooded with GPS units and everyone wants a slice of the GPS market pie, Magellan has come out with a device that brings something unique to the table. If you’re a hunter who like to hike, or a hiker that likes to hunt, or just someone who wants something extra for his GPS unit, check out the eXplorist 350H.


day3packraft

Tenkara fishing on the John Muir Trail

In 2013 I went backpacking on the John Muir Trail, a beautiful (albeit long) hike through the Sierra Nevada mountain range… and I brought my Tenkara rod.


???????????????????????????????


You can see the rod on the side of my pack in a rod sock (that light brown sleeve).


Screen Shot 2014-04-03 at 10.35.37 AM


Tenkara is a simple flyfishing technique originating in Japan. It excels at small streams and is perfect for backpacking due to its lightweight and compact nature. Tenkara rods like mine weigh in at 2.5-3.5 ounces and use only a fixed line that attaches to the tip of the rod.


Screen Shot 2014-04-03 at 10.36.41 AM


The rod I bought was an 11′ 6″ Iwana from Tenkara USA.


part5c


Enjoy these photos and watch the video below.


Great Outdoor Adventure wear from the Duluth Trading Co.

When I’m not out backpacking, I’m canoeing, fishing or working in the garage. That’s when I rely on clothing of a different performance. I look for clothes that can hold up to a beating while meeting the performance needs of the climate. That’s what I like about Duluth Trading Co.’s “Dry on the fly” cargo pants and Armachillo Long Sleeve shirt.

Duluth Trading Co. offered to send me pants and top, and since I had such great success with the Armachillo Sun Cape hat on the John Muir Trail, I figured I’d give them another try. Take a look at both of these products in this double feature.

Duluth Dry on the Fly Cargo Pants

Features:

  • quick-drying 100% nylon
  • 5.6 oz. weight fabric
  • Brushed for comfort
  • Crouch Gusset for greater range of motion
  • UPF 40 sun protection
  • Soft tricot-lined elastic waist
  • Removable web belt
  • Cargo pockets with quick-draw side zips for access when sitting
  • Deep side pockets – one with zip security pocket – and large rear pockets with flap hook-and-loop closure
  • Double-stitched seams
  • MSRP: $69.50

duluth3


I’ve had the pleasure of testing these pants through wet and dry, in the shop, on the lake, on the trail and even at my desk job. I continue to go to these pants when work gets serious.


When I first saw these pants, I expected them to be much heavier than they are. The quick dry nylon felt more like a comfortable cotton than a quick dry fabric, showing that Duluth cares as much about comfort as it does about function. Their light weight and quick dry feature means these are great for those adventures where you expect to get a bit wet and need something that won’t absorb a lot of water. The tricot-lined elastic waist means these are incredibly comfortable to wear, especially when touting a pack, or simply when active in hot weather.


These pants are very durable. I don’t mind doing bushwacking, throwing a canoe on my back, working in the shop, or pulling the cedar hedging out of the front yard in these because I know they’ll stand up to the task. If they don’t, I know they have an excellent warranty program as well.


Ok, these pants have more pockets then I know what to do with… ok so maybe I do know what to do with them. They can comfortably fit larger smartphones, tape measures, fishing kits, first aid kits, multi-tools, pretty much anything you can throw in them. The dual access pocket zips means that you won’t be struggling to get into them when sitting down in your canoe either!


The included (and removable) belt is a great feature that they’ve included. It’s lightweight, but really durable. Just what I need!


Overall I’m impressed with the Dry on the Fly pants. I tend to blow through pants quickly, especially when I work in the garage and outdoors with them. These have stood up to a lot of abuse and they look to be ready for another round next year.


duluth2


Duluth Armachillo Patterned Long Sleeve Shirt


Features:

  • Ultra light 2.5-oz. 50% nylon/50% polyester
  • Made-in-the-Jade™ fabric technology makes shirt feel cool to the touch
  • Bellowed pockets with pencil sleeve in the left, phone sleeve in the right
  • Back locker loop
  • Cut slightly smaller than our Tradesman Fit for improved wicking performance
  • MSRP: $64.50

I’ve tested these shirts in the sweltering heat of Utah Summers, the bug filled North (Canada) and lots of summer in between.


The shirt is light, comfortable and packable. The Made in the Jade fabric does make the shirt feel cool. I’m not sure how much is science and how much is psychology, but it’s definitely a top choice for hot summer days. There’s plenty of breathability, especially with venting on the back. It comes with sleeve cuff holders so you can button up the rolled sleeves when you’re hard at work. Oh and it dries really quickly.


I’m a bigger fan of the blue patterned top than the green one you see in the photos, but it does pair well with the Duluth Cargo Pants. It dresses up for slightly more formal ocassions, but still performs like a technical shirt. I think the price is a bit high for a shirt, but you are rewarded with the Duluth No-nonsense Warranty. Check out the shirt here.

Bike rides: a winning way for the whole family to get out

Here comes a Caravan The first Saturday of November we spontaneously decided to drive an hour to the Mission Creek in Kelowna, a trail wide and flat, as city trails often are.


Mission1


It was wonderful to stretch our legs after a long week of school and work. Our six-year-old was so proud of himself for biking the 6 or so miles. The fall leaves were golden, the sky was silver, the river was a ribbon of blue, and we all felt like a million bucks. Unfortunately, since our wallets don’t feel the same way, to make this all happen, we had to plan ahead. There’s a few things that made this all work. The past couple years, we’ve waited for good deals so we could buy:

1. A good bike trailer for our 2 and 4 year olds. (A Thule Cougar 2)

2. Helmets for everyone

3. A bike rack that could fit 5 bikes. (also a Thule – The Apex 5)

4. Bikes for the 8 and 6 year olds.


Mission5


As life would have it, we got the bikes second-hand, so we were able to splurge on the trailer and rack. We also picked up a free a tag-a-long bike for the 4-year old for when he’s ready. We picked up the ski/backpack kit with the Thule as well, which means that its life is extended into the winter months, making it a four-season investment.


Mission3


As for picking our adventures, the Okanagan is full of them. We’ve been asking around at Vernon and Kelowna Tourism for ideas on kid-friendly local bike trails, and they’ve been a huge help.  So when the opportunity came up (i.e. weather permitted), we were ready to grab some water bottles and snacks and jackets and GO! Check out a short video of the trip below and share some of your favourite local bike trails!


Naomi The Outdoor Adventure Team

Patagonia Tenkara Kit – #Tenkara review

If you spend time in the lightweight backpacking or fly fishing communities, you’ve probably heard of Tenkara. This traditional, Japanese “simple flyfishing” method has been growing immensely in popularity in North America, so much so that Patagonia has brought out their own answer to this by partnering with Temple Fork Outfitters and producing a complete Tenkara kit, designed to give you the gear and instructions to get out and enjoy the magic of fly fishing in mountain streams and lakes.

Patagonia Tenkara

Patagonia sent me a setup with their 10’ 6” collapsible Tenkara rod to try and test. Let’s look at what’s included and then see what I thought about it. Oh, and take a look at this video of a whirlwind Tenkara backpacking trip I did with the Patagonia setup earlier this year.


Features

  • Patagonia branded Temple Forks Outfitters 10’ 6” collapsible Tenakara Rod (also available in X length)
    • Weight: 2.5 oz
    • Length: 10’ 6”
    • Compacted length: 20.5”
    • Flor grade cork handle
    • Line keeper
    • Spare tip and second section
  • Accessories
    • Rod sock (carrying case) with line holder
    • 32’+ Level-floating .027” PVC coated mono core
    • Pre-looped 7.5’ 3x tapered leader
    • Box of one dozen soft-hackle flies hand tied by the Montana Fly Company, three of each pattern: Mormon Girl, Pheasant Tail, Peacock, and Hare’s Ear; all flies tied on #12 hooks
    • Quick setup guide
  • Book: Simple Fly Fishing: Techniques for Tenkara and Rod & Reel
  • MSRP: $279.85

PatagoniaTenkara6

The original Tenkara method involved horse hair lines and bamboo cane rods, no reel (the line is fastened to the tip of the telescoping rod) and small streams. Fast forward to today and you’ll see that the setup by Patagonia (and Temple Fork Outfitters) differs from that setup, and is more in the vein of modern Tenkara setups offered by other companies.

PatagoniaTenkara4

The Tenkara method is ideal for smaller streams, with its 12 o’clock, 3 o’clock casting, collapsible rod and fixed length, furled line. We won’t focus too much on the method itself in this review, we have a post by Jason Klass on What is Tenkara Fishing? if you’re interested in that.

PatagoniaTenkara8

So, What do we think of Patagonia’s answer to Tenkara?

The 10’ 6” rod is a great length for the beginner Tenkara fisher. The quality rod construction allows for simple extension and collapsing. The extra tip and second section is a nice addition for Tenkara rods, which are incredibly lightweight (2.5 oz), but fortunately I have not needed it.

The rod itself although not astounding in performance serves its purpose well. Experience fly fishers won’t be impressed with the action, but it doesn’t get in the way of presenting the fly or pulling in your typical catch.

PatagoniaTenkara7

Yvon Chouinard added a line holder that you can see I left attached where it is (rather than screw into the base of the rod like recommended for those who desire to take advantage of it). It’s a nice addition and many will find it very useful. I didn’t find it necessary as I could take down the setup and use the line holder on the rod sock.

Patagonia worked with Cortland to develop a PVC mono core floating line specifically for this setup. Typically Tenkara lines are wound lines. This more closely resembles western fly fishing lines, which means different knots for attaching the line to the tip and a heavier cast. If you’re used to the typical western fly fishing methods you’ll feel more at home with this setup, while taking advantage of the simplicity and portability of the collapsible rod and reel-lessness.

12024_181_VIEW7

Patagonia included a very long (over 32 feet) tenkara line, which I quickly realized was to allow the user to setup two different lines. They recommend a 20 foot line for typical use and 12 for smaller streams. Casting with more than a 20 foot length of the mono core becomes a challenge.

12024_181

The included box of 12 soft hackle flies should provide you with enough option to entice the fish if you get the presentation correct. It’s a mixture of Mormon Girl, Pheasant Tail, Peacock, and Hare’s Ear flies tied on #12 hooks. While none of these were the traditional reverse hackle flies that are a hallmark of Tenkara, they performed as expected while out in the mountains. You may want to add other flies to the mix, as all do.

12024_181_VIEW5


The velvet rod sock is everything you’d expect from a rod sock, with the addition of a built in line holder. It will bend if you wind the line tightly around it, but it springs back into shape while fishing. It’s a nice feature for those who don’t want to spend a few dollars on a line holder.

BK705_000_OPEN3

The Simple Fly Fishing book was put together by Yvon Chouinard (founder of Patagonia and enthusiastic fly fisherman), Craig Mathews and Mauro Mazzo, and includes paintings by James Prosek and other photos. Its purpose is to explain fly fishing with a Tenkara slant. It isn’t strictly focused on the techniques unique to Tenkara, but it is a great coffee table book that explains technique and knots and is a pretty, artsy page turner that is easy to read and understand for experienced and beginning fishers alike.

Marketed for a straightforward out-of-box experience, this would make a great gift set with everything you need and a book to get lost in when you can’t get out on the fly. The MSRP is high (at $280), and a kit could be put together for a lower price.


In Conclusion

The Patagonia Tenkara Kit offers everything you’ll need to make your entrance into fly fishing. While not strictly “traditional” as far as Tenkara goes, it is a fully functioning kit that you can slide into your backpack (sans book) and take to that mountain stream or lake for a relaxing and simple Tenkara experience. You can’t beat the easy and simplicity of Tenkara, and one thing is sure, Patagonia’s entrance into this market signals Tenkara coming to the mainstream. If you take the time to learn how to use the kit, with a bit of practice you’ll experience success and understand why Tenkara is growing in popularity.

Luci – Inflatable Solar Lantern by MPowerd

When I turned this lamp on for the first time, I was reminded how far LED technology has come. Not only that, I was impressed with how well MPowerd has executed this inflatable solar lantern.

MPowerd was founded in 2012 with the goal of providing micro solar powered products to “do good by doing well”. They work on providing green, off the grid solutions to the energy problem. And from what I’ve seen, they’re doing pretty well for a company that’s only been around for two years.

A little while ago MPowerd sent me the Luci to review, let’s look at the features and then take a look at what I think:

???????????????????????????????

Features

  • 10 x 6500k LEDs
  • 65 Lumen output (with a 10ft illumination range)
  • 3 settings (Bright, Super Bright and Flashing)
  • 6-12 hours of light
  • Photovoltaic Panel integrated
  • Materials – Inflatable waterproof PVC
  • Dimensions: 5″ diameter x 1″ collapsed
  • Weight: 4 ounces
  • 8 hour charge time
  • 3.7V, 1000 mAh battery
  • 300-500 charge life cycle
  • MSRP: $14.99
  • 2 PVC hanging loops

What are my Thoughts?

The Luci Solar Lantern is a great all-weather solar light for your home, campsite and/or tent. It’s sturdy and puts out a decent amount of light for your around camp duties.

I really like how it can be inflated and deflated so that it doesn’t take up a lot of pack space, but still provides decent lighting while in use.

I’d like to see a brighter version of the lantern, maybe one with a rounded bottom that would spread light a bit more, but for the price, size and weight, it gives out adequate light.

It’s ideally suited for a picnic table or in a tent to have omni-directional lighting. It’s equipped for the job with the PVC hanging loops that are attached to the top and bottom.

I’m really impressed with the quality and price of the lantern. $15 for a solar powered LED lantern is a great price for something that is built to last.

I’d love to hear your thoughts on solar lighting and if and how you’d use a light like this.


Cairn gear subscription – $25 for $35+ of gear

A while ago the crew behind the Cairn Box sent me a gift box to test out. I’ll start by saying that I was so impressed I bought a six month subscription of goodies as a gift to one of our faithful reviewers.

So, what is a cairn box?

well, you can look at the video above, or you can continue reading. The idea is that you pay $25 for a monthly subscription and then every month you’ll get a package of outdoors related goodies that are tailored to your tastes. The total retail value is over the $25 you pay, so it’s a huge win, and it gives you the chance to try out products you may not have heard of.

The categories of the gear that you may receive are:

  • Gear
  • Apparel
  • Food/nutrition
  • skin care

For example, my Cairn box contained:

hammockgood_lipsmt-sm-cont

  • 1 Grand Trunk ultralight hammock – valued at $20
  • 1UCO storm proof match kit – valued at $7
  • 1 pack of skratch labs energy drink mix –  $35 for a 24 pack
  • 1 Huma Chia energy gel – $54 for a 24 pack
  • Elemental Herbs all good lips chapstick – #3.50

XLL201000 huma_gel

You can see all the different cairn boxes they’ve sent out so far by clicking here.

Earn Points

Once you’ve received the box, you can fill out a survey that will help tailor what is received in future boxes and will earn you points towards free boxes or discounts on gear they plan to sell on their website.

Shipping

Shipping is included in the $25, so there’s no hidden cost. Unfortunately, that means this is limited to the USA for now… at least until they open up a Canadian branch ;).

thumb1_large

Subscription

You can choose to get a single month of Cairn, or you can buy as many months as you want. The more months you subscribe for the bigger discount you receive:

  • 1 month – $25
  • 3 month – $70 ($5 off)
  • 6 month – $135 ($15 off)
  • 12 month – $260 ($40 off)

What do I think?

The concept of Cairn is awesome. If you’re big into the outdoors and have $25 disposable income to spend on gear every month then you should check this out. You get a lot of bang for your buck and you get exposure to gear you may not have tried in the process. All of the items I received are useful (especially the hammock!) and stuff I’ll be trying out on my future adventures.

This is a great opportunity for brands to get their products in the hands of outdoors adventurers and gain exposure in an industry that is typically a challenge to break into. If you are abrand and want to partner with them, check them out here.

I bought a 6 month subscription, but let us know down below if you’d buy a Cairn box for yourself or a friend.


How Wolves Restored an Ecosystem

John Muir said, “When we try to pick out anything by itself, we find it hitched to everything else in the Universe.” We have an amazing testimony to this in the wolves of Yellowstone.

Wolves were taken out of the ecosystem in Yellowstone more than 70 years ago, and although the impact of this wasn’t immediately seen, we can see what amazing change took place when they were brought back.

Take a look at Sustainable Human’s video, “How wolves Change Rivers”

Adam’s River Sockeye Run 2014

Last weekend we headed out to Roderick Haig-Brown Provincial Park in the Shushway area of BC, Canada to watch the 2014 Sockeye run.

Roderick Haig-Brown Provincial Park

The park has several trails that meander along the Adam’s River, offering many options to see the remarkable red fish splashing up the river in pursuit of their spawning grounds.

Adam's River Sockeye Run

The word Sockeye apparently comes from the First Nation word Sau-Kai meaning Chief – most likely a reference to the large hump on the back of the males.

Sockeye Salmon Spawning

The Sockeye return every 4 years, changing the river from it’s demure brown to a crimson red colour. When we were there, only about 5% of the expected run was there, and despite that, it was remarkable.

Examining a Female Sockeye Salmon


We stopped for lunch on the river and happened across a dead female and a teacher and student from the University of Victoria. These self professed “nerds” were quick to turn the adventure into an awesome learning experience for the kids. The kids were enthralled with what they learned and were delighted to hold the salmon roe.

Sockeye Salmon

After the crowd of kids started to disperse, my daughter got the prized job of returning the sockeye to the river where it could give back to the riparian zone that it had returned to after all those years.

If you haven’t seen the sockeye run, there are a few more weeks to do so. Check out your local parks to find out more, or if you want the trip, head out to Roderick Haig-Brown Provincial Park to see it for yourself.

We’d love to head back in a few weeks when the run is at its peak and get even more video of this amazing sight.

Canoeing at Greenbush Lake, BC

One of the amazing things about British Columbia is that you can head out to backcountry lakes on long weekends and have epic family adventures without seeing another soul. Our recent trip to Greenbush lake was an awesome example of this.

Greenbush Lake Protected Area lies east of Vernon and about an hour north of Cherryville. You have to pass by the very popular “Sugar Lake” for about an hour until you come to a road on the right noted by an overgrown, painted sign. The road is lined with Thimbleberry bushes and takes you to a couple forest service campsites and a boat launch.

When we arrived, we heard a pickup truck pulling away, which meant we would have the entire day to ourselves for fishing, paddling and exploring.

Greenbush Lake

Greenbush lake itself was amazing. It’s a mix of azure blue and turquoise from the run-off of the nearby peaks that slope steeply down to the water. The are loons on the water and, as we would soon discover, a beaver dam and lodge near the inlet of the lake.

???????????????????????????????

After loading up the four kids, we set across the lake paddling, dragging our lines behind us as we went. Our target was a small delta at the inlet of the lake that I had seen from satellite images.

???????????????????????????????

It turned out to be an excellent spot for lunch and exploration. Mrs. Adventure cooked up some sausages and pulled out a fine spread fit for a king and we tucked in. Fortunately, there were no tyrants in attendance.

Outdoor Adventure at Greenbush Lake

Having fed up, we started our adventure looking for footprints, stones, and wildlife.  We found evidence of a branch that a beaver had chewed, so headed up the creek looking for more signs.

Looking for Adventure

After a short jaunt across a log-pile and through the ice-cold creek, we found a hidden dam that the beavers had been working on. We didn’t want to disturb them in their winter preparations, so we headed back to the canoe for some fishing.

We hadn’t had any success up until this point, so it was time for a quick lesson in “matching the hatch”. Matching the hatch is when you observe what’s currently hatching in the lake. It can be done by watching what’s flying around, checking the water, or opening a fish to find out what it has been eating.

???????????????????????????????

My daughter looked through all the flies I had with me, and chose the one that looked like something she had seen flying around. The results were immediate. From the first cast, we had a fish. And that wasn’t the only one. As we paddled back across the lake, she hooked several more, of which we kept one.

greenbush8

After we unloaded the kids, they had a quick lesson in fish anatomy as we cleaned the fish. From there my daughter and I headed out into the lake to dispose of the entrails and practice our strokes on the water.

After packing up we drove the 2 and a half hours home, happy to add a new “secret spot” to our outdoor adventure list. Check out the video of our adventure below.

ENO – Flexfly Utility Tarp

I love tarps. If I’m going on a day-hike, to the beach, backpacking, car-camping, canoeing, or snowshoeing, I will always have a shelter with me. It doesn’t matter if there’s sun, rain, wind or snow, or simply the possibility that we’ll be spending the night out, a tarp will handle all of those things. My most versatile, durable and functional tarp came to me by way of Eagle Nest Outfitters. It’s the Flexfly.

Last year I received the Flexfly Utility Tarp to test and I’ve been putting it to some long-term testing over the past year.

The Flexfly utility tarp is  great for hammocking and much more. Over the past year, this tarp has been a constant companion on my outdoor adventures because of how versatile it is. Let’s take a look at the features to see why and then let’s talk about what my opinions on it are.

  • Material: 210D Nylon Taffeta w/ Poly Urethane coating
  • Includes 2 50″ collapsible aluminum poles
  • Dimensions: 10′ 6″ x 10′
  • Catenary cut
  • Stuffed size: 14″ x 5″
  • 6 attachment points
  • Hammock compatible
  • stitched and taped seams
  • line locs
  • guy line
  • includes zippered carry case
  • (stakes not included)
  • weight: 3 lbs w/case and poles
  • weight: 2lbs 1 oz w/o poles
  • MSRP: $134.95

Keep reading and check out the video below to see it in action.

How did I test it?

Over the past year, I’ve used this tarp in the backyard, car camping, backpacking, and on day trips. In addition to its regular use, I’ve used it to make a kiddy-pool in the backyard (it performed very well).

day2amhammock

What are my thoughts?

The Eagle Nest Outfitters Flexfly is correctly identified as a “utility” tarp. It’s tough and ready to handle what you throw at it. The 10-foot by 10-foot-six dimensions are plenty for a family and gives lots of coverage for a hammock and plenty of space to keep sun, wind and rain off you and your gear.

Set up is a breeze because of its catenary cut. There’s a lot of science to the catenary cut of a tarp. In at nutshell, it makes it really easy to tighten up the tarp evenly without having to re-adjust the tension on all the other guy lines. If you have the choice, always choose a tarp with a catenary cut.

The fabric, stitching, seam, grommets and poles are built for durability. A taught tarp is a must for high winds and heavy rain and to get that you really have to have taught lines. I didn’t feel I had to be gentle when tightening the guy lines to the point of a high pitch hum when I plucked them.

The inlcuded 50″ aluminum poles are a nice feature for set-up when there are no sticks, branches or trees on-site and you want a good view from under your shelter. They’d be perfect for the beach, or other festivals. When I’m concerned about weight though, I leave them behind and they shave off a pound.

The line-locs are a great feature that allows quick adjustment of the tension after it’s set-up, without having to re-tie nots.

It’s great for a large hammock shelter, but provides good coverage as a picnic table shelter, as well as an emergency shelter, picnic blanket or tent alternative.

This is definitely something to keep in your trunk for impromptu adventures.

ENO_flex

What improvements could be made?

Although this is an excellent tarp and great for all your outdoor adventures, I always look for areas of improvement.

Although the guy-line works just fine, I’d like to see a smoother, less-stiff option.

I’d also like to see a set of stakes included with it (Eagle Nest Outfitters does sell easton tent stakes). I use a set of Mountainsmith v-stakes with mine.

Conclusion

The Eagle Nest Outfitters Flexfly utility tarp is a great all-round tarp. It has a lot to offer, works great as a campsite tarp, with a hammock or in pretty much any situation where you need a shelter. ENO puts a lot of thought and high quality into its construction and it paid off.

It’s an excellent hammock tarp, but also great as a stand-alone shelter for camping, canoeing or festivals/picnics as well.

If you are in the market for a versatile, high-quality tarp, definitely check it the flexfly out. You won’t be disappointed.

Ross Lake Packrafting Trip photo & video essay – Part 2

In the end of May I headed out to the North Cascades for a 3-day backpacking and packrafting trip, with a bit of hammock-ing thrown in for good measure. I’ve decided to share the experience via photo and video. Click here for Ross Lake Packrafting Part 1.

day2hike3


After packing up the rafts, we headed up the trail into yet another climate. Day two continued along the east side of the lake, where water was plentiful from the Spring Run-off.

day2climbup

Instead of wading through the creek, we wandered downstream, opting to test our balance on the trees that were strewn across the gulley.


day2hike2


This picture is another fine example of why I love hiking in the Pacific Northwest. There are a millions of shades and textures of green.


day2hike


I was trying to test my exposure skills, but was struggling with getting a good balance of light. If I could have waited here until the evening, I would have.


day2evening


Just down from Hidden Hand camp there are amazing views from a rocky cliff. If we didn’t have the packrafts with us, we would have had to backtrack up the valley and then come back down the shore on the right to get back to the car.


day2foodhang


We played it safe by hanging our food with a counter balance. Check out the article that I wrote for the Sierra Trading Post on How to Hang food in the backcountry for an in depth explanation.


day2amhammock


Just a fun shot of my Eagle Nest Outfitter’s DoubleDeluxe Hammock, tarp and atlas straps.


POinboat


There was a slow current in the lake, and so we took a break from paddling to enjoy lunch, stretch our legs and enjoy the incredible vistas that the area had to offer. It’s hard to beat a good cheese and a handful of sour Mike & Ikes when you’re out on the trail… or on the water.


toad


We saw a couple toads in the area sunning themselves on the dappled forest carpet.


day3backpack


This is my 40 liter Gossamer Gear Gorilla with everything for the weekend, including my packraft and packraft paddle. I took the same pack out backpacking on the John Muir Trail as well.


day3dam


One final view of the mountains before heading up the trail. That bridge behind us was our starting point. We had come full circle, but barely had to touch the same trail that we entered on.


day2rosslake


You could spend a week or more hiking around Ross Lake. The trails head up into the surrounding peaks and the lake itself crosses the border into Canada.


Check out the video to see a few minutes of what it’s like hiking and paddling around Ross Lake.